Art. What is it?
It is an age-old question that artists and philosophers have been contemplating, debating and creating since the beginning of human existence. Humanity are a species who cannot help but be creative. It is a tale as old as time. Prehistoric cave people painted their caves, carved bones and made jewellery and modern man is no different. We create to figure out our place in the world, to make sense of the world around us and simply because it gives us pleasure to do so.
So why encourage our children to create art?
For so many reasons! It is important on a development level. As I mentioned above, it helps them make sense of the world they live in, in a time in their life when they are still figuring out their place in it. It encourages their imagination and can initiate further imaginative play. It can help gross motor skills as well as interaction with other people and peers. The world is an exciting but also daunting place for children. Some may have just realized they are separate entities to their parents, while others know they are separate and are discovering their own personalities, through what they like and don’t like. Creating art helps open up self-expression, problem-solving and with Big Feet help, an appreciation of art.
So why ice painting?
Firstly, why not?! Creating art doesn’t have to be exhausting and expensive. Art can be created with pretty much any material. Place paper with crayons on a table and your child will create some art for you. Ice painting is an extension of this and introduces you and your child to the idea that the options are endless. Food coloring gives you peace of mind that even if they put it in their mouths, it is edible. The ice part, that it is free to make! The painting with ice, that it is also sensory play for them. They will explore a different temperature, what happens to ice when it melts, how it feels on their skin and what it looks like to paint with.
What you will need:
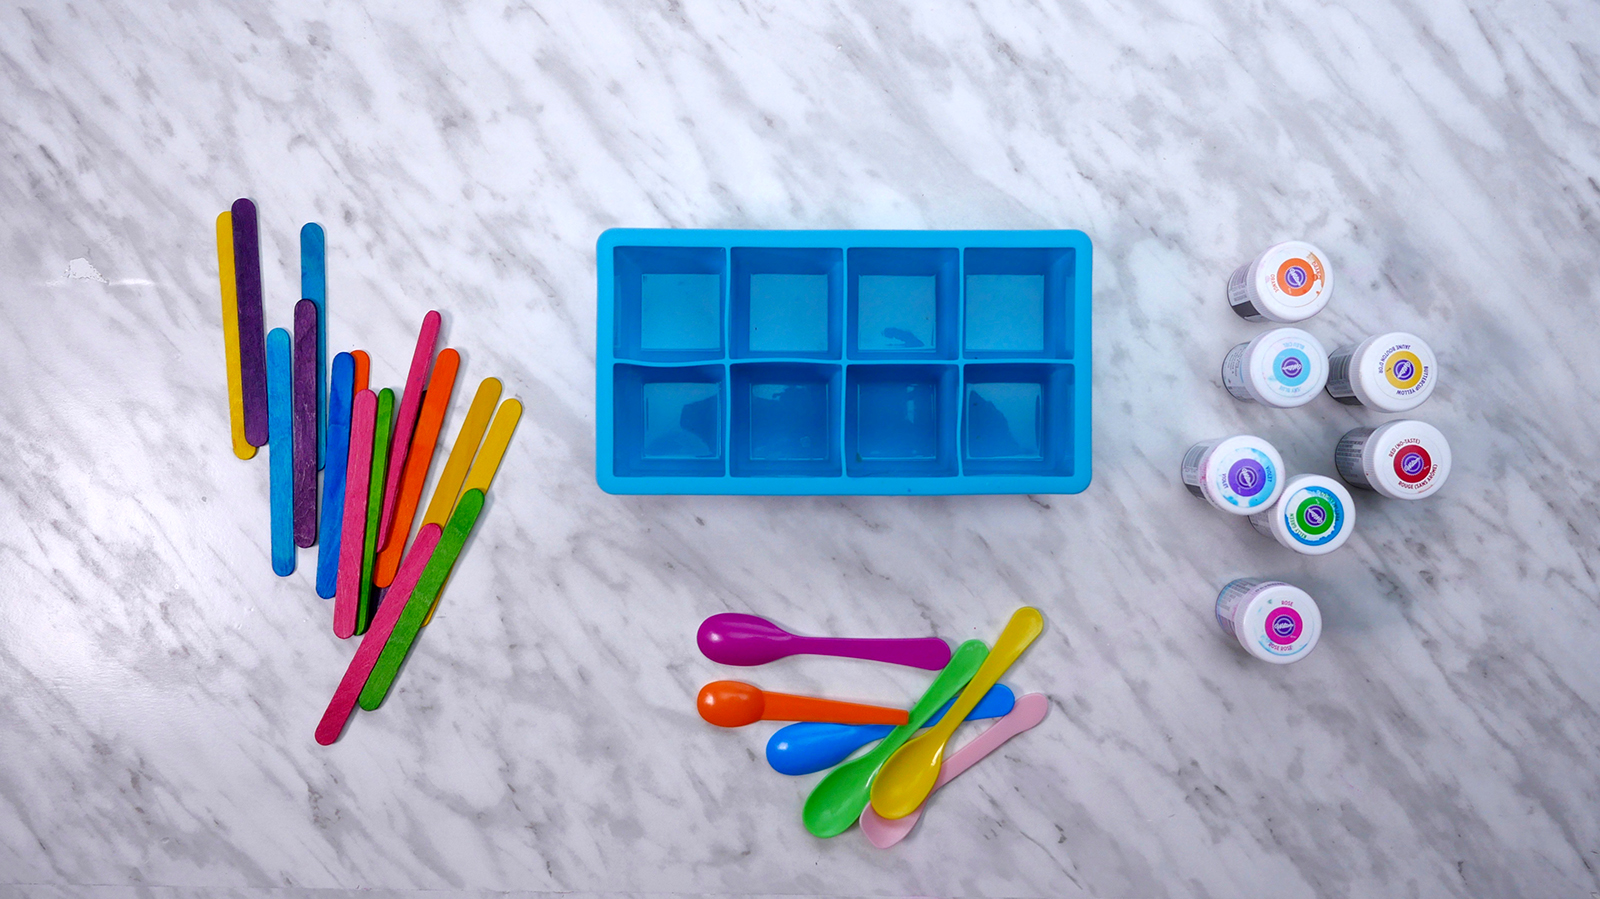
- Water
- Ice cube tray
- Food coloring gel (a few colors)
- Popsicle sticks
- Pen
- Paper
- A freezer
- Spoon (one for each color)
Method:
- Fill the ice cube tray up with cold water and set gently on a flat surface.
- Open up your food gel colors, with a spoon for each one. Using the end of your spoon, dip it into a color and then swirl it into the water of the ice cubes. Make sure there is a lot of color in each one, as it will affect how vibrant the color is when painted with.
- Repeat this with each color, using a different spoon so not to contaminate colors.
- Once they all have color, gently place it on a shelf in your freezer. Leave them in for 1 hour.
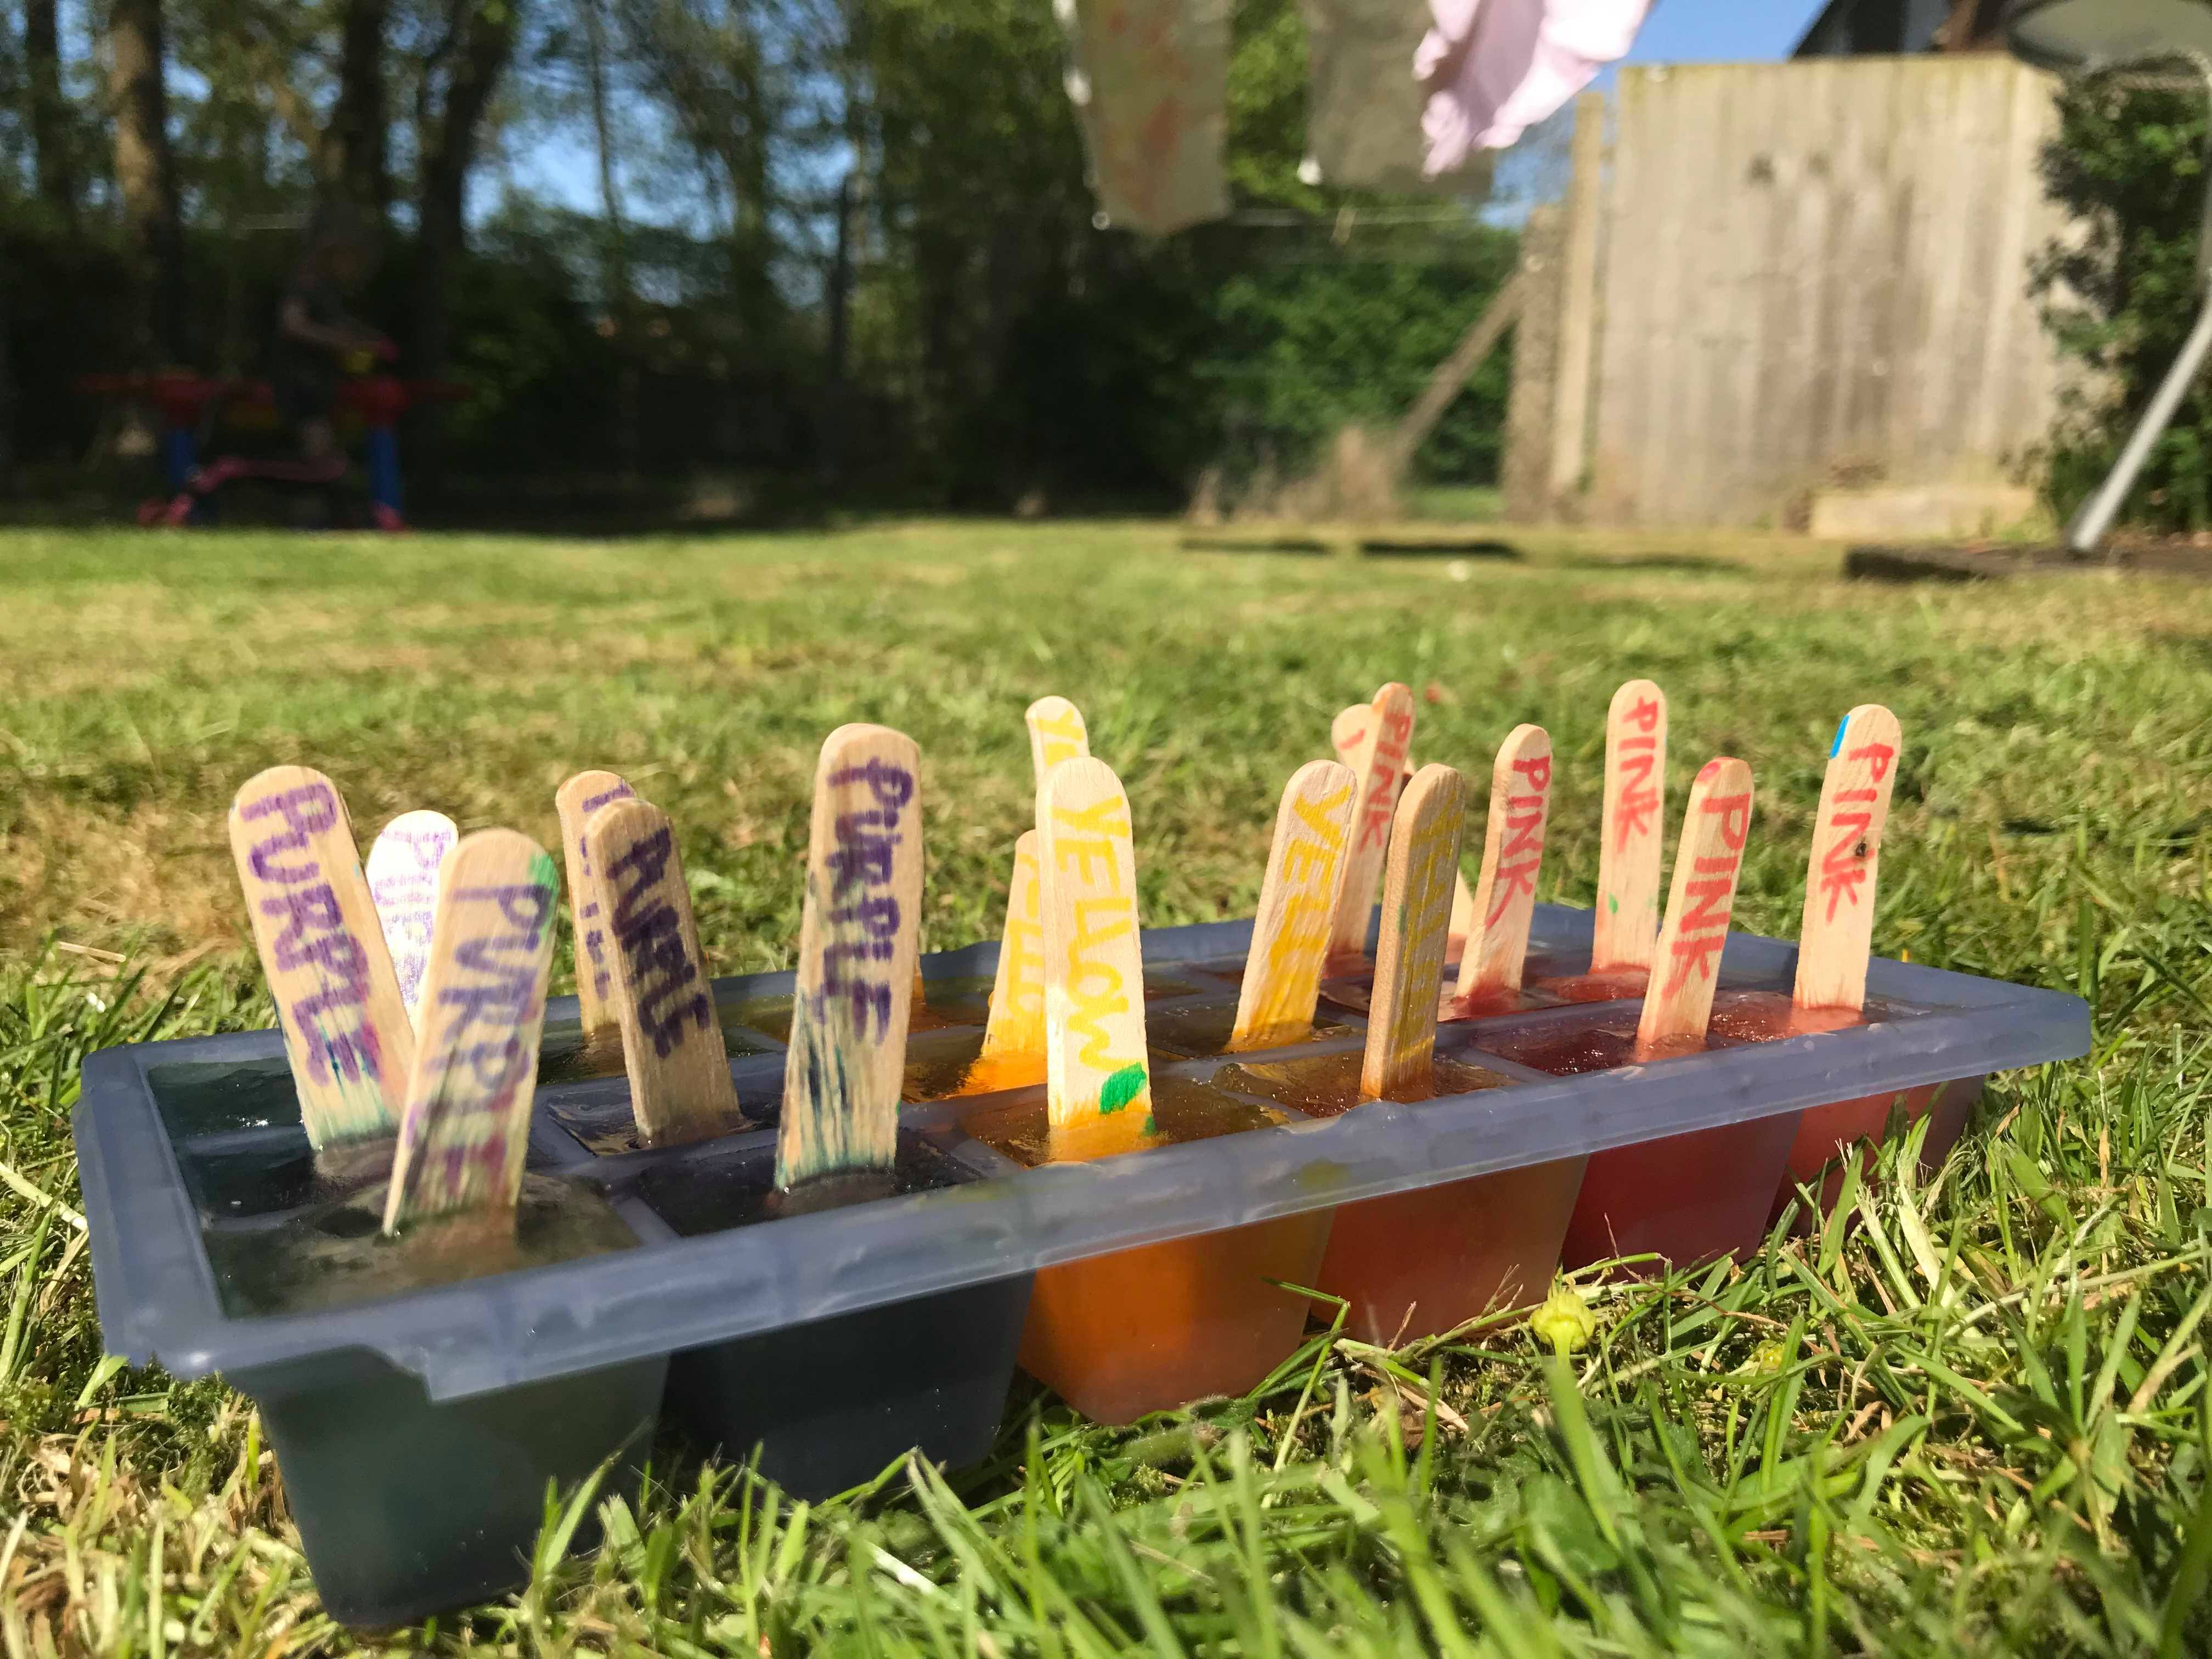
- While they are in the freezer, label your popsicle sticks with the relevant colors that you have used, one for each cube. This is an opportunity for revising colors, letter recognition and color to word association.
- After an hour has passed, open the freezer. The top layer of each ice cube will have just frozen over. With your popsicle stick gently crack this layer and position it as upright as you can manage. Do the same with each ice cube, making sure each ice cube has its own popsicle stick.
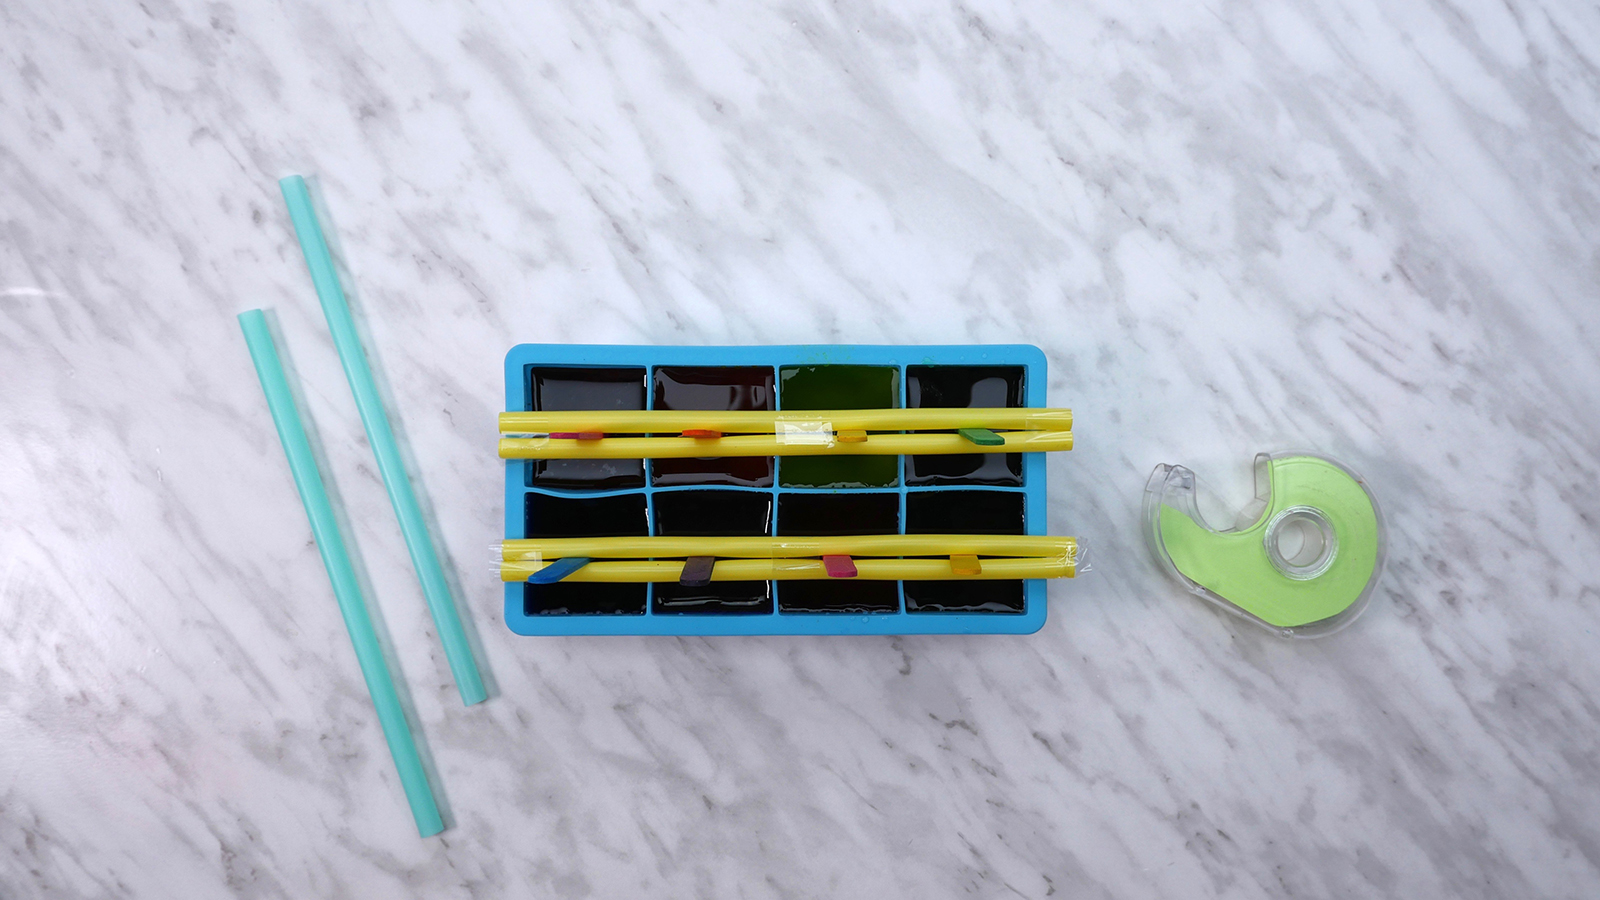 Short cut: You can also use plastic straws over the tops of the ice cube trays as shown to hold the sticks in place, and skip this step altogether.
 - Close the freezer and leave for another two hours (larger trays may take up to six hours).
- Be sure the ice is frozen solid before removing from the freezer. If they are frozen, get them out and leave them on the side for 5 minutes until they have loosened enough to pull them out. While you wait, get your paper set up to start painting. Outside is a great location for this activity, as it can get messy!
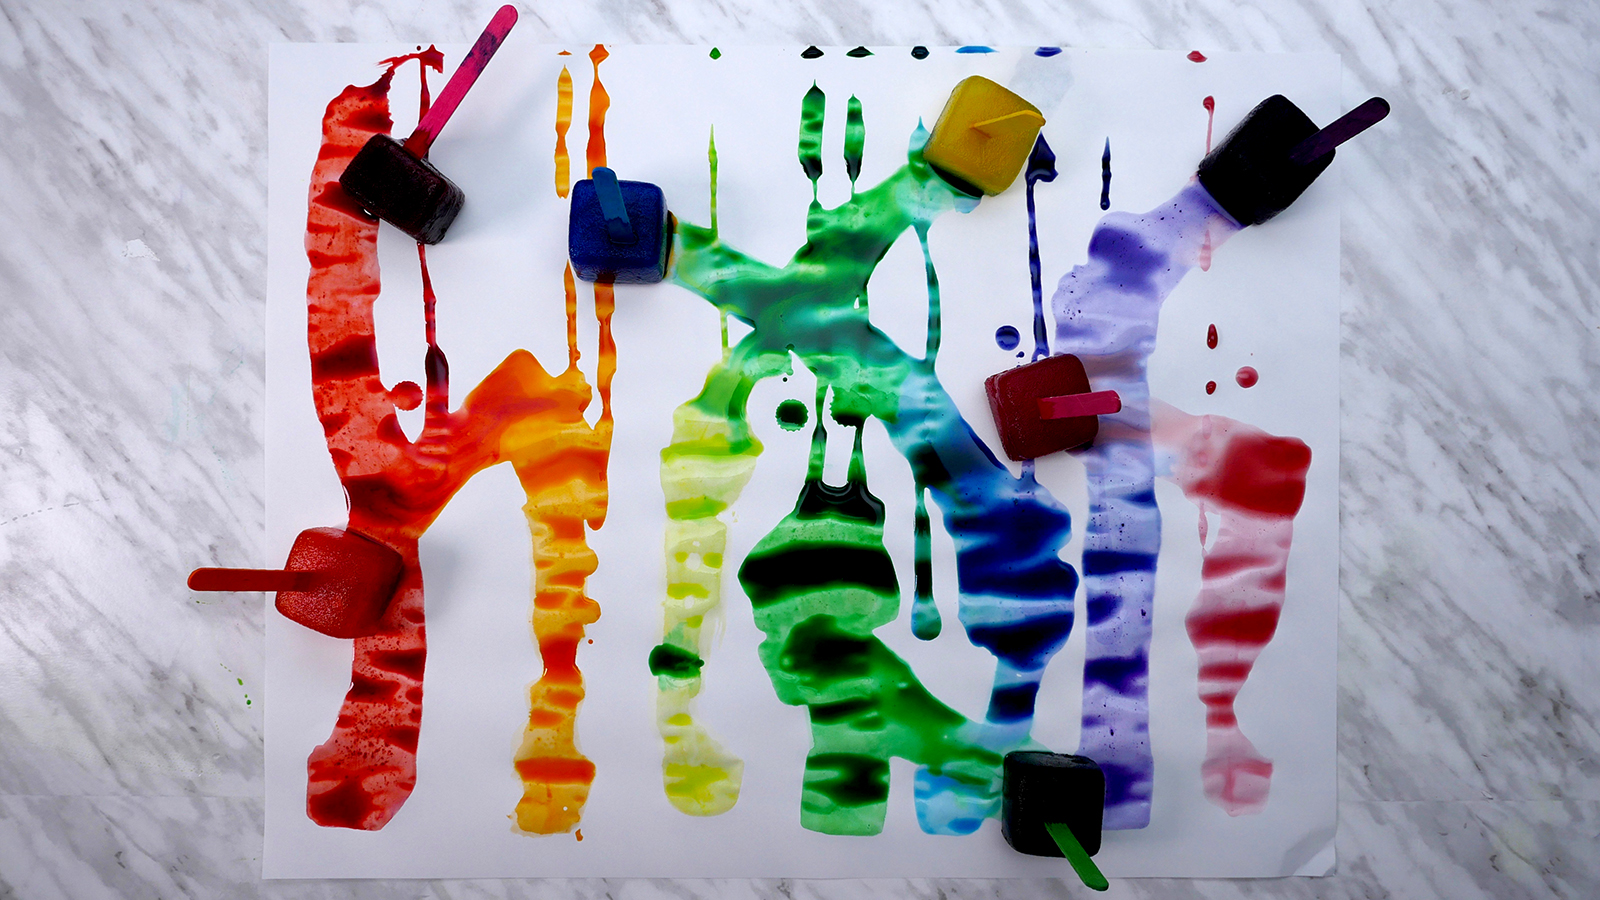
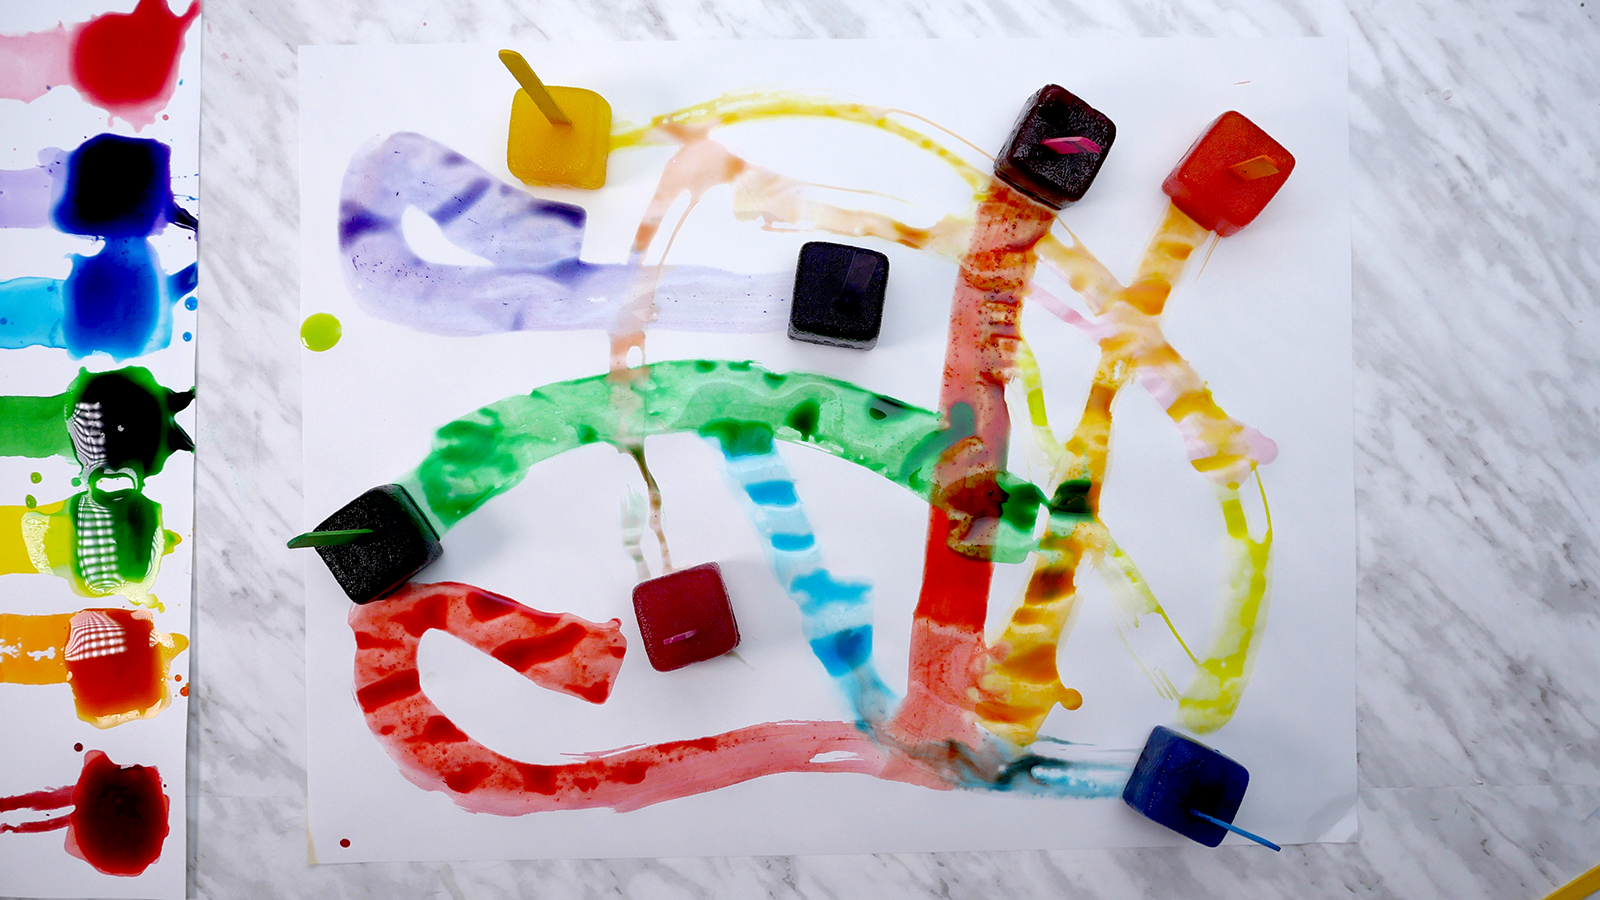
- Pull out your ice cube “paintbrushes” and start creating!
Painting Tip: You will get better results if you allow the ice cube to melt a little. By doing this the food colouring is fluid enough to be able to paint with and will ‘stain’ the paper beautifully.
Note: If you are doing your creating indoors, please make sure you have something in between your paper and the surface it is on. It is easy to forget that your fancy new ice cube “paintbrushes” are made of water and can create water stain marks that can be irreversible.
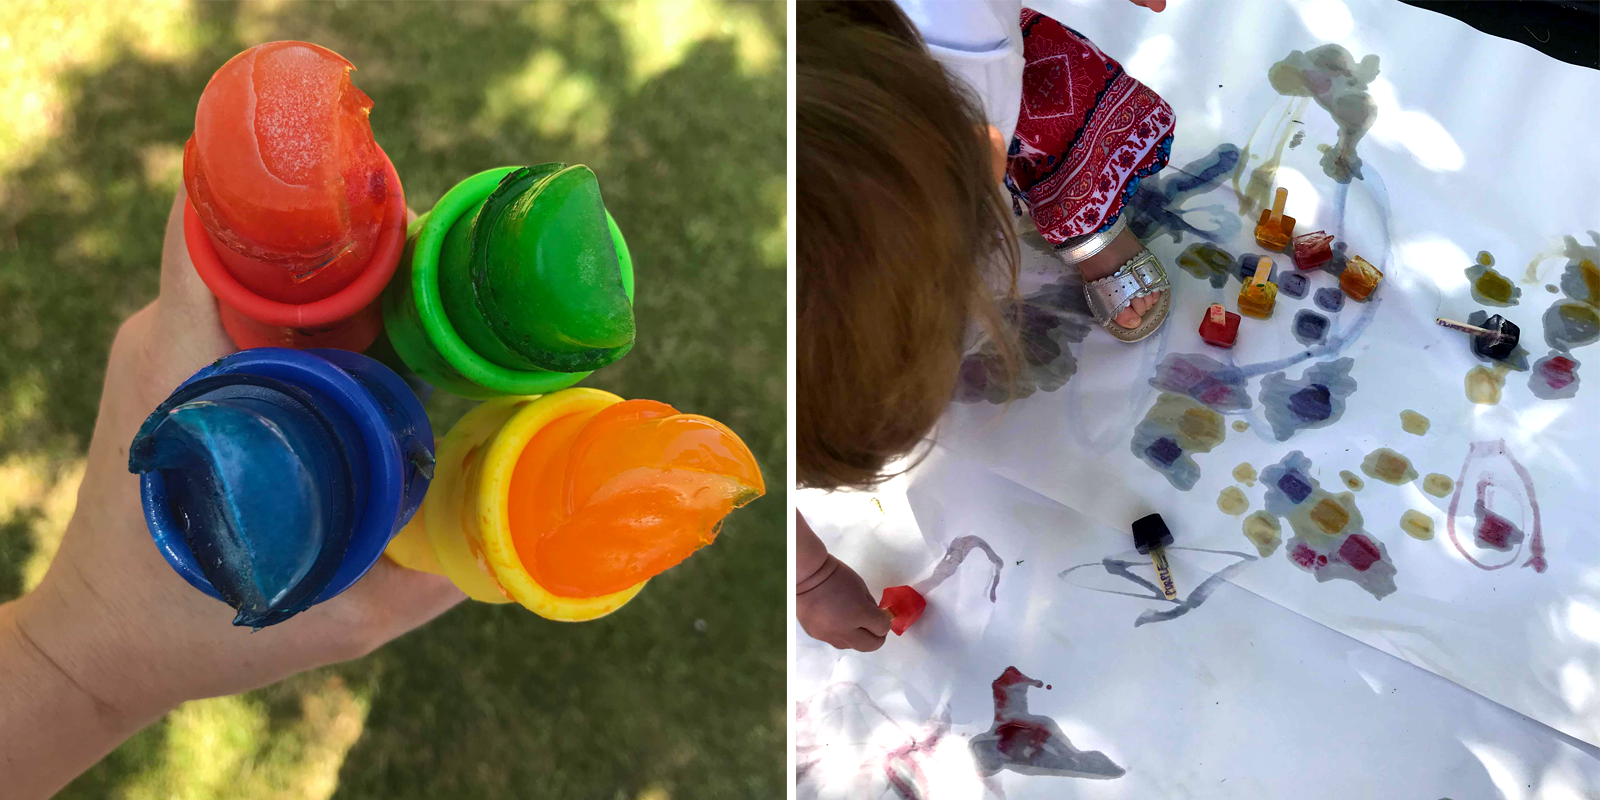
Another option: No ice cube tray? No problem! Color your water with food coloring and pour them into popsicle moulds. They may be easier for the more Little Feet to hold. We have included some images of this version too!
Or, if you have an ice cube tray but no popsicle sticks, leave this part out and use a pair of tongs or tweezers big enough to hold the ice cube with to paint.
Educational factors
You can use this art activity to revise color recognition. We made sure each color of popsicle mould had the same colored ice and each ice cube had the color written on the popsicle stick, in the same color. The addition of writing encourages letter recognition and color word recognition. And lastly, science! This is a REALLY easy and visually stimulating way to introduce what happens to water (a liquid) when it stays in a cold temperature and freezes (a solid), and then stays in a warmer temperature and melts (back to a liquid).
So let’s all cool down in the summer sun with some sensory ice painting fun.
We don’t need snow to H2Whoa!
Don’t forget to follow us on Twitter, Instagram, Pinterest, and Facebook!
 Contributor
Grace Selous Bull is an arts education author and freelance blogger. Her book, ‘Potty About Pots: arts and crafts for home and school’ is aimed at children from 5-12 years old and takes them through a journey of ceramics through time. She is a full time Mummy of two girls, both of whom love being creative, and is married to her husband, Andrew, who does not.
Original content © 2018 Super Simple. Not to be reprinted without express written permission. Terms of Service.