This craft may look like your favourite whimsical sugary treat, but don’t try a bite! These clay donuts are fun and easy to make, and when you’re done you can decorate your fridge with them.
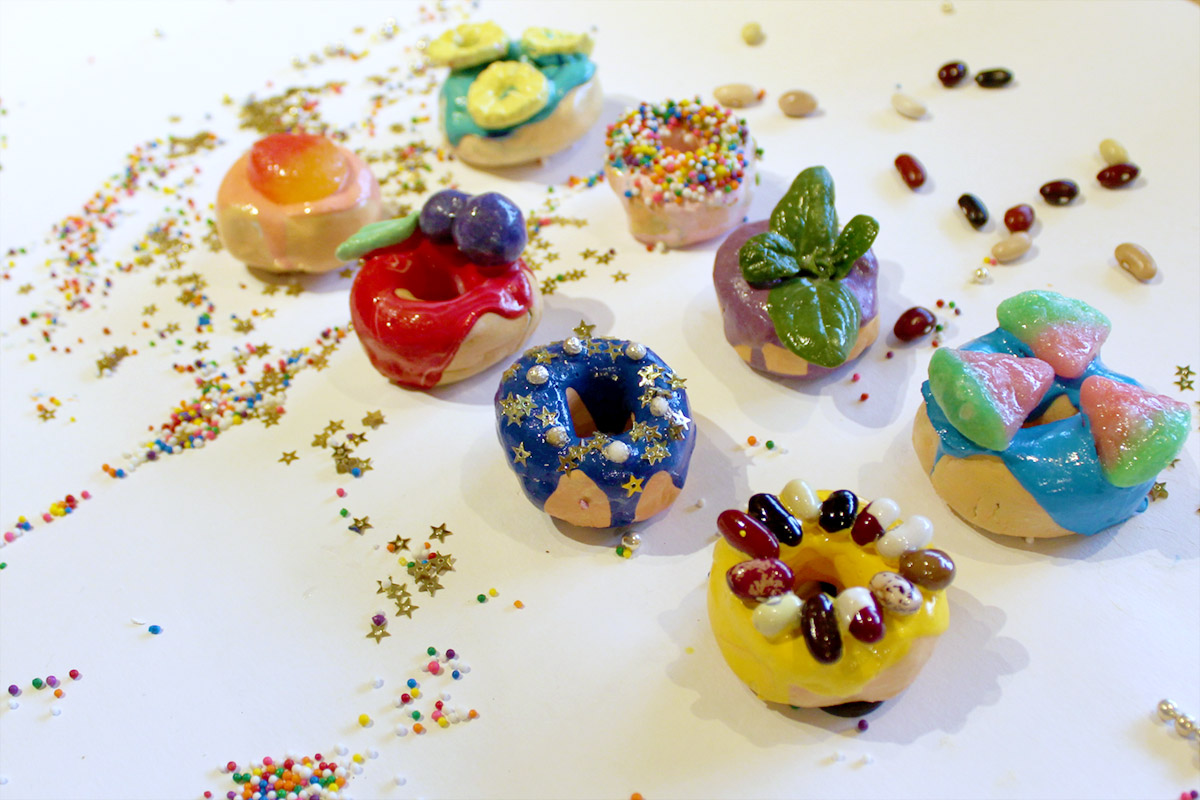
Donuts come in so many different varieties; we’ve made some traditional flavours as well as some very unusual ones. Can you recognize some Bumble Nums ingredients in our donuts? We’ve made a Spinning Pineapple donut, a Purple Pear donut, a Bright Shiny Star donut, a Swooping Spinach donut, a Bouncing Bean donut, and an Underwater Watermelon donut. You can follow along or make up some of your own varieties. Yum!
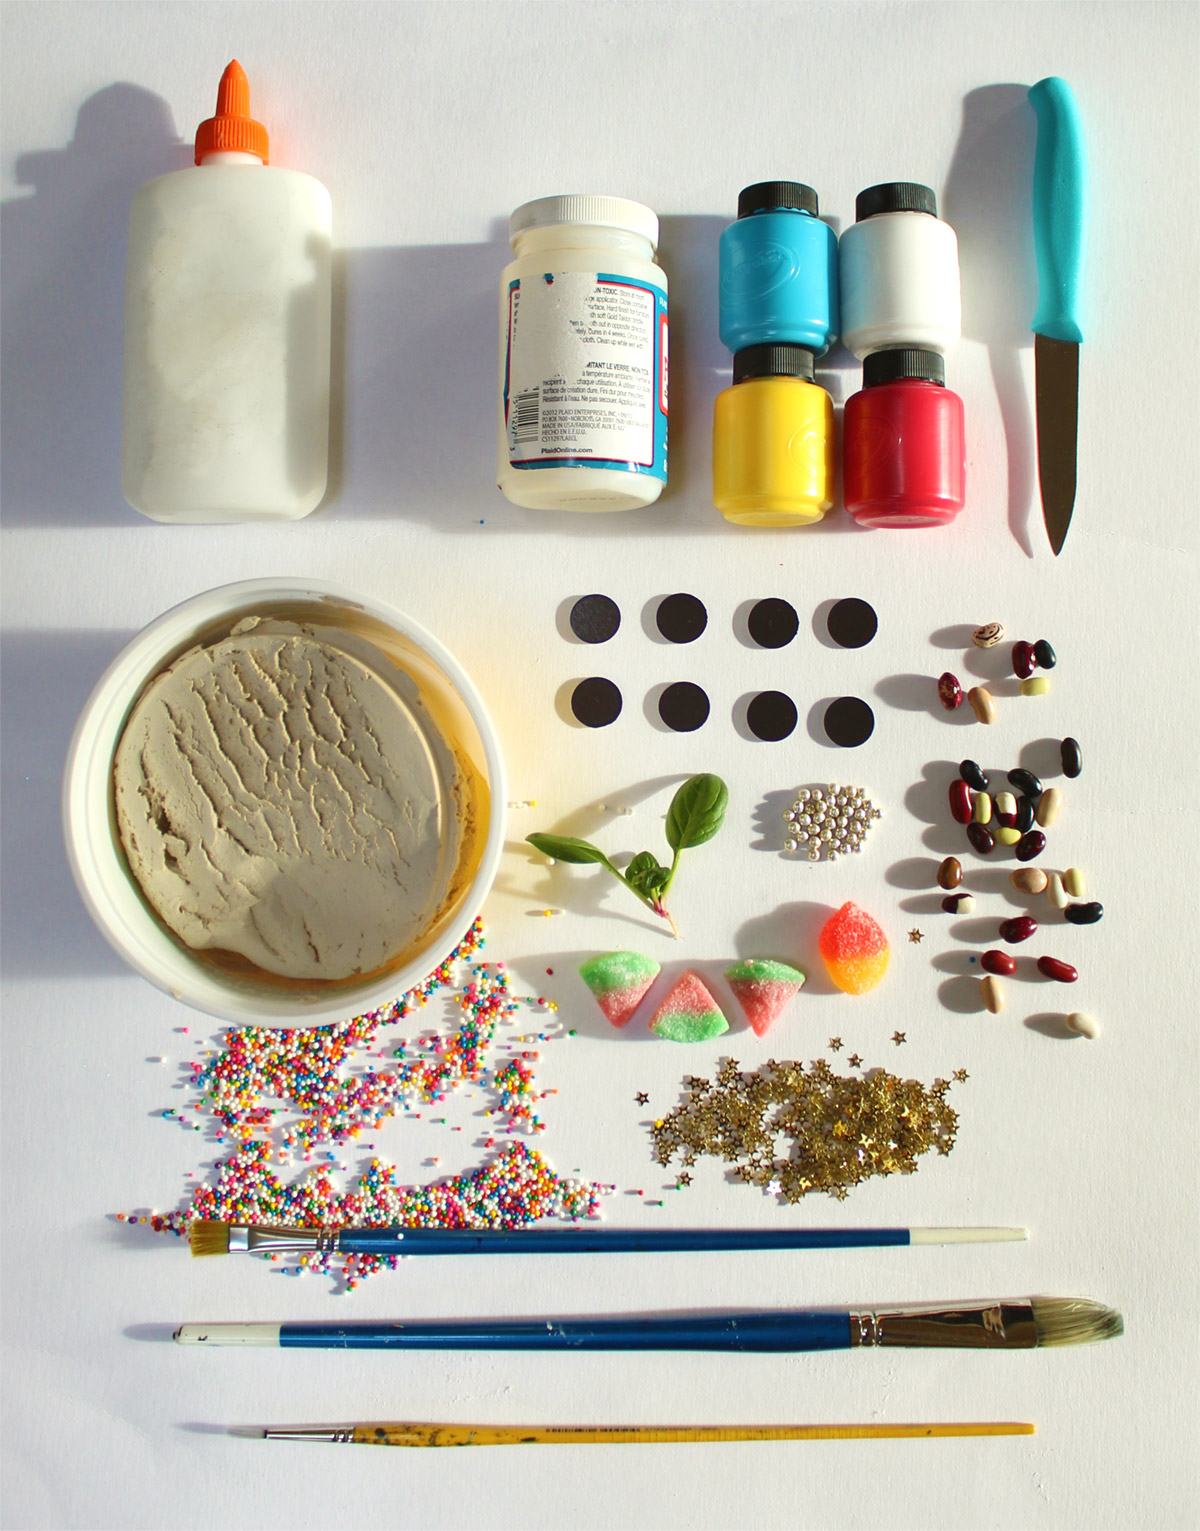
Materials:
- Sculpting clay: any variety will work for this project! Pay attention to whether your clay needs to be air-dried or baked in the oven.
- Acrylic paint
- Paintbrushes
- Magnets: the stronger the better.
- Craft glue
- Clear glaze
- A paring or X-acto knife, if you’re going to be cutting shapes out of the clay.
- Decorating materials: anything you’d like to use! Cake-decorating materials are great. We used star sequins and silver balls for our Bright Shiny Star donut, real spinach leaves for our Swooping Spinach donut, dried beans for our Bouncing Bean donut, and watermelon candies for our Underwater Watermelon donut.
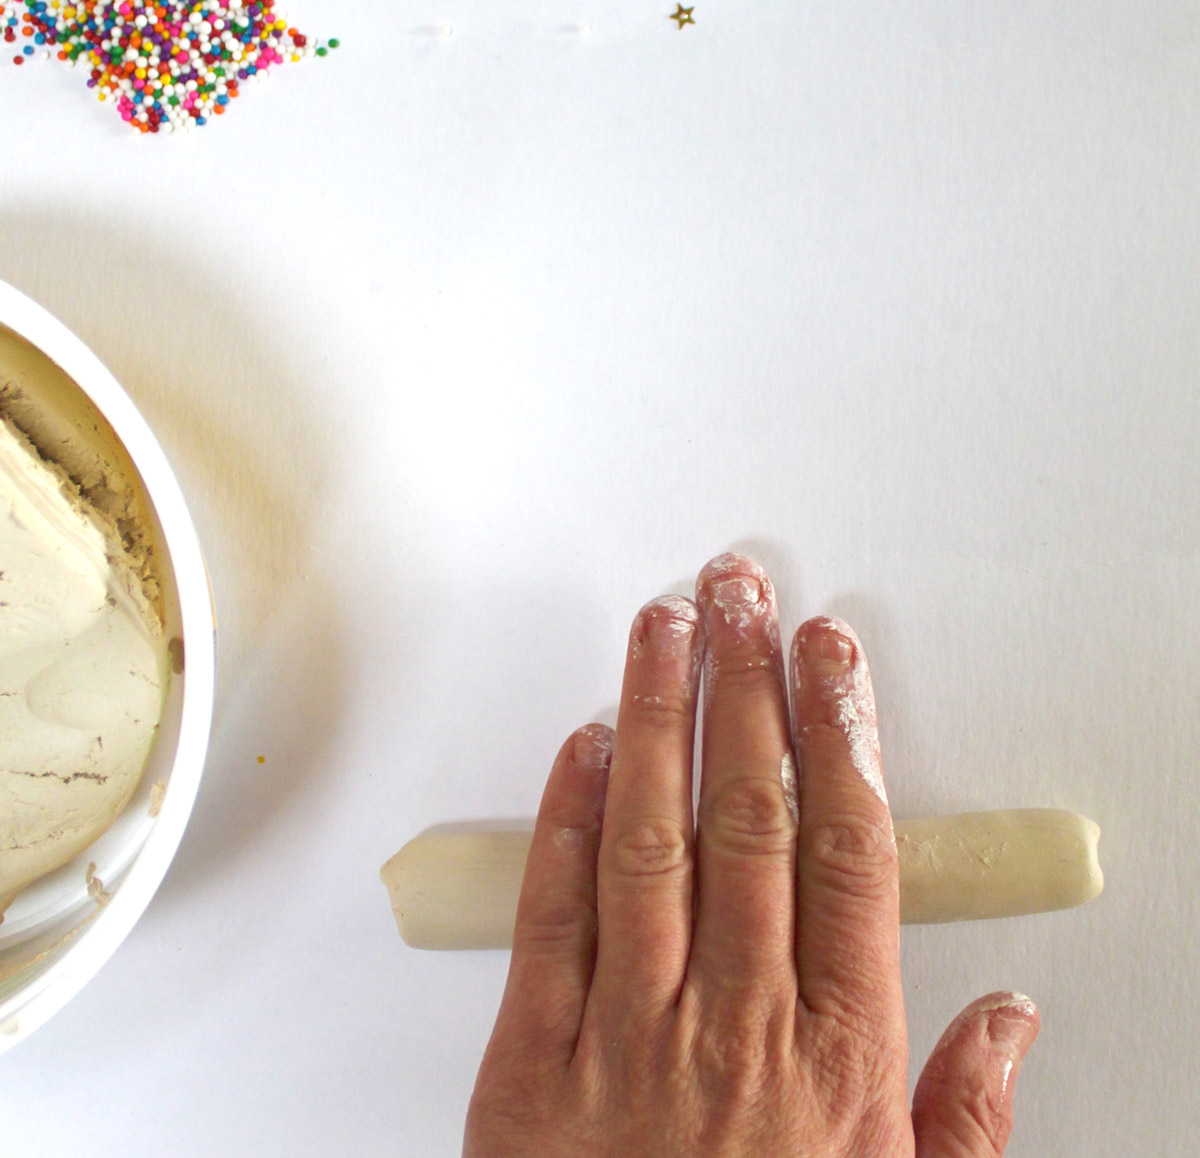
Step 1. Take a small piece of clay and use your hand to roll it into a long cylinder. You’ll want to keep your donuts fairly small; if they get too heavy they won’t stick to the fridge.
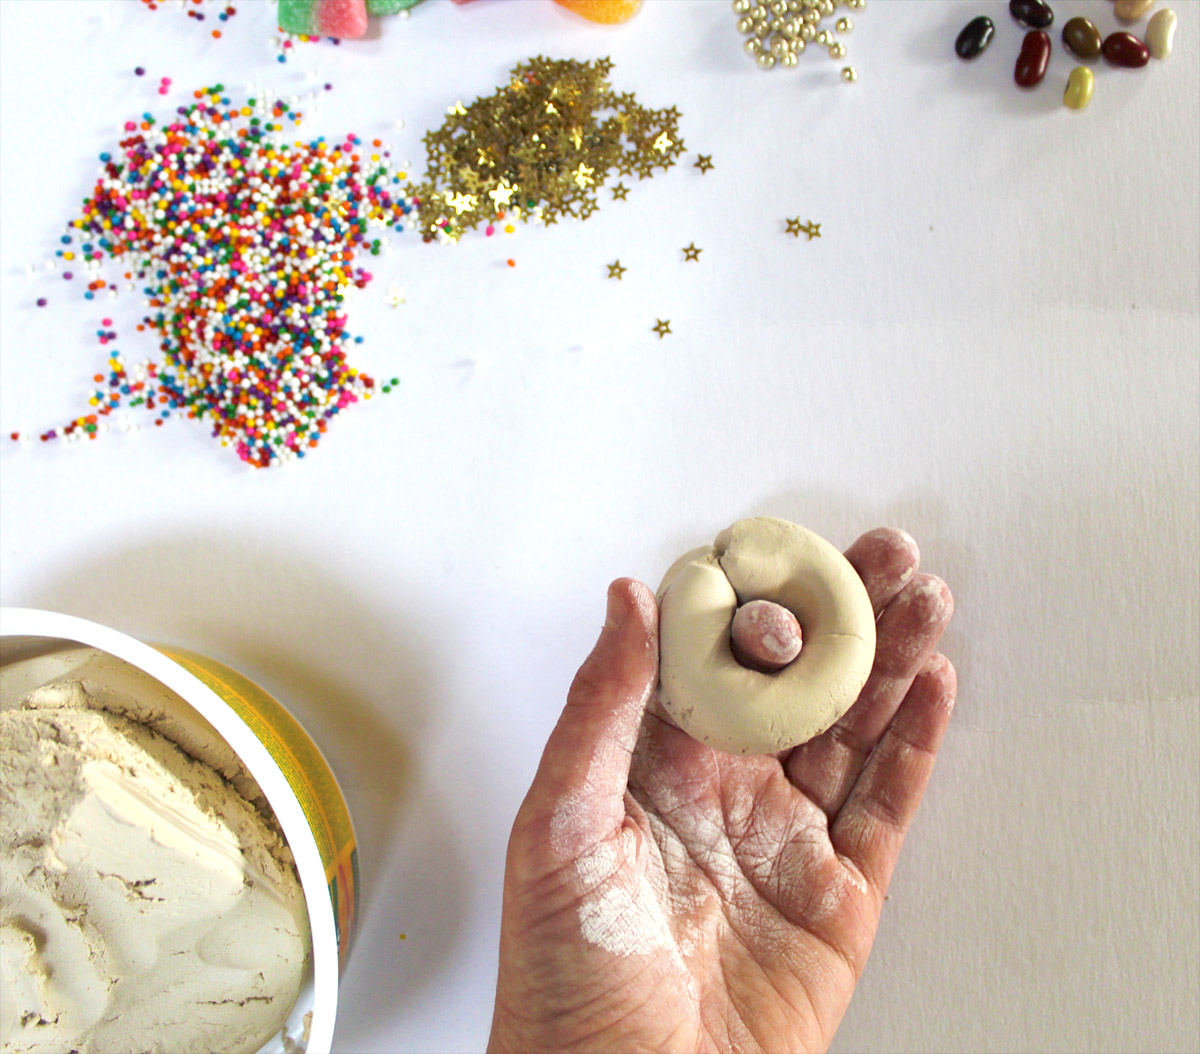
Step 2. Roll the cylinder around your finger to make a circle. Use your hands and some water to smooth the joining seam.
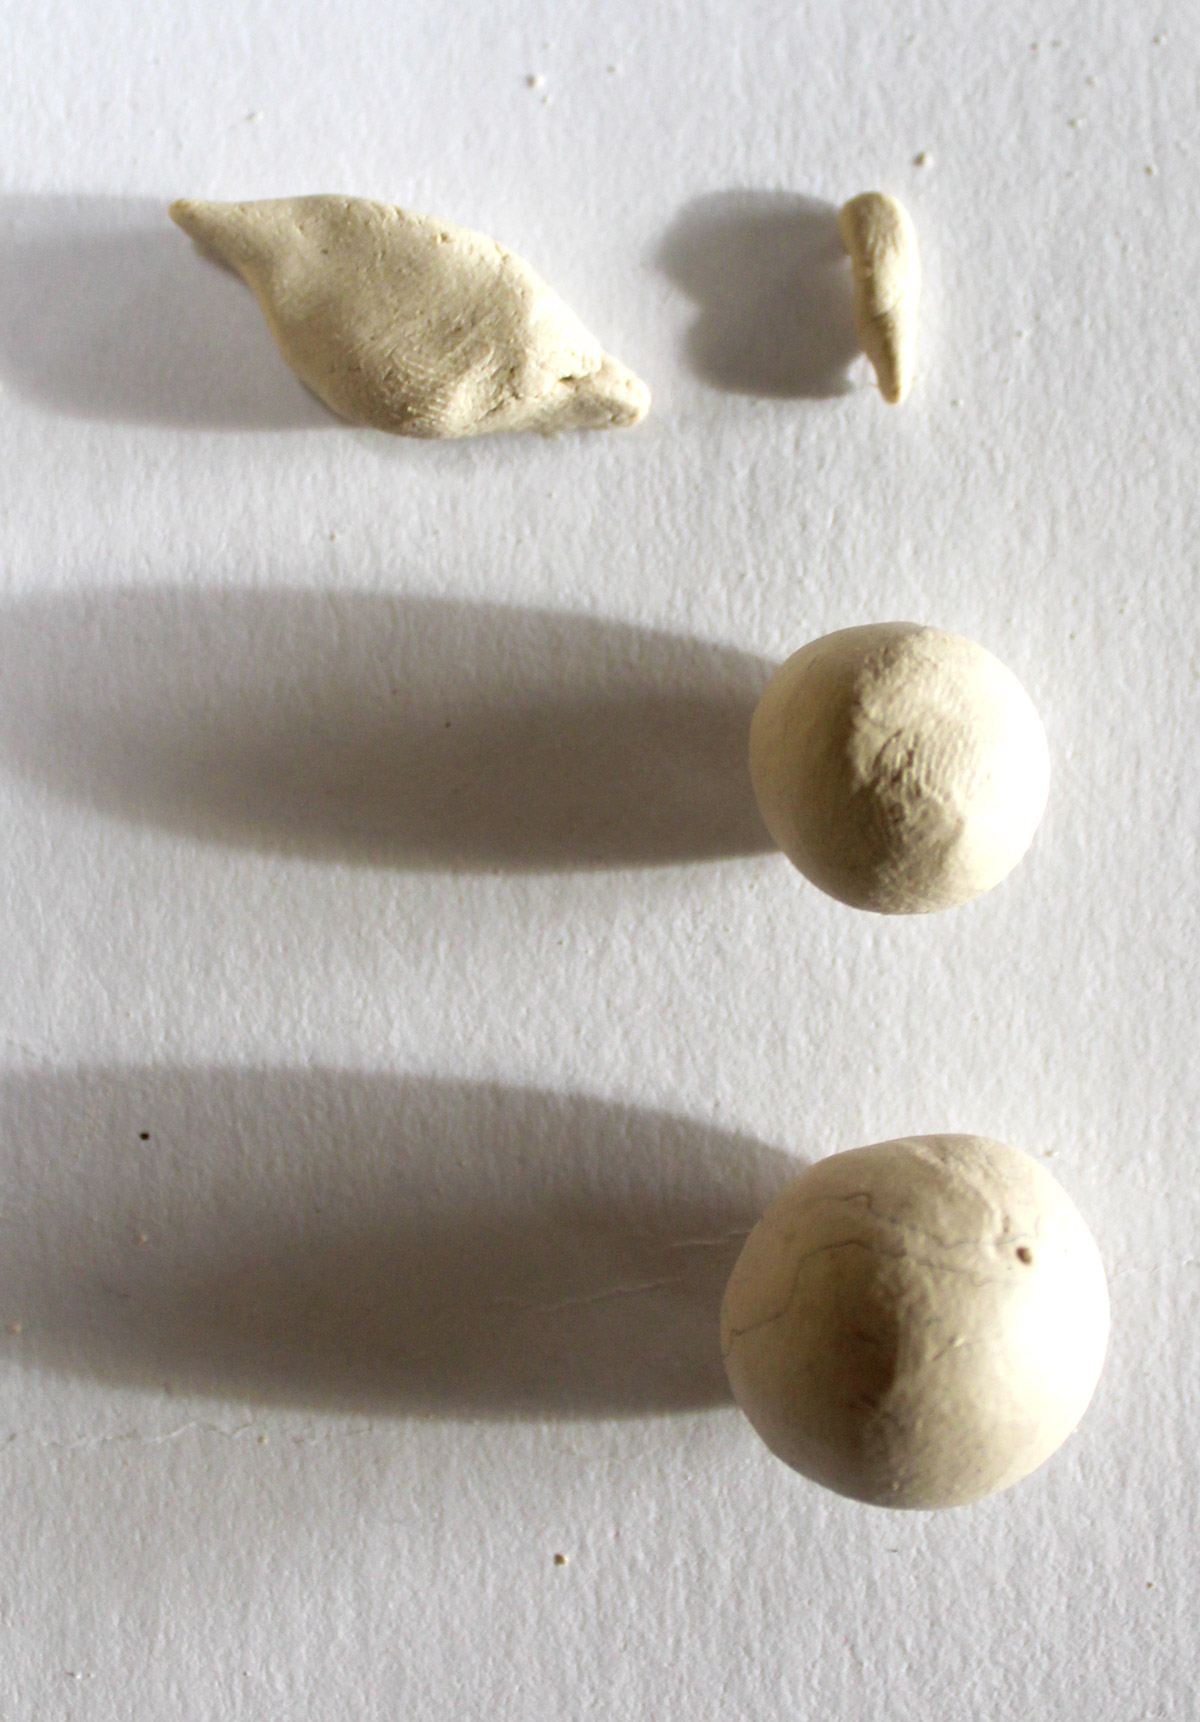
Step 3. For a Purple Pear donut, roll out two spheres, a stem, and a leaf. Join the spheres and smooth them together, then attach the stem and leaf.
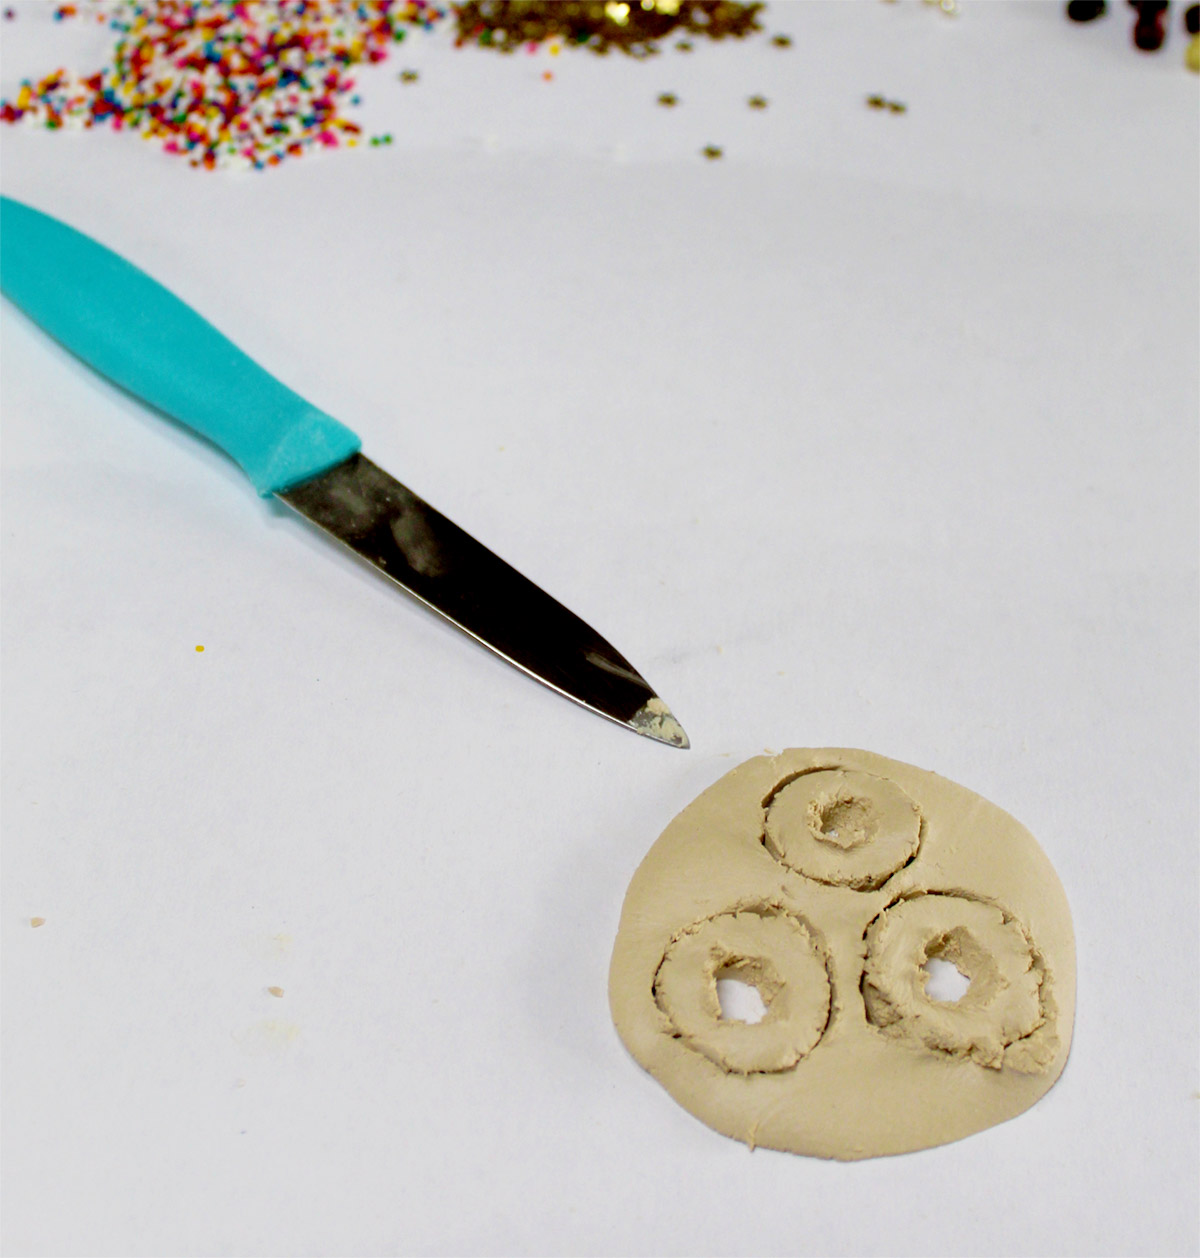
Step 4. For a Spinning Pineapple donut, roll a ball of clay with your hands and then flatten it between your palms. Cut out rings with the tip of a knife, then press the blade of the knife into the rings to make ridges.
Step 5. Dry the clay according to its directions. This may mean baking it in the oven or leaving it for a couple of days before continuing with your project.
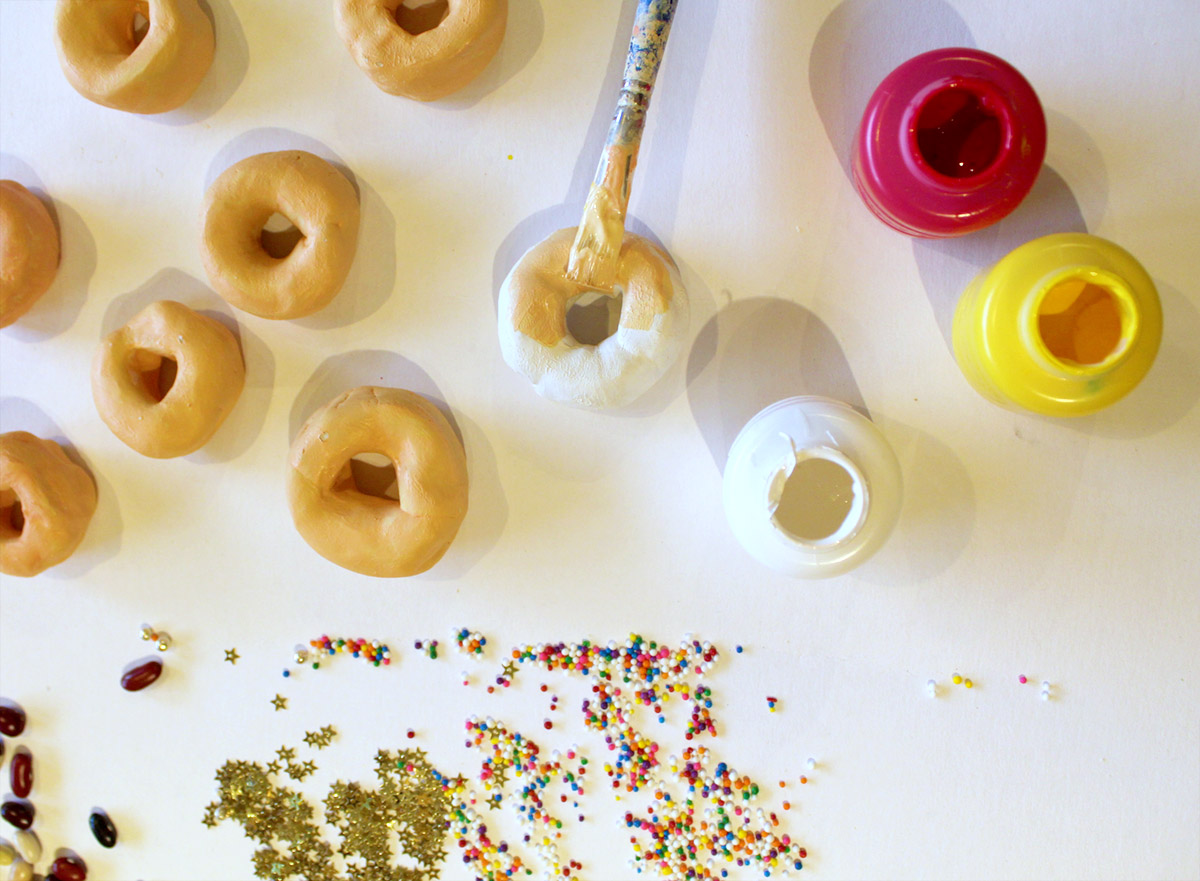
Step 6. Mix a toasty donut color with red, yellow, and white paint; paint your donuts. Paint any clay ingredients and allow everything to dry.
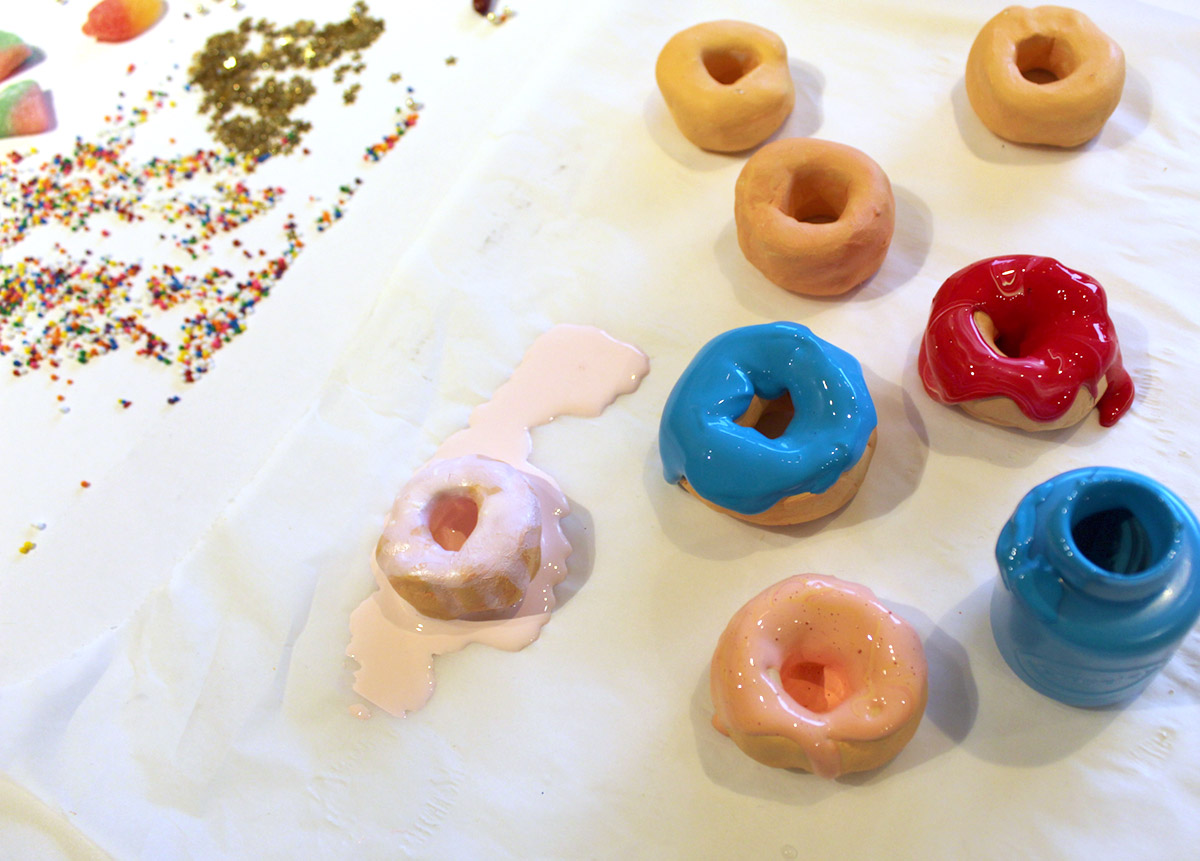
Step 7. For our donut glaze, we’ll need paint that has a good consistency for pouring. Depending on your acrylic paint, you may be able to pour it straight from the bottle or it might need some water mixed in. Pour paint over your donuts, letting it drip down the sides and leaving some of the donut exposed.
Step 8. Decorate! You can place hard objects like beans, sequins, and toppings made of clay directly into the wet paint. If using candy, coat it thoroughly in clear glaze first and let it dry (you may even want to give it two coats to really seal in the sugar); then press into the wet paint or use white glue to attach it to dry paint. If using sprinkles, hold off until you’ve put clear glaze on the donuts; glazing over the sprinkles will cause the colors to bleed.

Step 9. Brush clear glaze over the donuts. If you’ve used fresh leaves, give them an extra thick, thorough coat (or apply a second coat when dry).
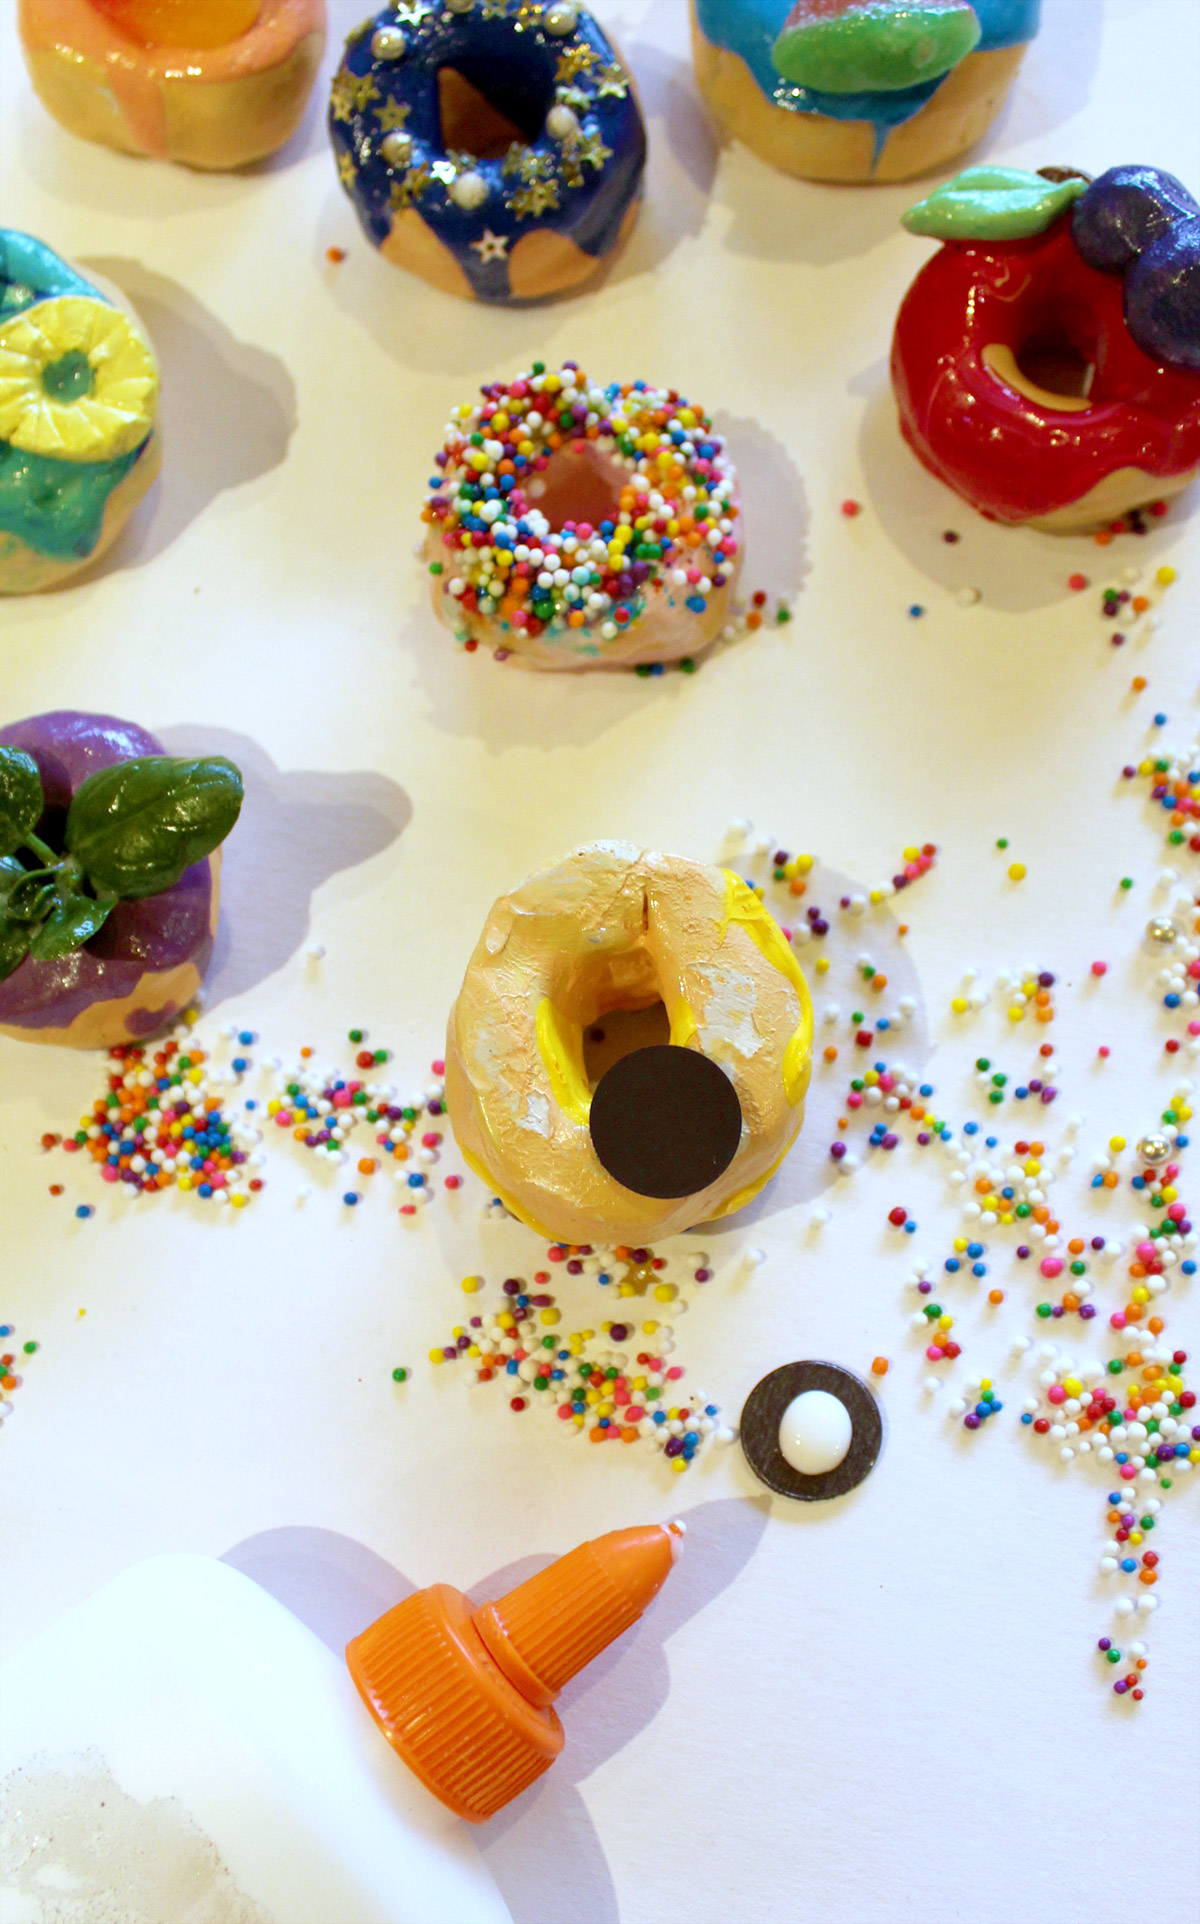
Step 10. Glue magnets to the back of each donut; you may need several magnets per donut to hold them to your fridge.
Don’t forget to follow us on Twitter, Instagram, Pinterest, and Facebook!
Original content © 2019 Super Simple. Not to be reprinted without express written permission. Terms of Service.