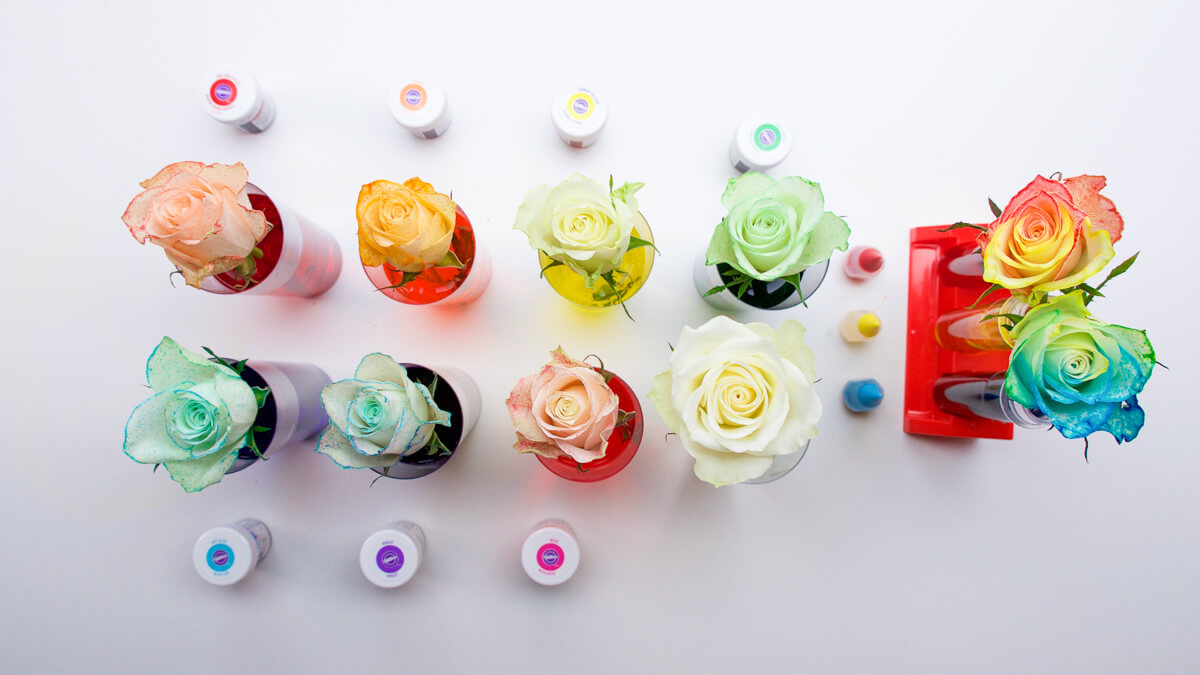
Flowers are blooming everywhere you look these days! This is a beautiful experiment you can do with your little ones for some color fun, and for a simple lesson to demonstrate that plants need water. You can create flowers all the same color, or make a rainbow bouquet! We also experimented with carefully splitting a flower’s stem into two stems to make a flower with two different distinct colors and a bit of a new color once the two blended – a great way to introduce color mixing to little ones! Let’s get dyeing!
Things you’ll need
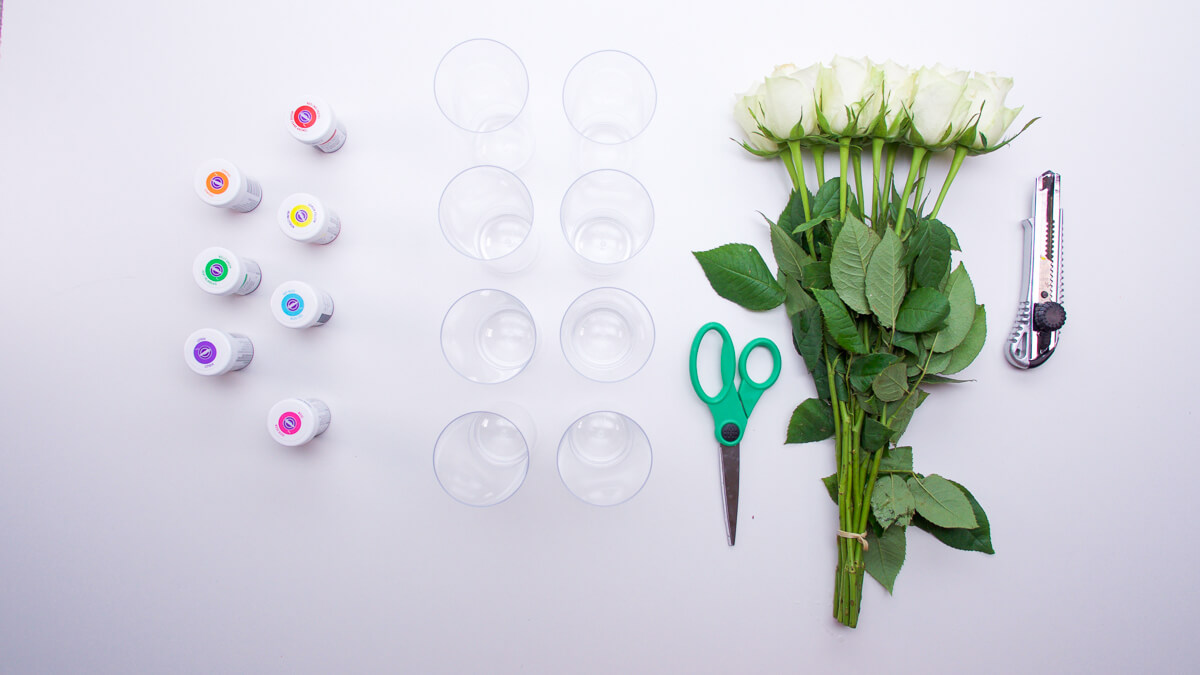
- Flowers – white flowers work best. We used roses.
- Cups
- Water, room temperature
- Food coloring dye
- Knife
- Scissors
Step 1
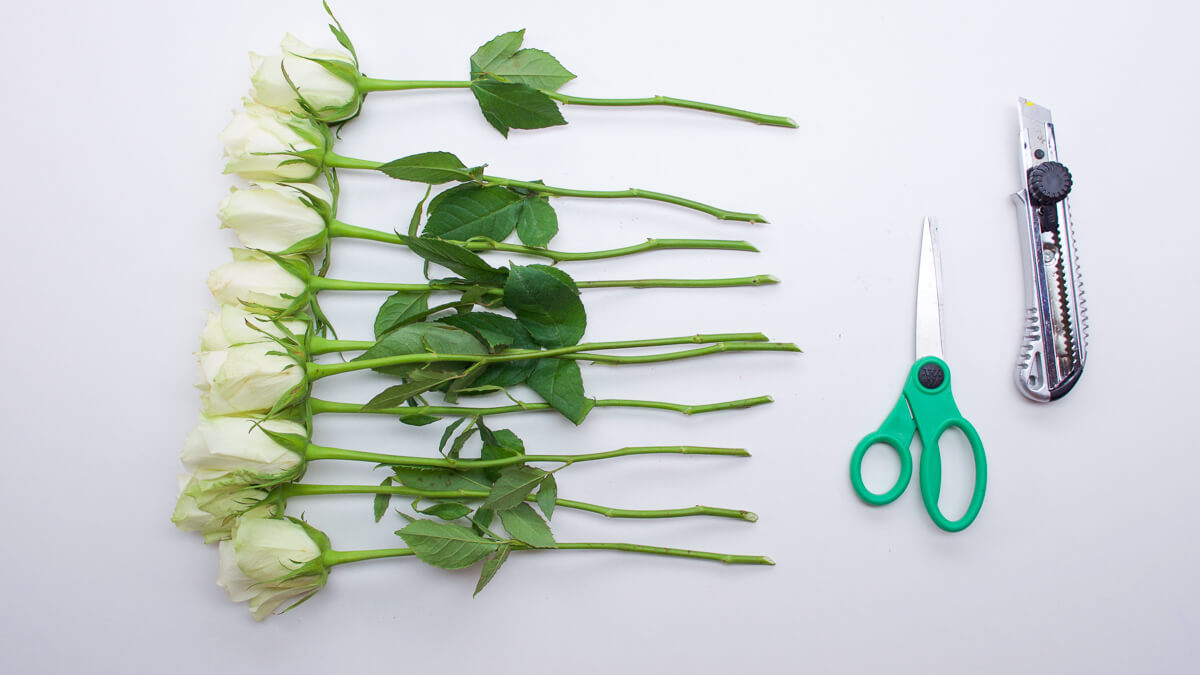
Cut the flower stems diagonally at the bottom and remove any bottom leaves. This will help the stem to absorb the water.
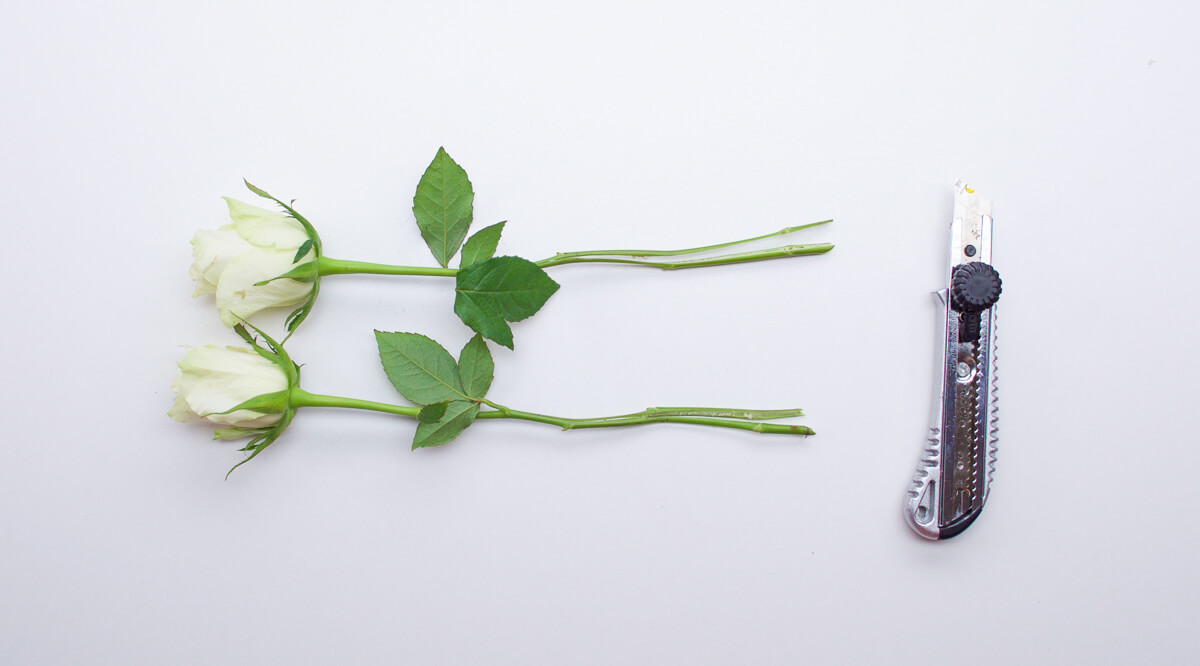
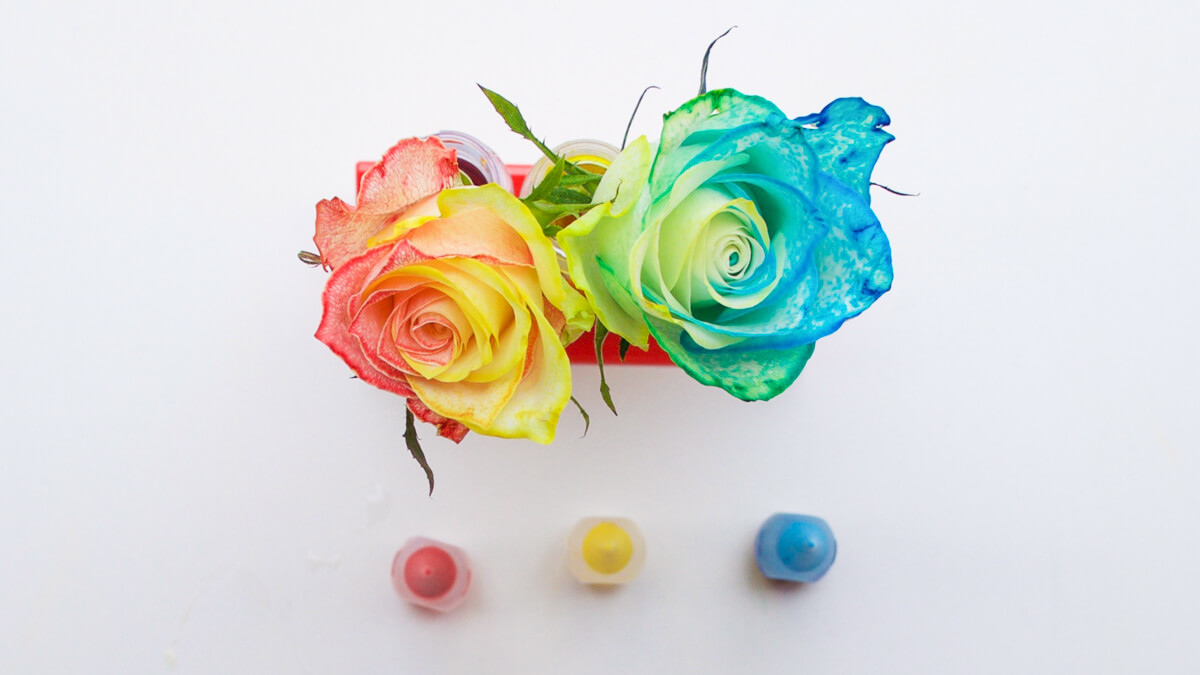
To make flowers with two colors, carefully cut down along the centre of the stem with a sharp kitchen knife or utility knife. Cut enough length so that each stem can make it into its own cup and so it sits in about 2” of water.
Step 2
Fill your cups with 1/2 cup of water. Room temperature water works best as it will absorb more quickly into the flower!
Add 20-30 drops of food coloring to each cup and mix thoroughly.
Step 3
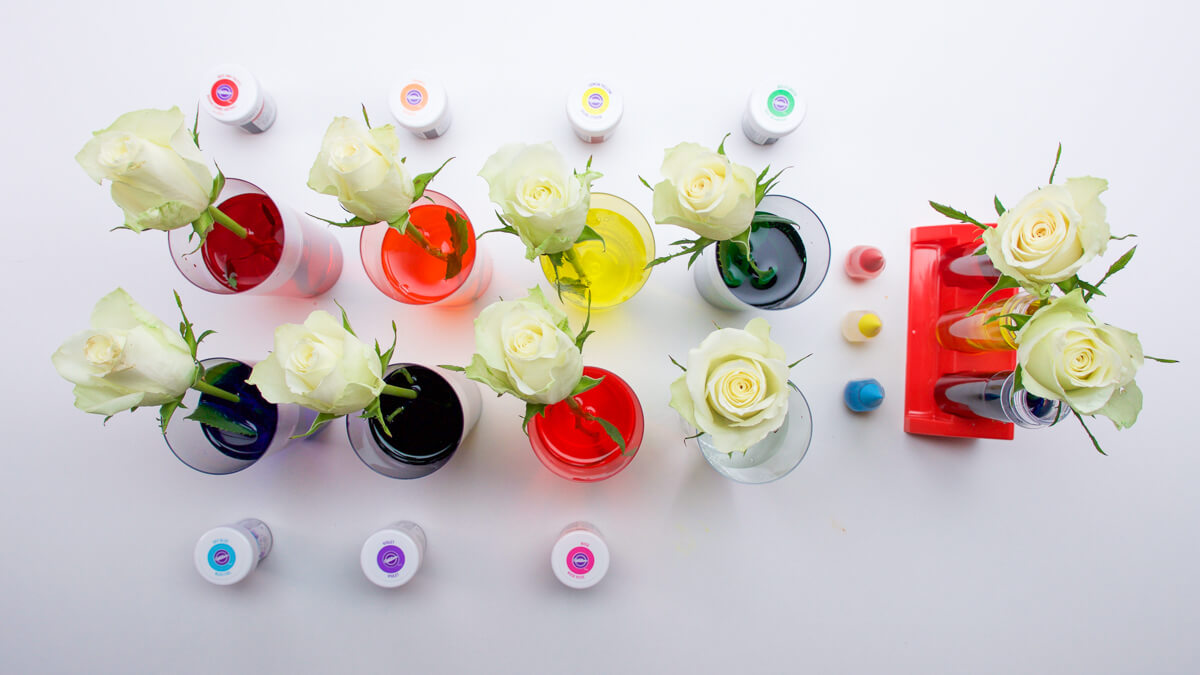
Add the stems of the flowers to the colored water cups.
Wait…
After at least 1-2 hours you will start to see the colors in your flowers! For deeper saturation leave in cups for 1-2 days.
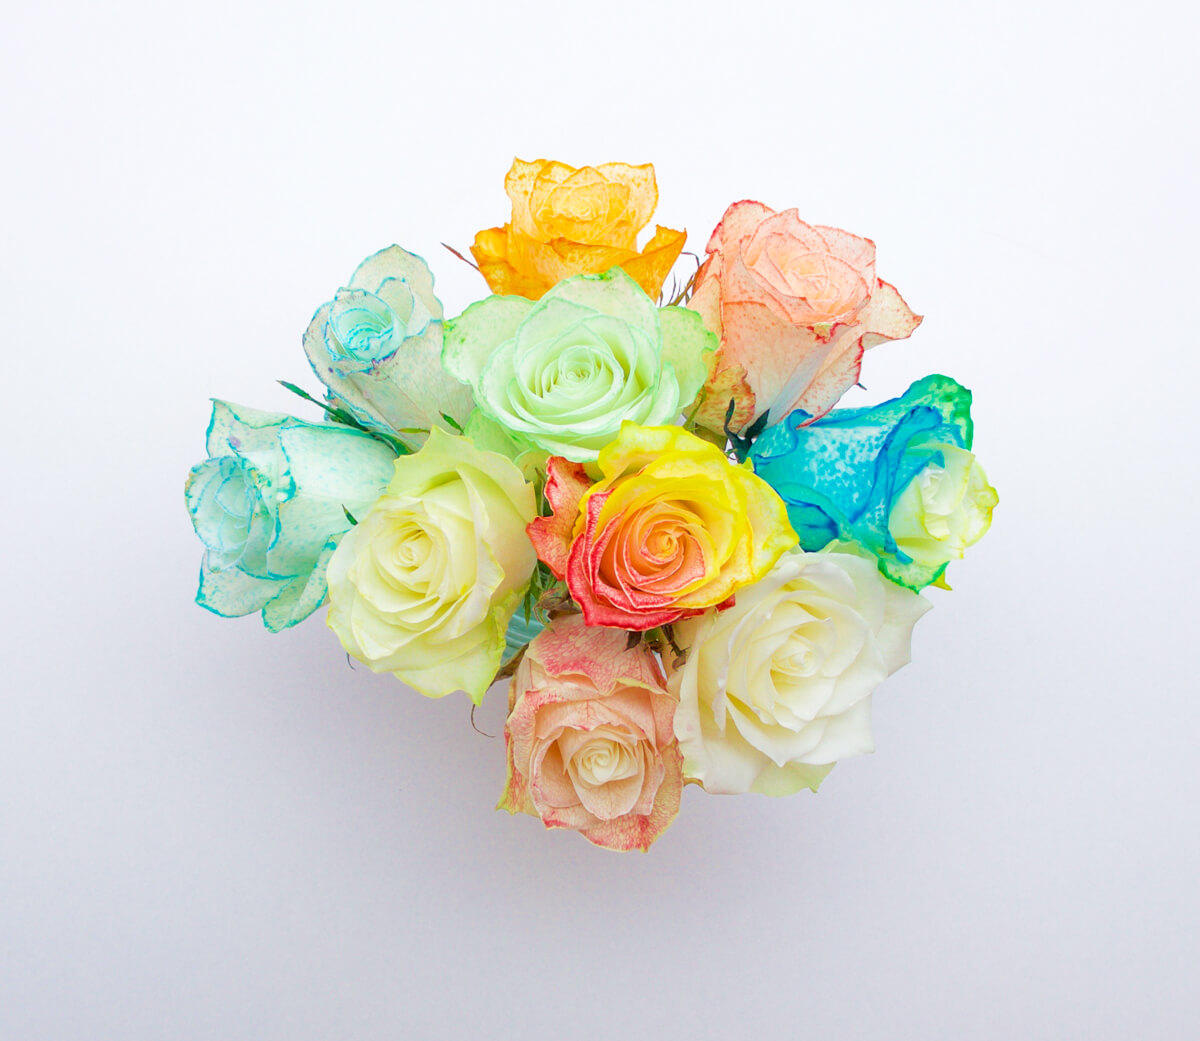
Now you have a beautiful rainbow bouquet, and learned something along the way.
For more fun with flowers, check out our Caitie’s Classroom episode about Spring!
Don’t forget to follow us on Twitter, Instagram, Pinterest, and Facebook!
Original content © 2020 Super Simple. Not to be reprinted without express written permission. Terms of Service.