Combining learning with craft is a wonderful way of integrating creativity and subjects like science. Wind can be difficult to explain to a child without any visual aids. Children learn by seeing and doing, so teaching them with the accompaniment of an easy craft is an excellent tool to help make sense of a new topic. There are many simple, inexpensive crafts you can do with your children when explaining wind to them. Today we will be making your own Wind Chime to hang. It can be hung anywhere that comes into contact with the air. That could be on a porch, backyard, front garden, balcony, window, you name it! But before we start, let us talk a little about wind with some facts.
15 Facts About Wind:
- Wind is air that is moving.
- We cannot see the wind itself, but we can see objects being moved by the wind, like branches on a tree.
- Wind occurs when air moves from a place of high pressure to a place of low pressure.
- Hot air rises and cold air sinks.
- Wind can be both hot or cold.
- There are different words to describe how fast or slow the wind is blowing. It can be as little and soft as a ‘breeze’ or as fast and dangerous as a ‘hurricane’!
- Wind is energy and can be harnessed to create electricity. Wind turbines are one way of making energy from it. The movement of air moves the propellers and this movement creates energy which creates electricity.
- Windmills have been used since 2000 BC! They were first created in China and Persia (now Iran).
- A small wind turbine has the potential to power a whole home’s electricity.
- Boats with sails use the wind to steer their ships to help propel them forward. This is another way you can ‘harness’ wind to create energy.
- There is a place around the Equator called ‘the doldrums’. This spot of the sea often doesn’t get any wind. In the past, ships with only sails would get stuck there for weeks at a time. This is where the saying, ‘stuck in the doldrums’’ comes from.
- In Greek mythology there were the Anemoi, four gods of the wind. They were children of the Keeper of the Wind, Aeolus and Eos, Titan goddess of the Dawn. Their names are Boreas (North wind), Notus (South wind), Zephyrus (West wind) and Eurus (East wind).
- The instrument to measure wind is called an ‘anemometer’, taken from the ‘Anemoi’ greek wind gods (shown above).
- Wind reports always tell you where the wind is coming from and not going too. If it says the wind is, ‘coming from the North’ then it is going to the South.
- Francis Beaufort (1774-1857) was an Irish hydrographer and officer and British Admiral in the Royal Navy. He was the first to create a wind scale to measure wind force at sea, created in 1805. The wind has a scale from 0-12/17 and the wind speed can be measured in ‘knots’, ‘kilometres per hour’ (kph) or ‘miles per hour’ (mph).
Making your own Wind Chime
What you will need:
- Scissors (normal or patterned ones)
- Paper plates / card
- String (we used transparent and normal)
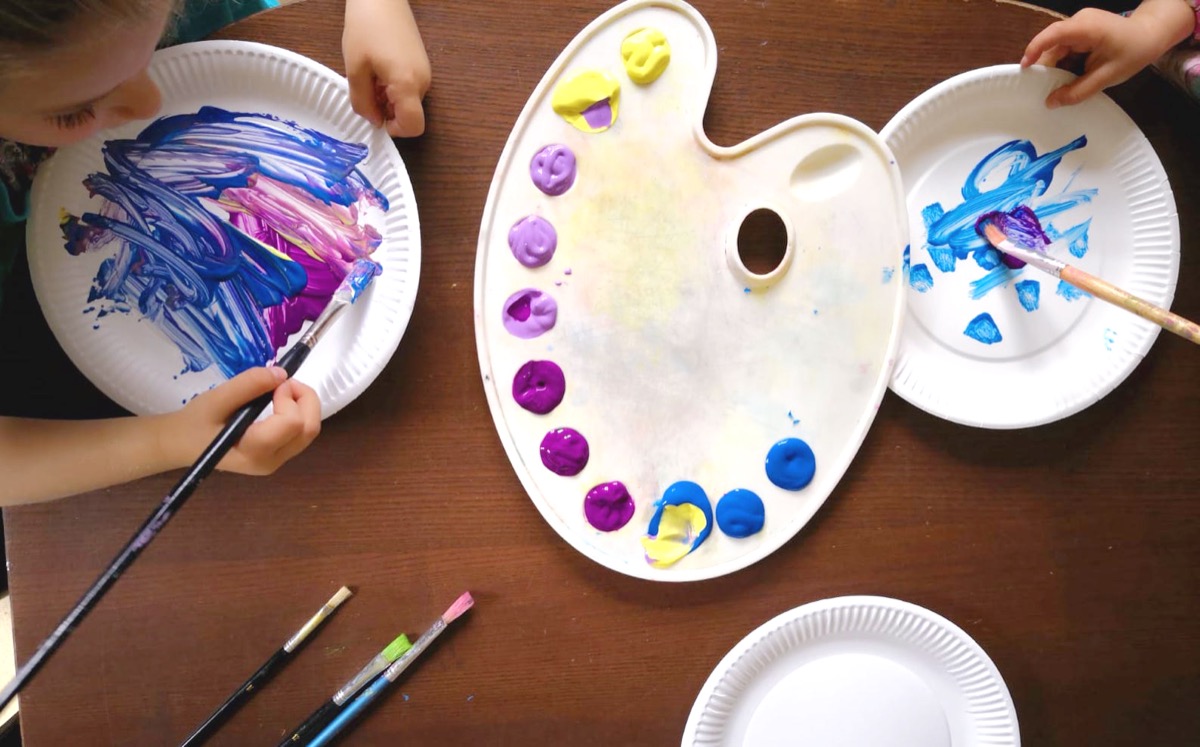
- Paint/crayons/pens/stickers for decorating your plates
- Bells
- Hole punch / sharp pencil
- Glitter and glue (optional!)
Instructions:
- First your child needs to decorate their paper plates or card and allow to dry. We used paint but any other decorating material can be used.
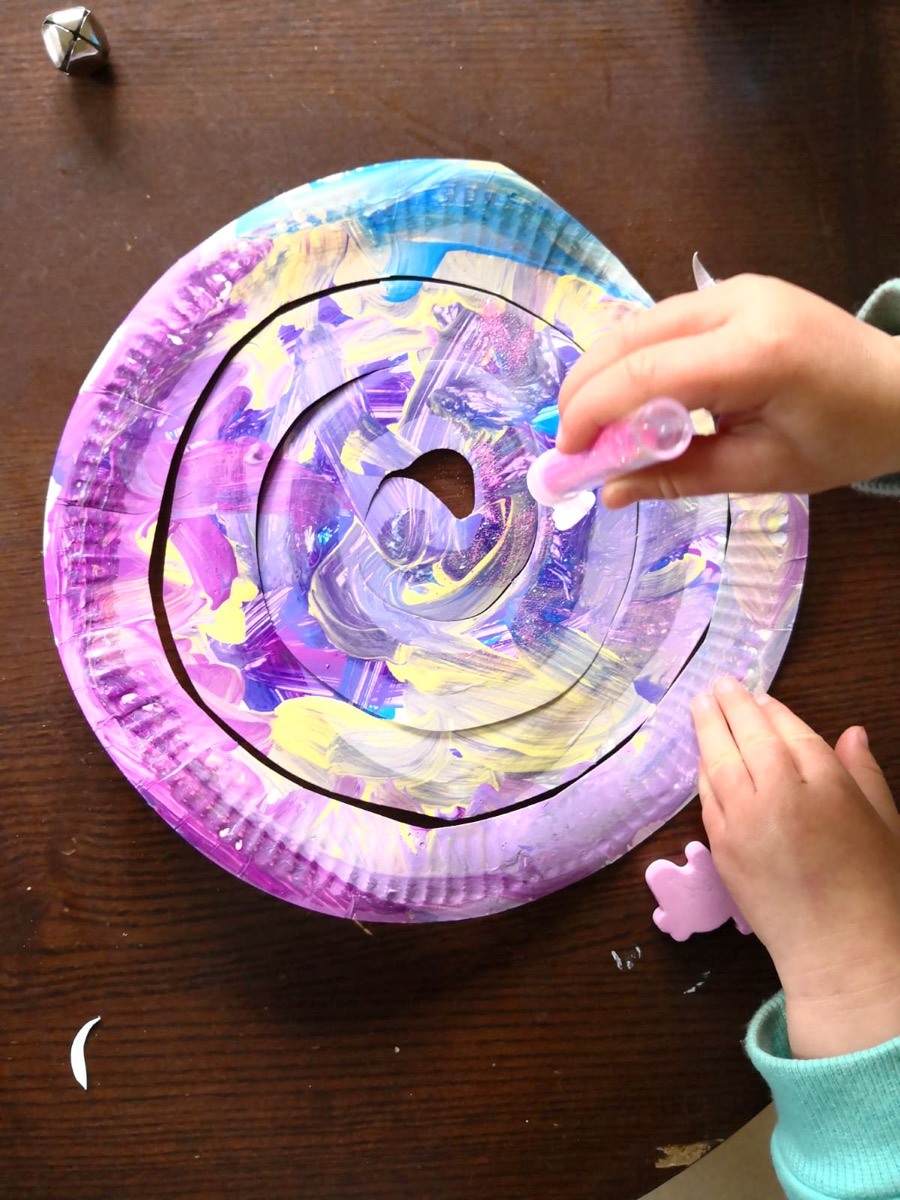
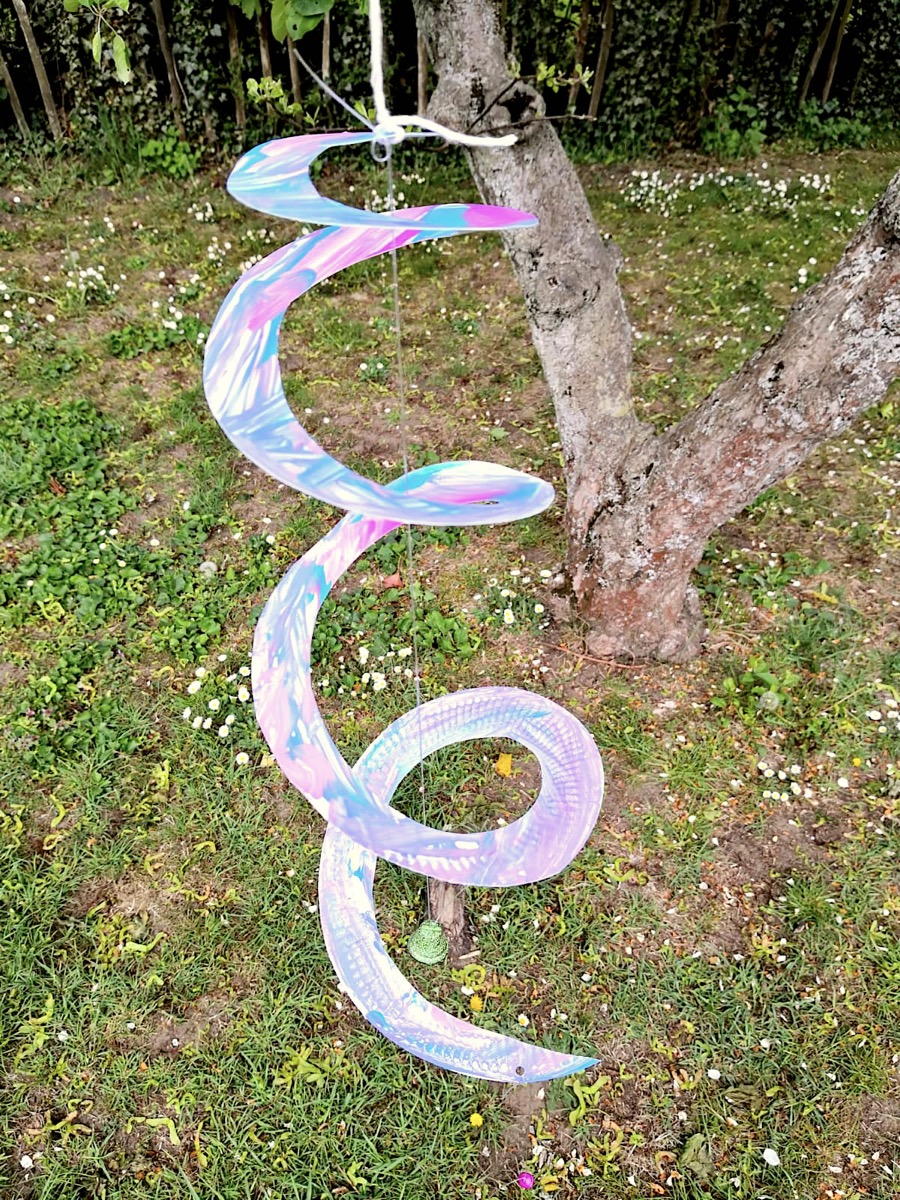
- When dry, draw a large spiral on them, starting in the middle. It will look a little like a curled up snake. The middle looking a little like a snake head.
- If your child can use scissors, allow them to follow the line to cut the spiral out. Be on hand to help them if they need it, as the middle part can be tricky.
- If they would like to go further with the decorations, for example add stickers or glitter, now is the time to do so.
- At the top of the spiral with a hole punch or sharp pencil make a hole. This is where your string will be tied and where you will tie your string to allow it to hang.
- Cut some string long enough that it will hang below the bottom part of your spiral. At the bottom end tie a bell on to it. At the top of the spiral, where the hole is, tie the other end of the string. The string and bell should hang inside your paper spiral.
- Add as many or as few strings with bells. The more bells you add the more it will ‘chime’ in the wind.
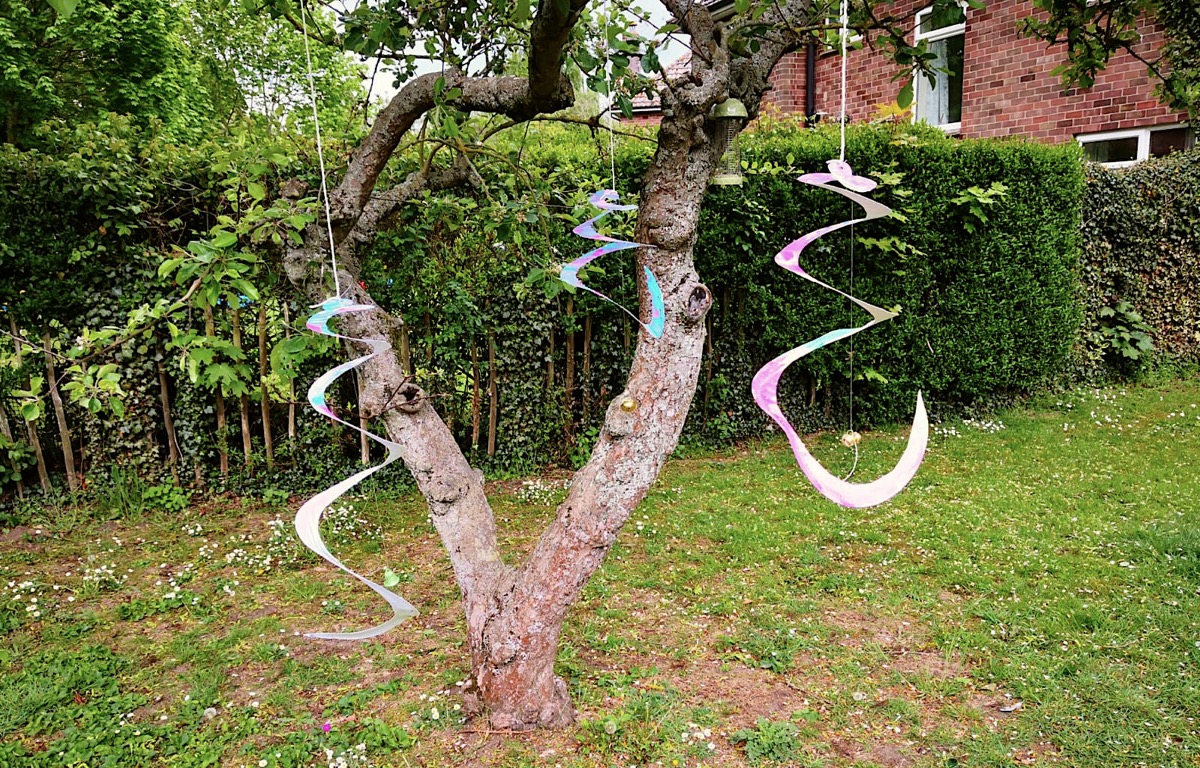
- Now tie another string to the top hole and hang it on a tree, or your porch or on a balcony.
- Watch how a breeze or gust of wind, spins it round and round.
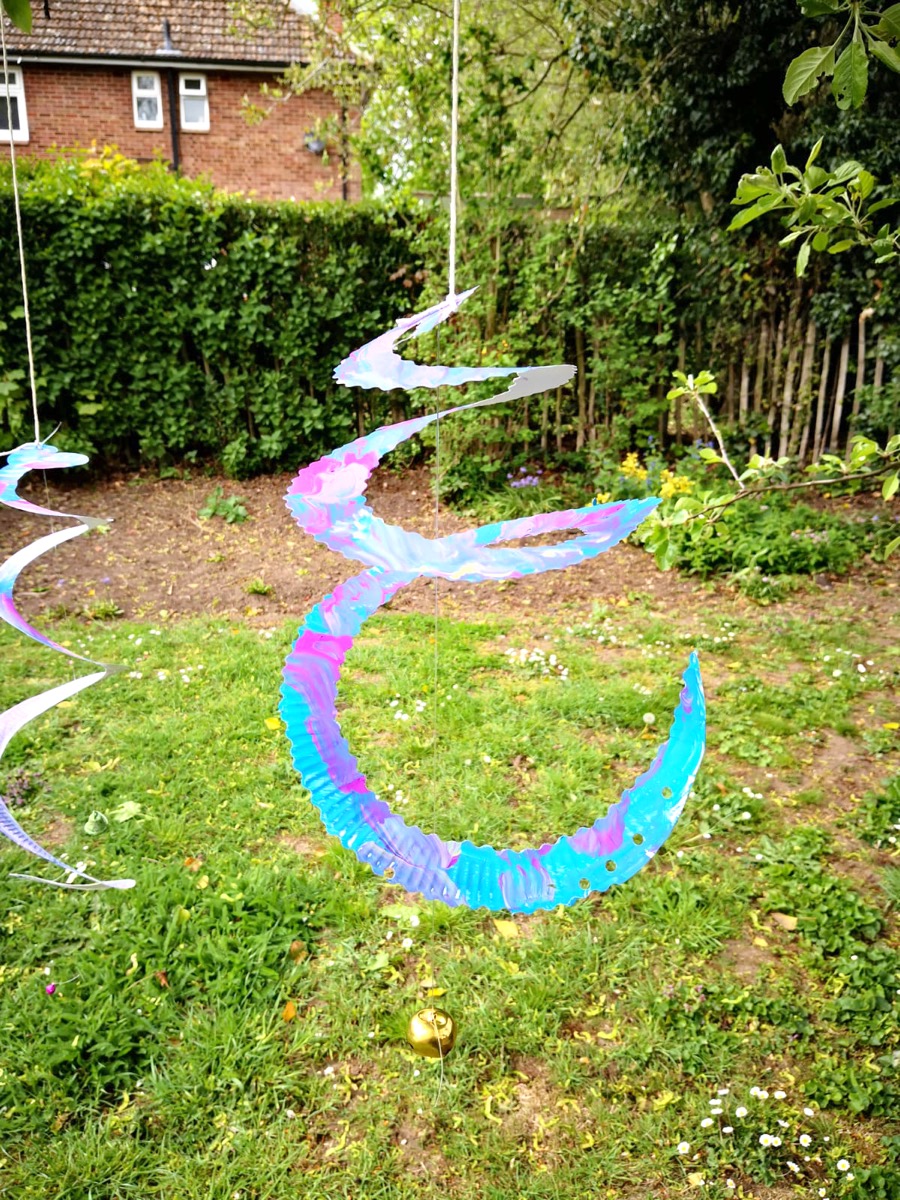
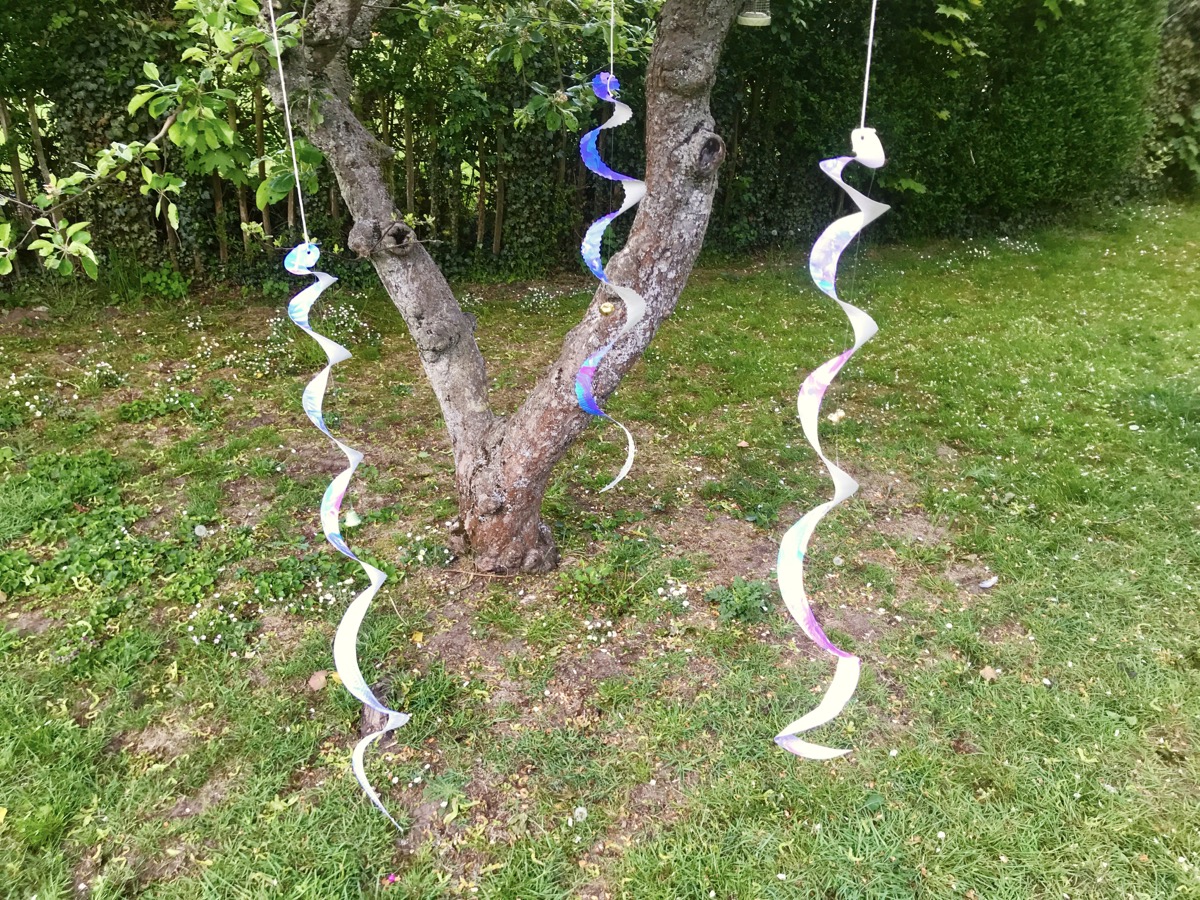
- After 24 hours you will see that the spiral has lengthened and stretched. You will have a much longer spiral wind chime and the bell will be half way down the spiral and not at the bottom!
Questions to ask and discussions to have with your children afterwards
- When it is windy, what do you think will happen to your spiral?
- If there isn’t any wind, what will happen to your wind chime?
- If there is no wind, will there be any noise coming from it? And if there is wind?
- Does your spiral wind chime remind you of the motion of a tornado? If they don’t know what a tornado is, show them a few pictures of videos of it and talk about the similarities.
- What do you think we will see tomorrow when we look at the wind chimes? Note down their answers and the next day go have a look and see if they were correct. You should find your wind chime has lengthened and the bell will now be half way up the spiral. This means the bell will chime more as it bumps against the spiral in the wind. Below is a photo of our spirals after a day of hanging. Notice how they are much more stretched out?
Enjoy harnessing the power of wind with your colourful creations! For more fun activities and learning with wind, watch the Caitie’s Classroom episode all about wind!
Don’t forget to follow us on Twitter, Instagram, Pinterest, and Facebook!
 Contributor
Grace Selous Bull is an arts education author and freelance blogger. Her book, ‘Potty About Pots: arts and crafts for home and school’ is aimed at children from 5-12 years old and takes them through a journey of ceramics through time. She is a full time Mummy of two girls, both of whom love being creative, and is married to her husband, Andrew, who does not.
Original content © 2019 Super Simple. Not to be reprinted without express written permission. Terms of Service.