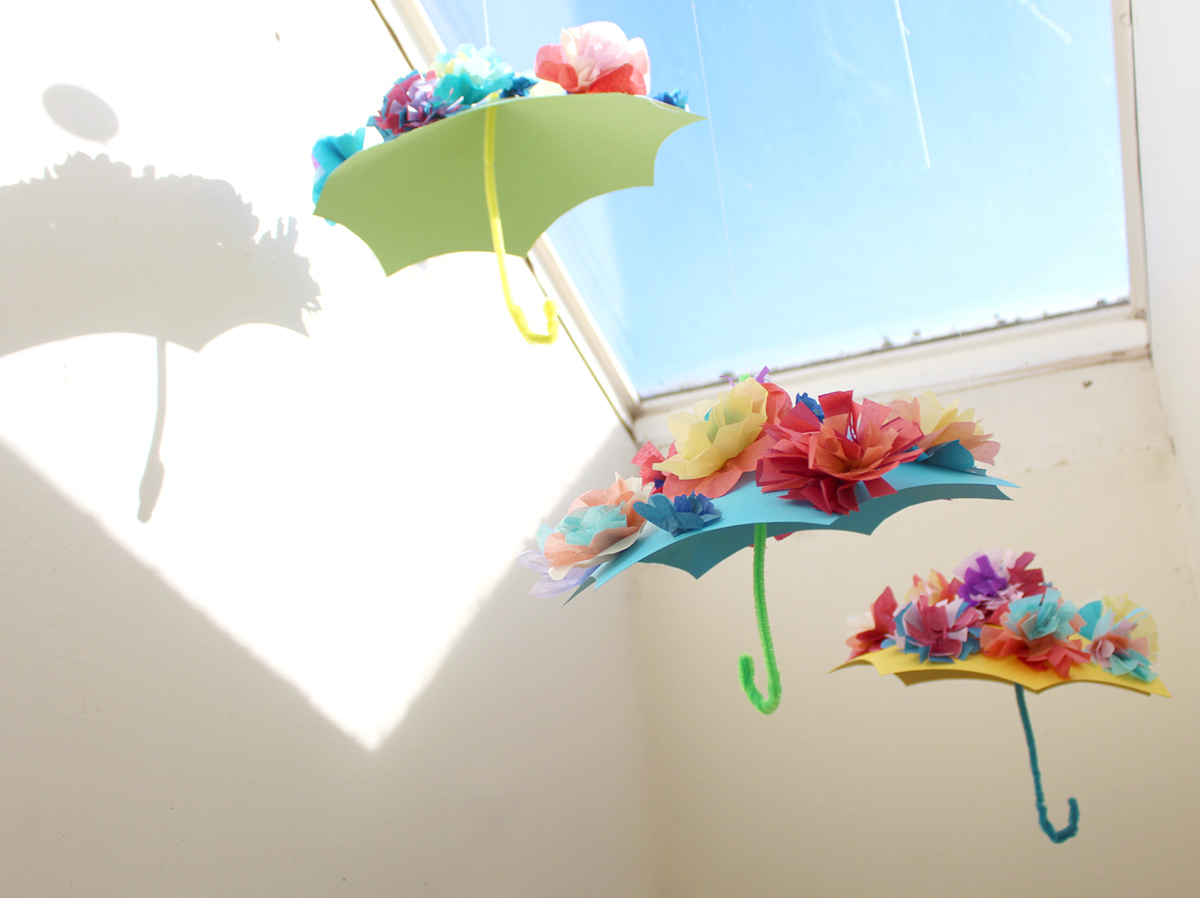
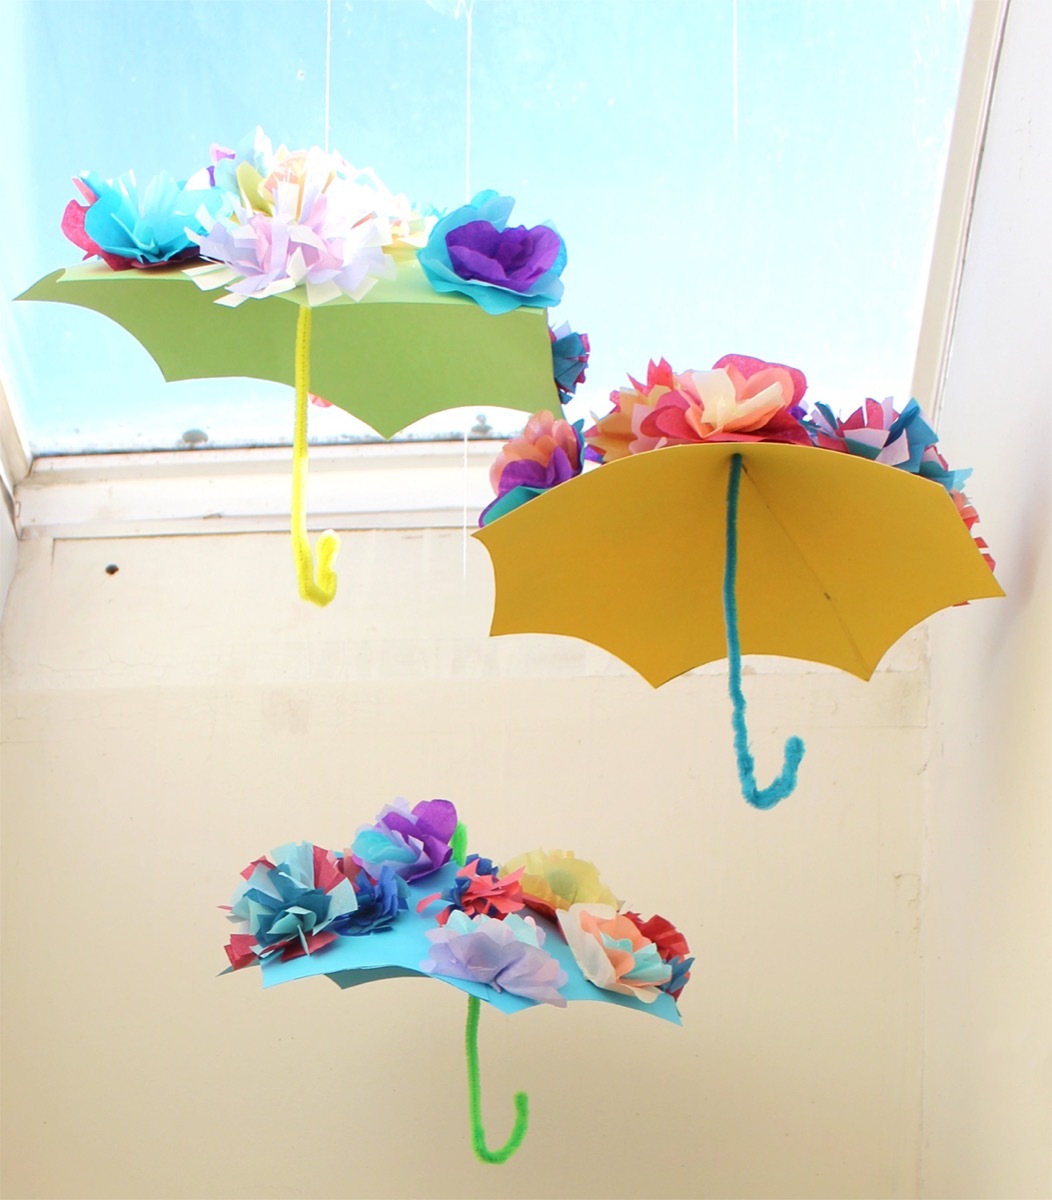
This is a great indoor craft to brighten up a rainy day, and to help you remember what April showers bring! May flowers need lots of sunlight to grow, but first they need a lot of rain.
We’re going to make a simple umbrella out of card stock, then learn two different methods of making brightly colored tissue paper flowers to decorate it. This project can be adapted to a simpler variation by skipping the step where we turn a circle into an umbrella shape, and instead simply making a cone.
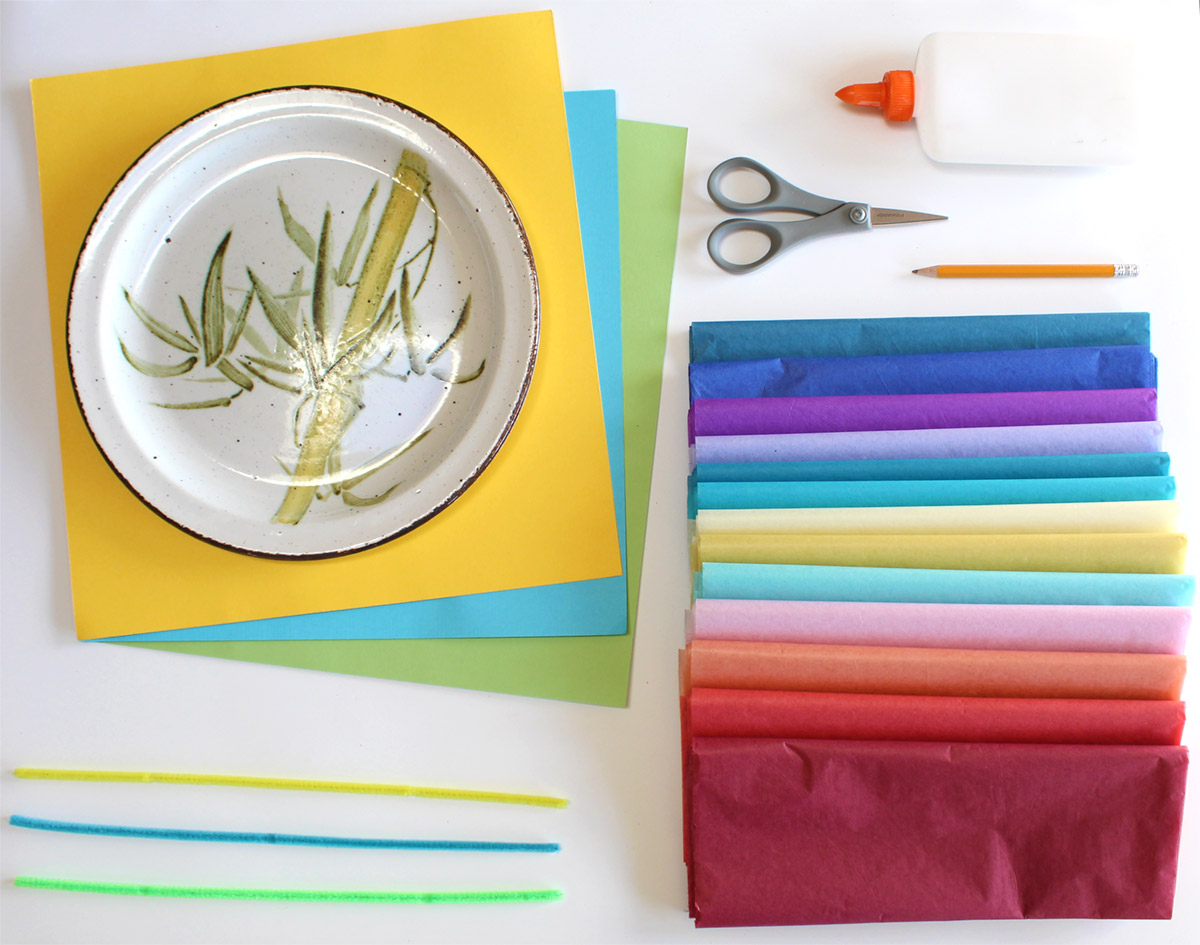
Materials:
- Colored card stock – one sheet for each umbrella
- Tissue paper
- Pipe cleaners – one for each umbrella
- A plate for tracing
- A pencil
- Scissors
- White glue
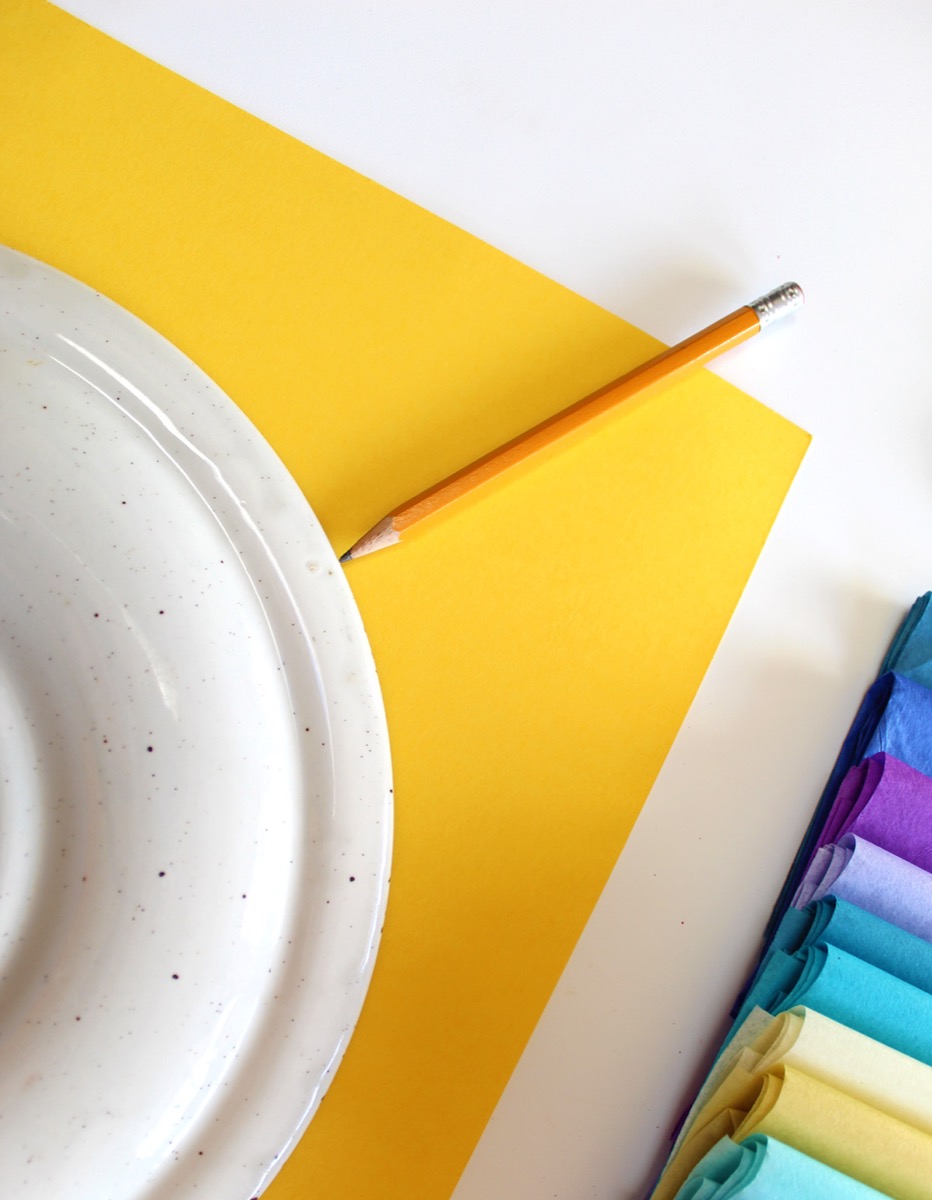
Step 1. Place the plate face-down on a sheet of card stock and trace around the edge.
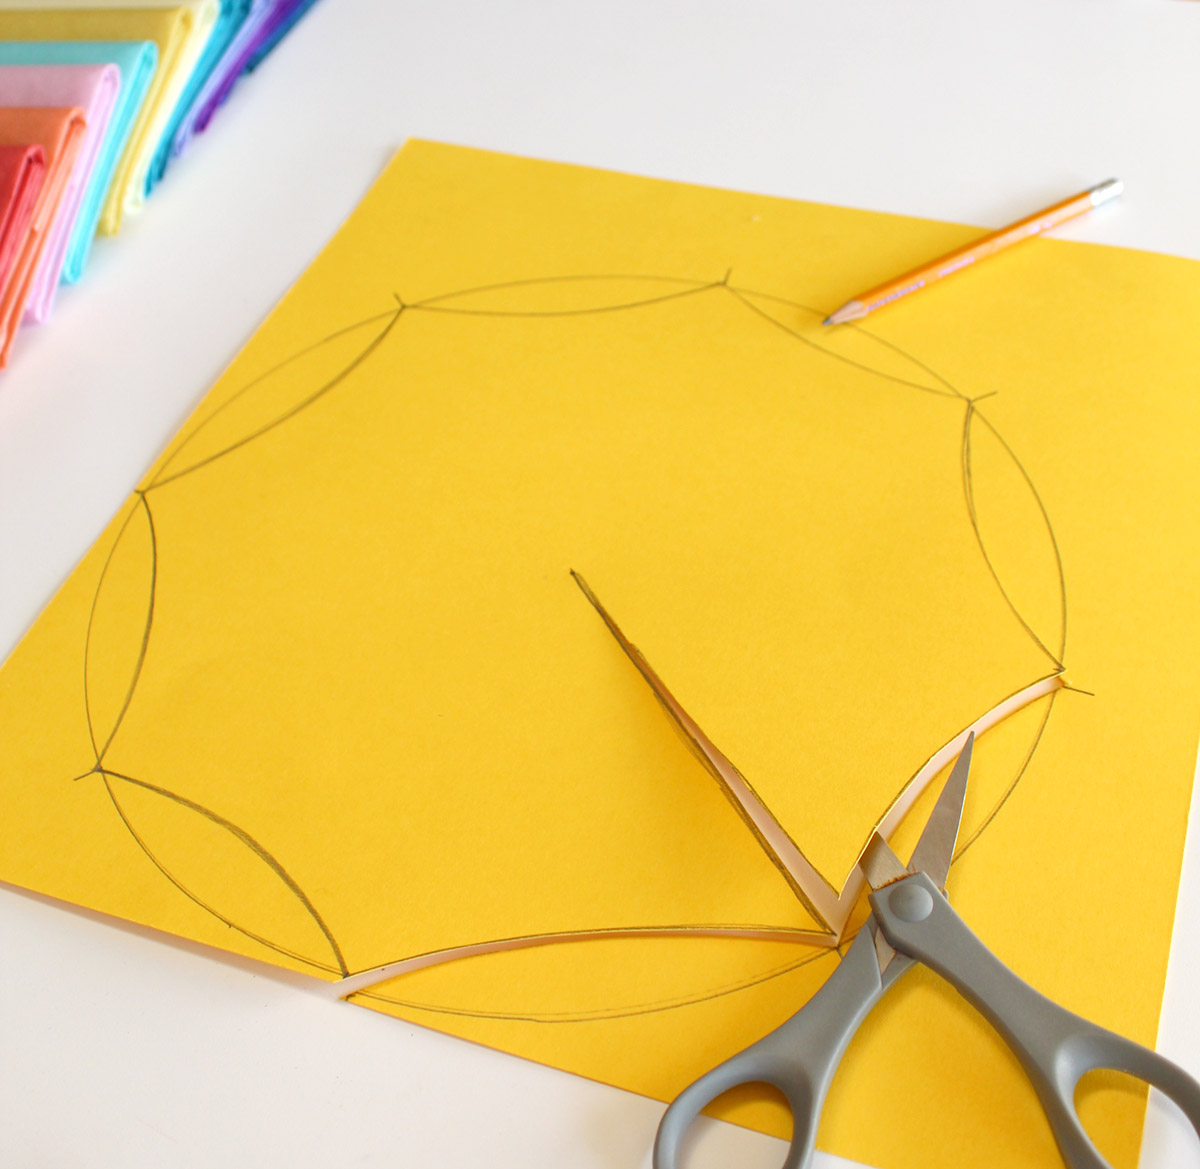
Step 2. Make eight marks around the edge of the circle, then draw curved lines between them as shown. This umbrella pattern is very forgiving, so don’t worry about spacing them perfectly! Cut out your umbrella, then cut a slit from one corner to the centre.
Step 3. Squeeze glue onto a triangular section of the umbrella, next to the slit, as shown.
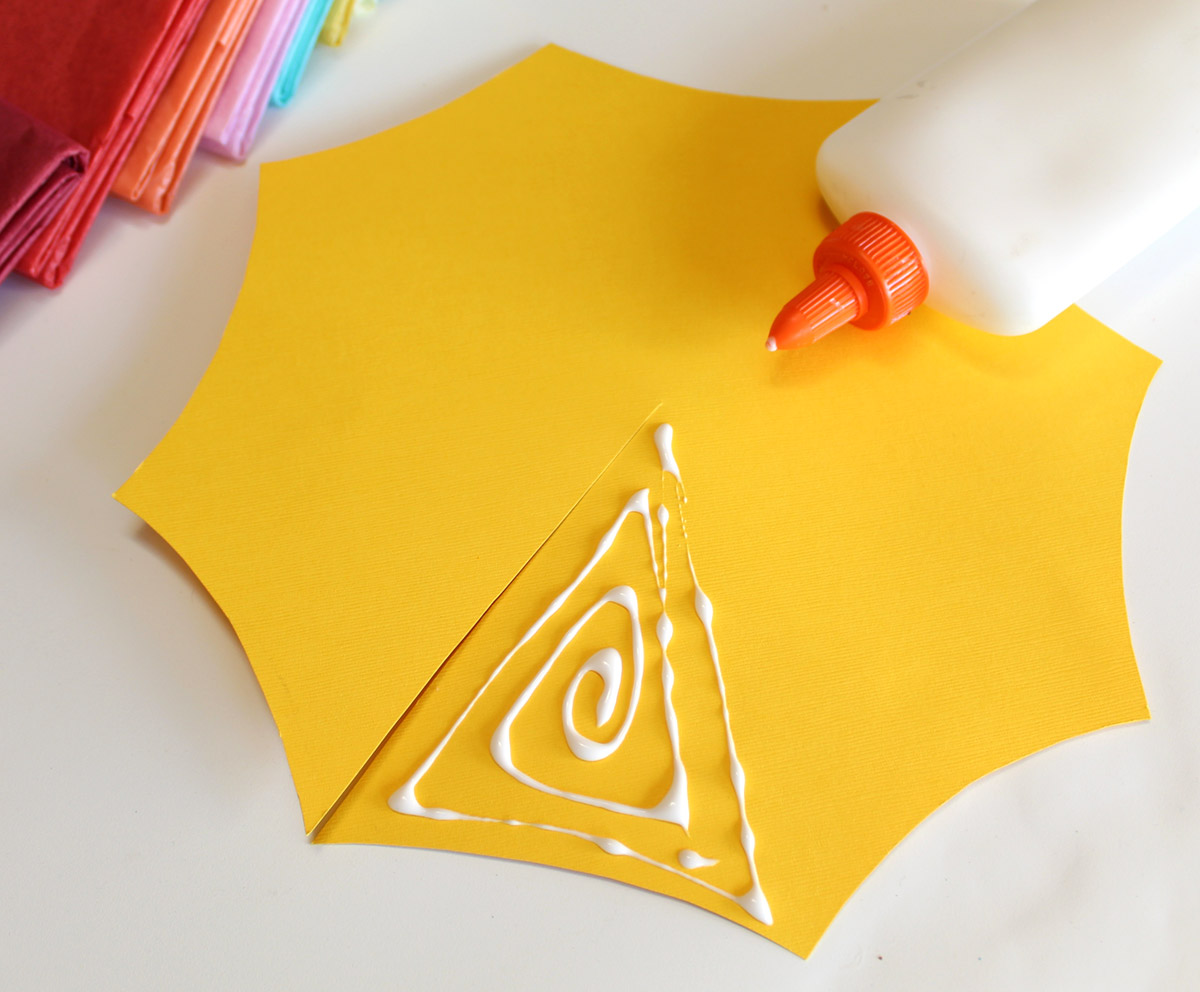
Step 4. Roll your umbrella into a cone shape and hold the glued edges together until they’re dry enough to stick. If you have any uneven edges sticking out, you can trim them.

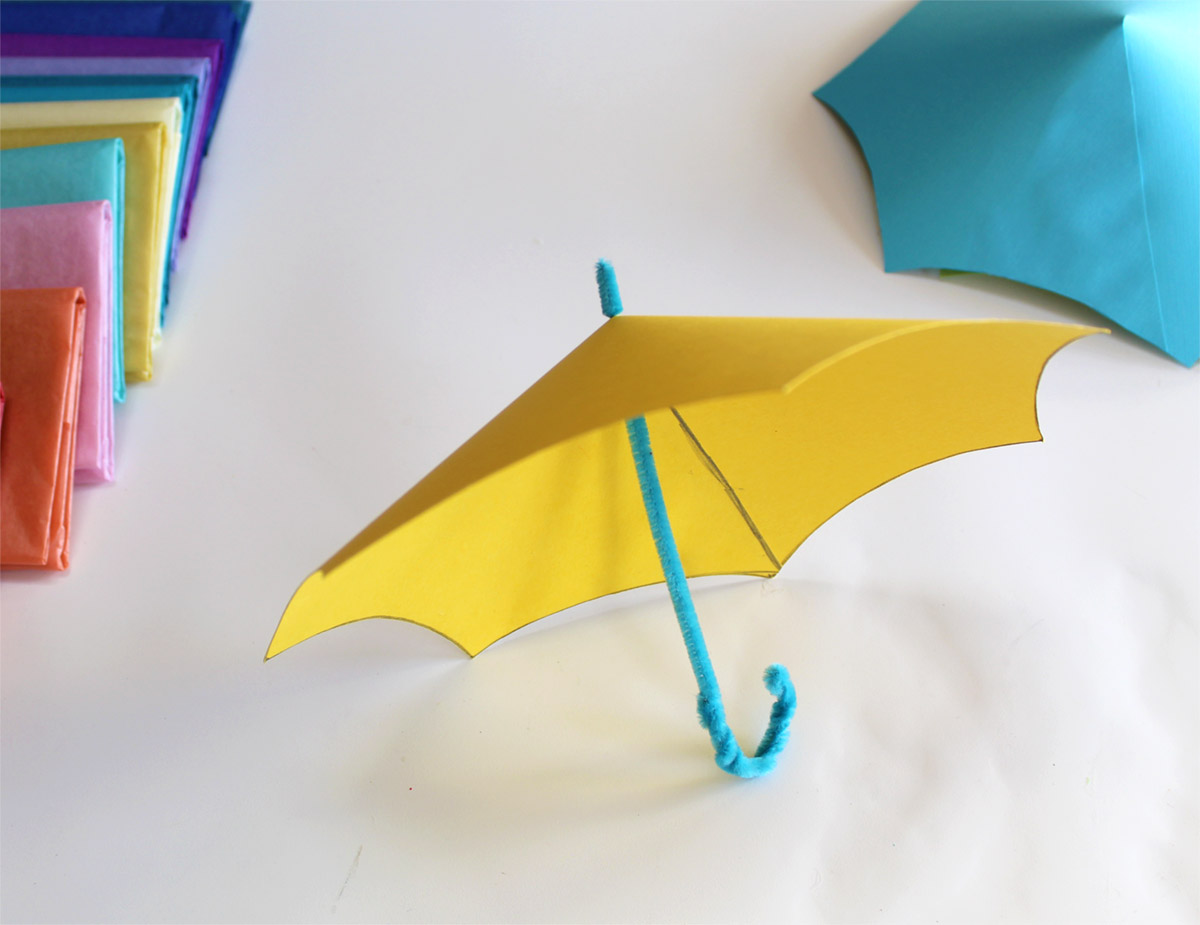
Step 5. Poke a pipe cleaner through the centre of the cone. Fold down the piece poking out the top so that it is at double thickness; this will keep your umbrella from coming apart, and will also create a loop that you can use to hang it up at the end. Fold a section at the very bottom to double thickness, twist it a bit, and shape it into an umbrella handle.
Step 6. We’re going to learn how to make two different types of tissue paper flowers. For both, you’ll need to cut out lots of tissue paper circles (like the umbrella shape, you don’t need to worry about making them perfect).
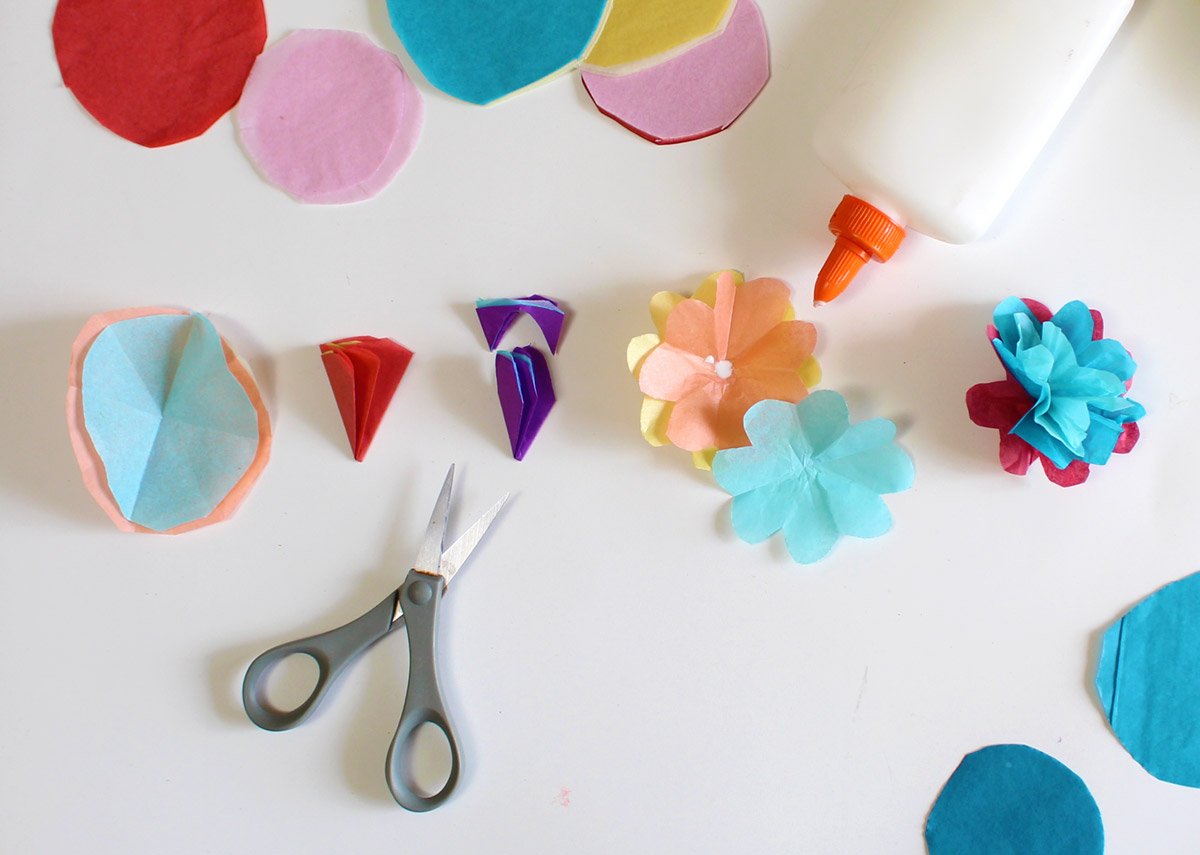
Step 7. Flower Number 1: Stack three circles together. Fold them in half, then fold in half again, then fold in half a third time; you’ll now have a small triangle. Cut the top of the triangle into a curved petal shape, then unfold. Place a dab of glue in the centre of the first flower shape, then place the second flower shape on top of it; repeat to add the third flower shape. When the glue has dried, scrunch up the layers of tissue paper one by one and twist the centre at the bottom to form the flower.
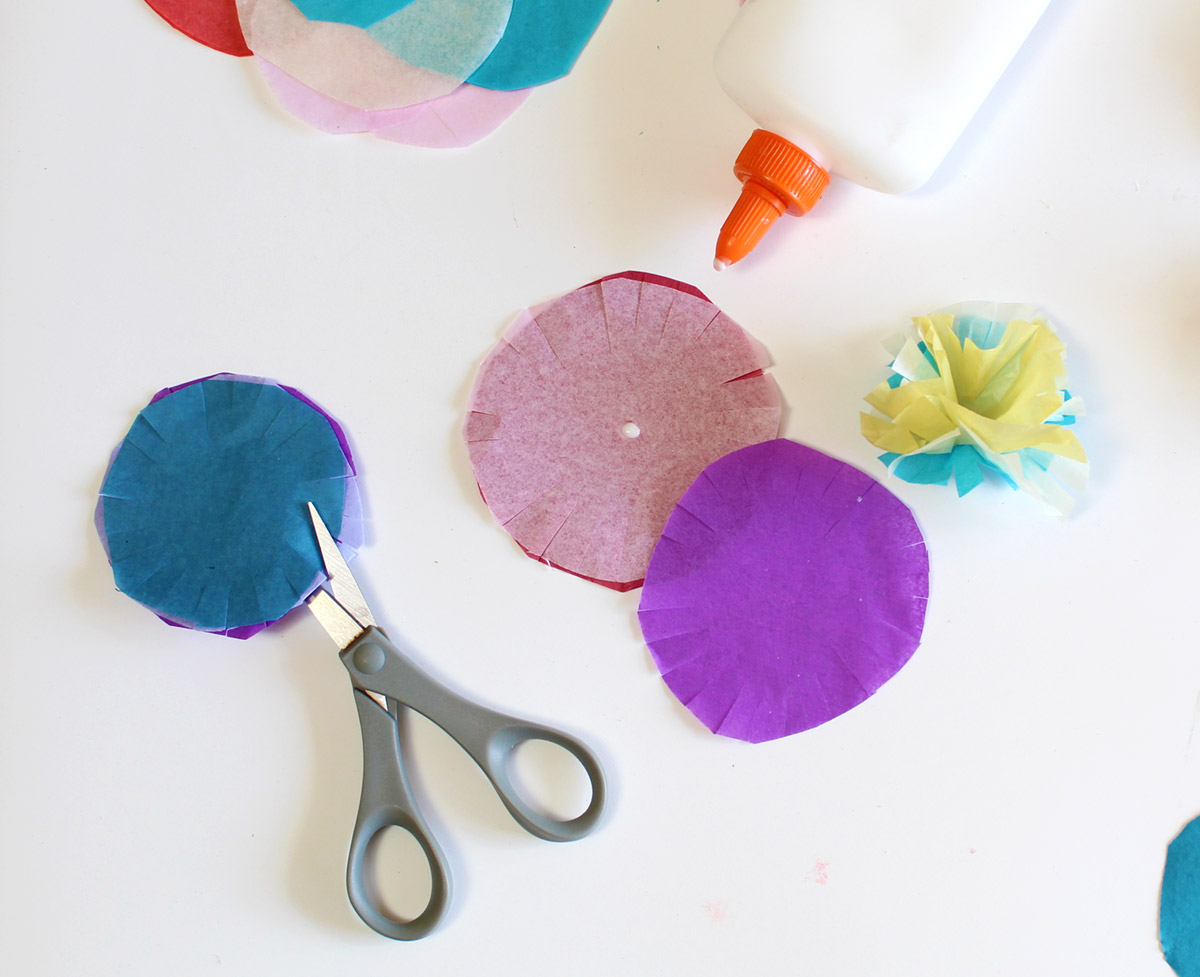
Step 8. Flower Number 2: Stack three tissue paper circles together. Cut a fringe all around the edge, then glue together in the centre the same way you did for Flower Number 1. When dry, scrunch up the layers of tissue paper one by one and twist the centre at the bottom of the flower.
Step 9. Glue the flowers to the top of your umbrella. You’re done! Hang them up to catch the sun.
Tune into Caitie’s Classroom on Tuesday at 11:00am EST Live on the Super Simple Songs YouTube Channel to learn more about the rain!
Don’t forget to follow us on Twitter, Instagram, Pinterest, and Facebook!
Original content © 2019 Super Simple. Not to be reprinted without express written permission. Terms of Service.