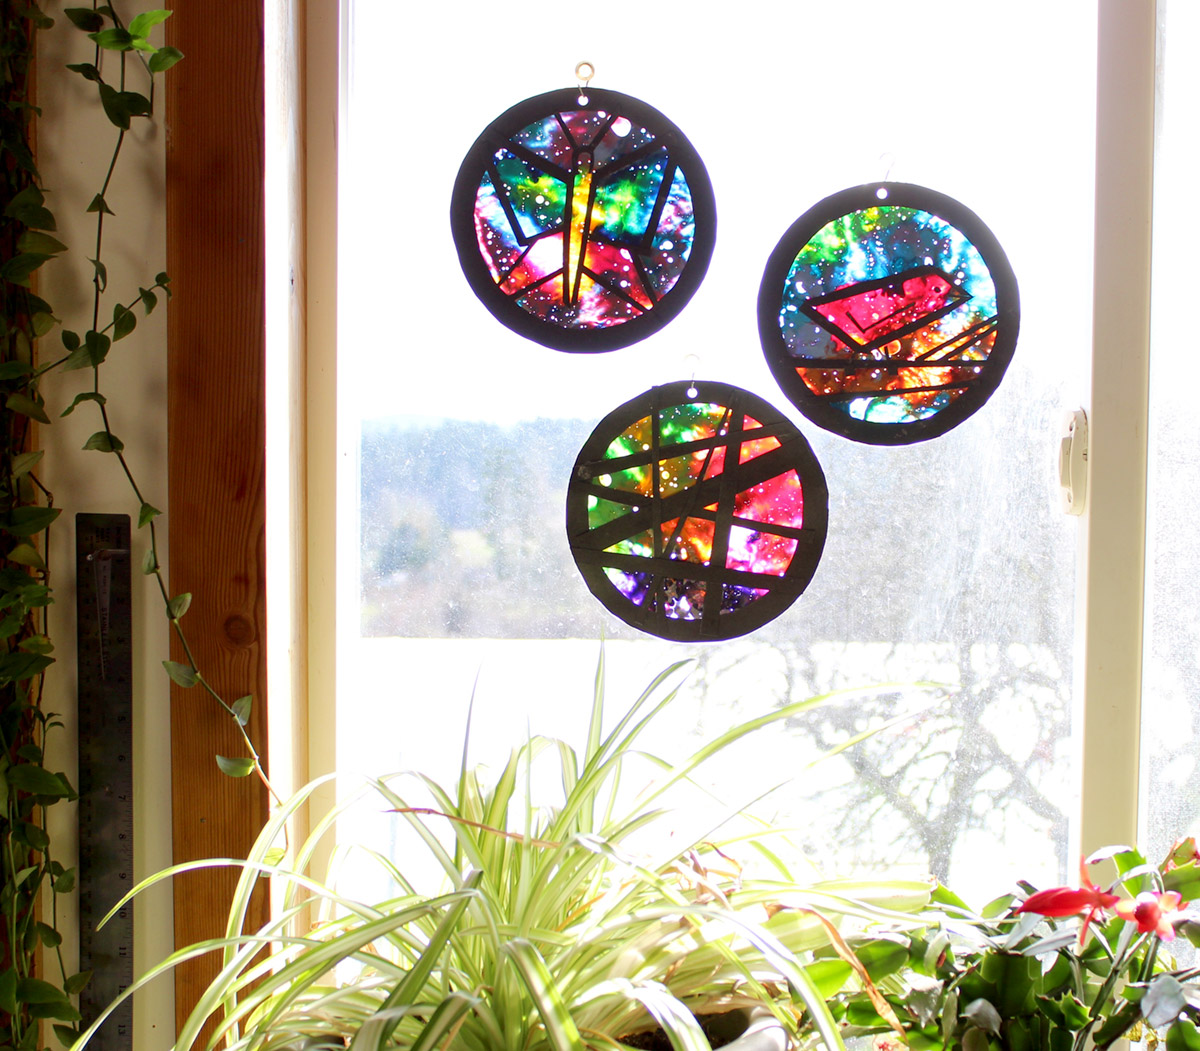
Summer is around the corner! The days are longer and lighter as we approach the summer solstice, the longest day of the year. Here’s a craft to help you catch those lovely sunbeams.
There are a few steps to this project, but all of them are fun and simple. We’re going to make wax crayon shavings and melt them with an iron between two sheets of waxed paper, and then frame our suncatcher with black cardstock to create a beautiful stained glass effect. For a more challenging craft, you can plan out a picture first; for an easy one, you can just use long strips of cardstock to make geometric shapes. The result of melting the crayons is vibrant, colorful, and full of interesting textures when the light shines through.

Materials:
- Black card stock
- Waxed paper
- Crayons
- 2 plates for tracing, one a little smaller than the other
- A pencil
- Scissors
- White glue
- A pencil or crayon sharpener
- An iron
- A hole punch
- A suction cup window hanger
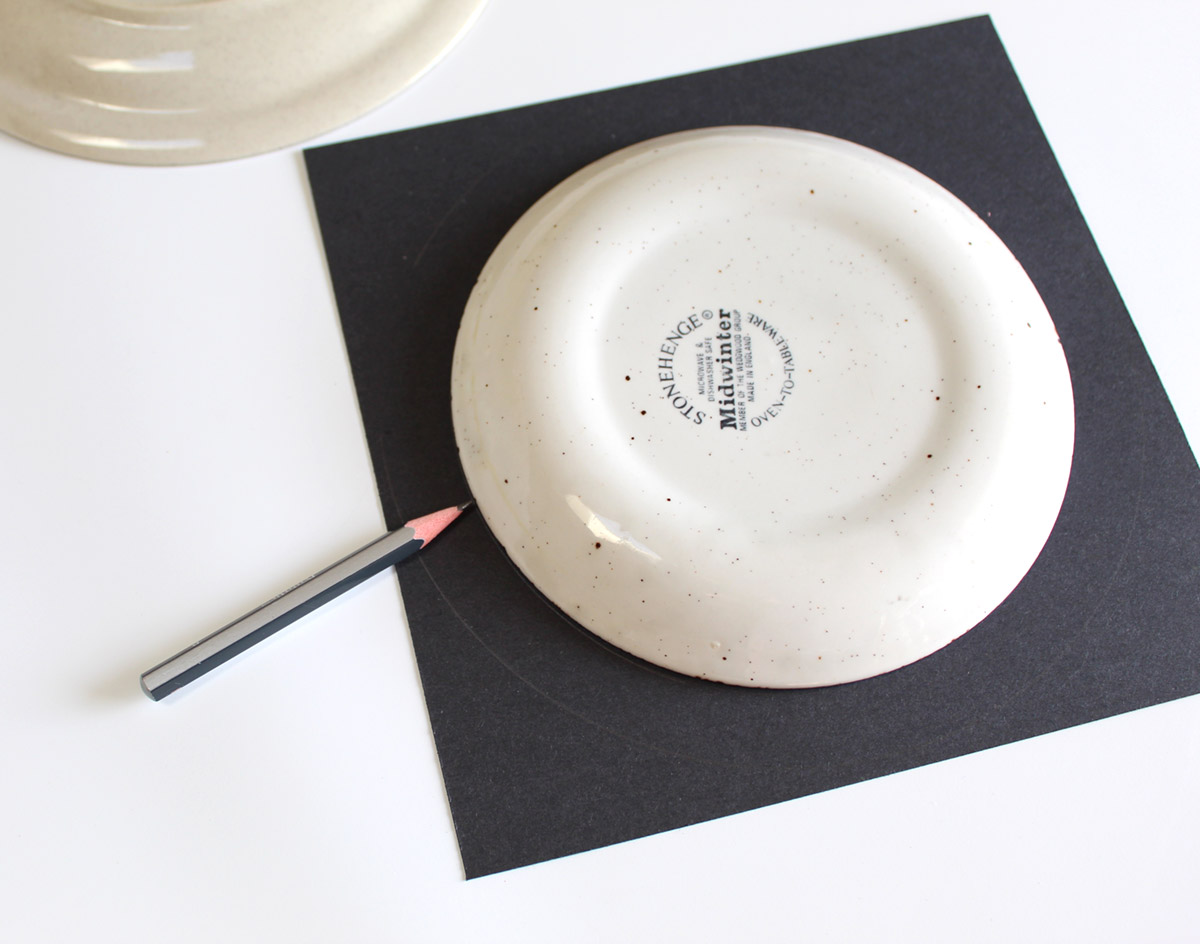 Step 1. Place the larger plate face-down on the card stock and trace around the edge with a pencil. Position the smaller plate in the middle of the circle you’ve drawn and trace around its edge.
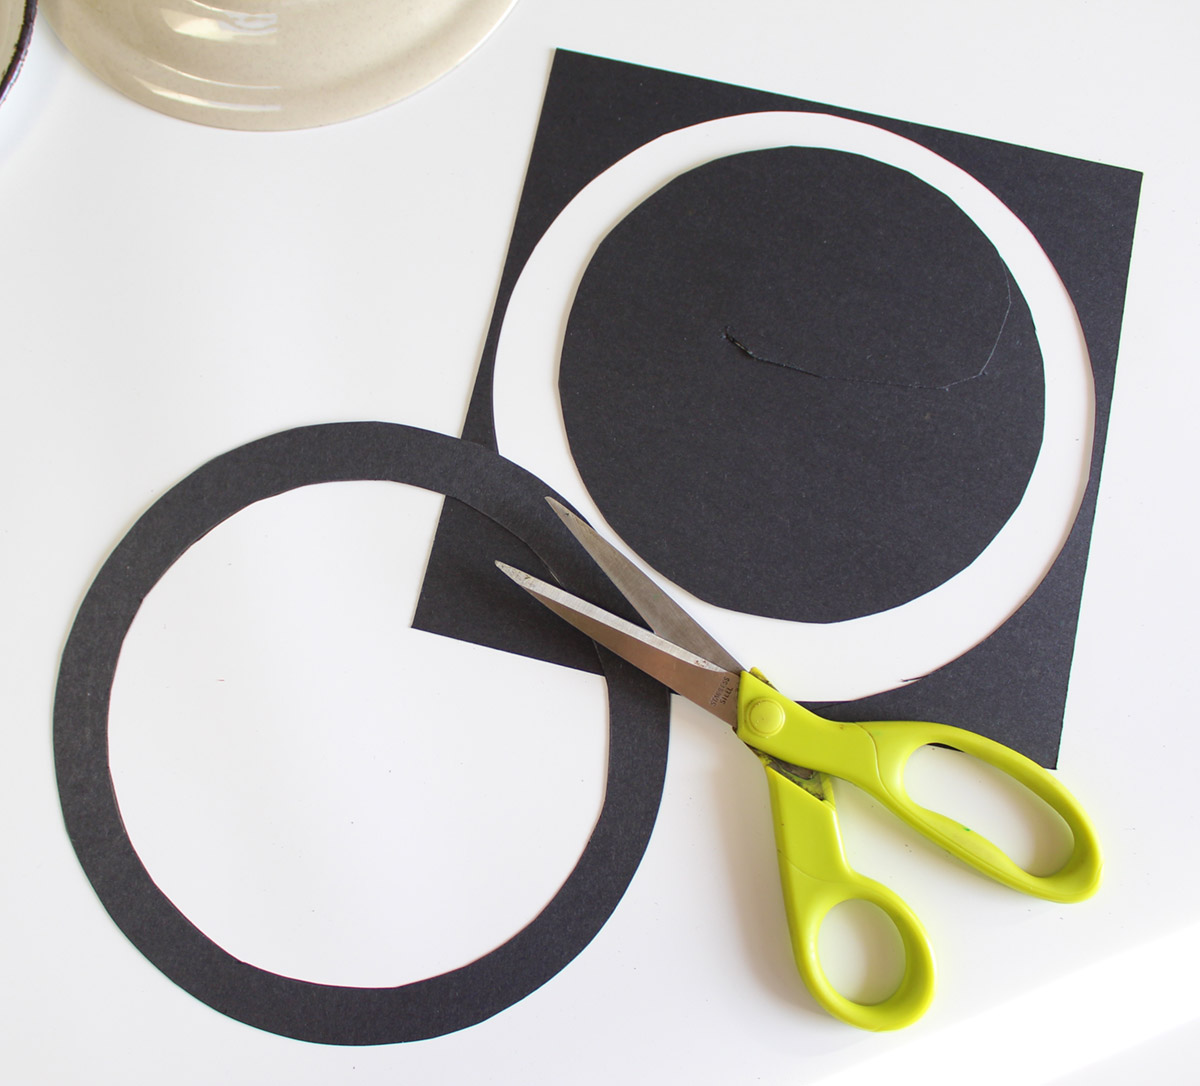 Step 2. Cut along both pencil lines to create the outer ring of your suncatcher.
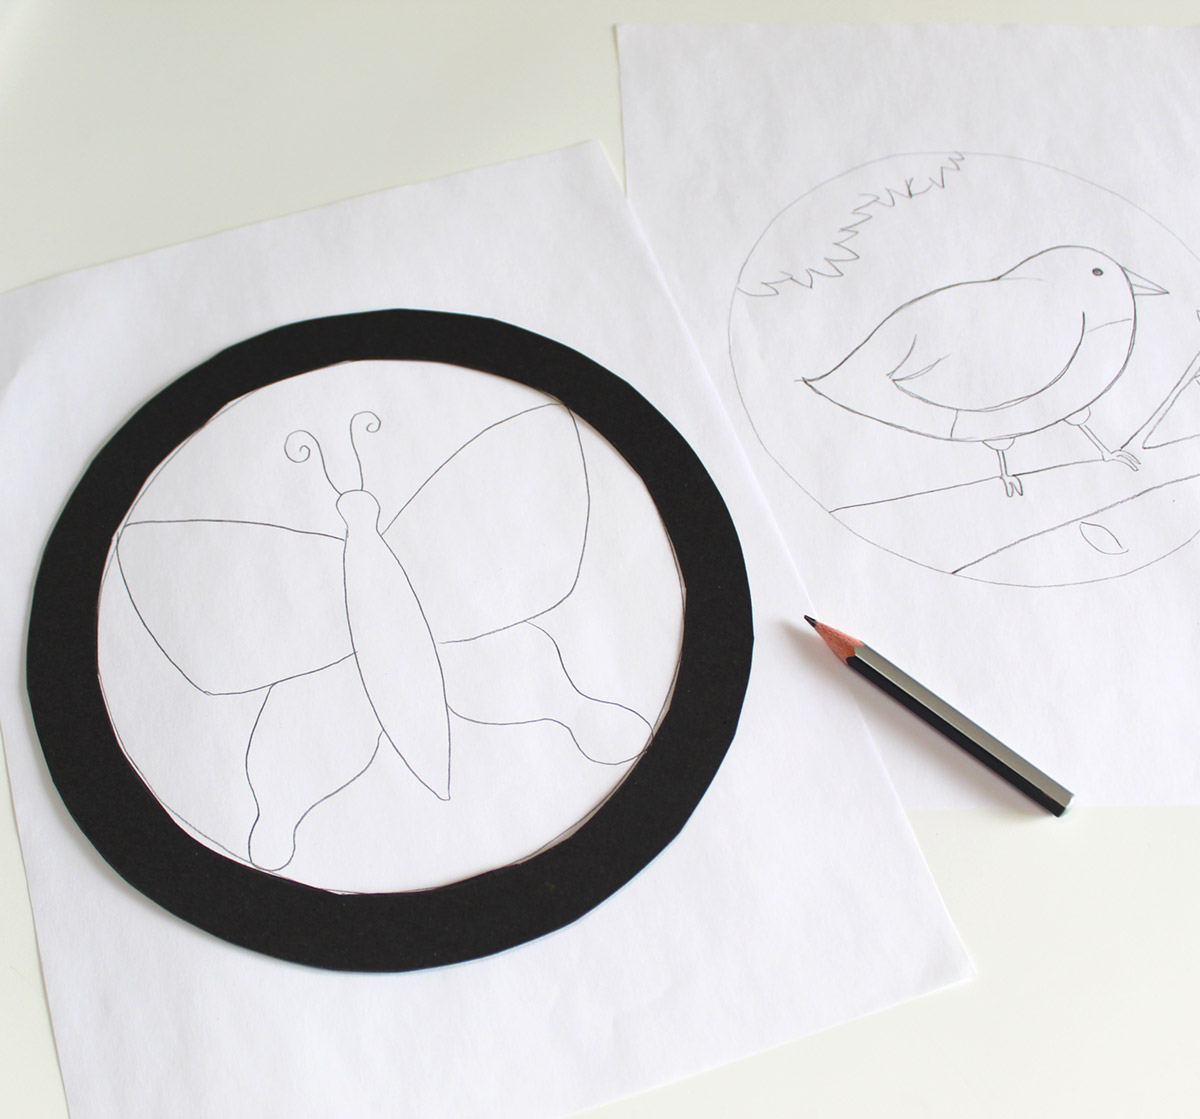 Step 3. Optional: To plan out your suncatcher, you can trace the inside of the ring onto a sheet of plain white paper and draw inside of it. Try to stick with large, general shapes and steer away from smaller details.
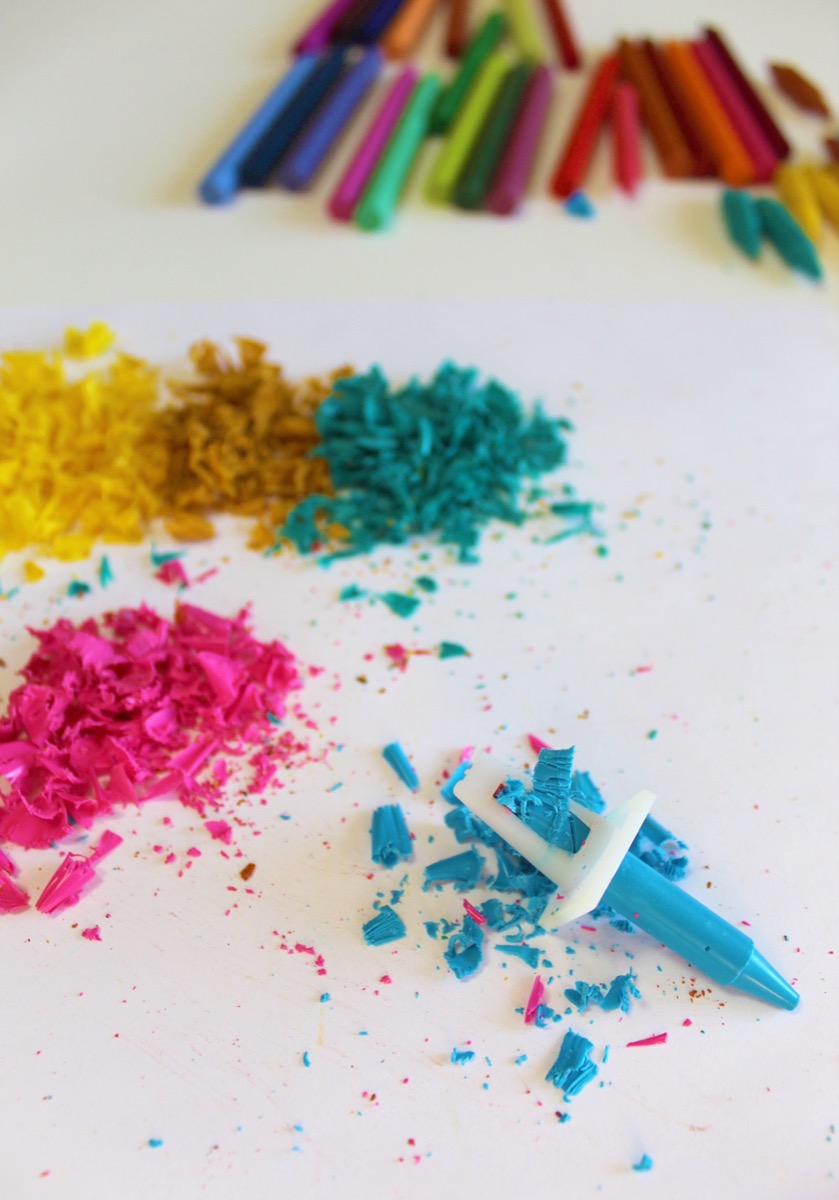 Step 4. Peel the paper away from the crayons. Use the sharpener to create crayon shavings.
Step 5. For each suncatcher, cut two sheets of waxed paper a little larger than the cardstock ring.
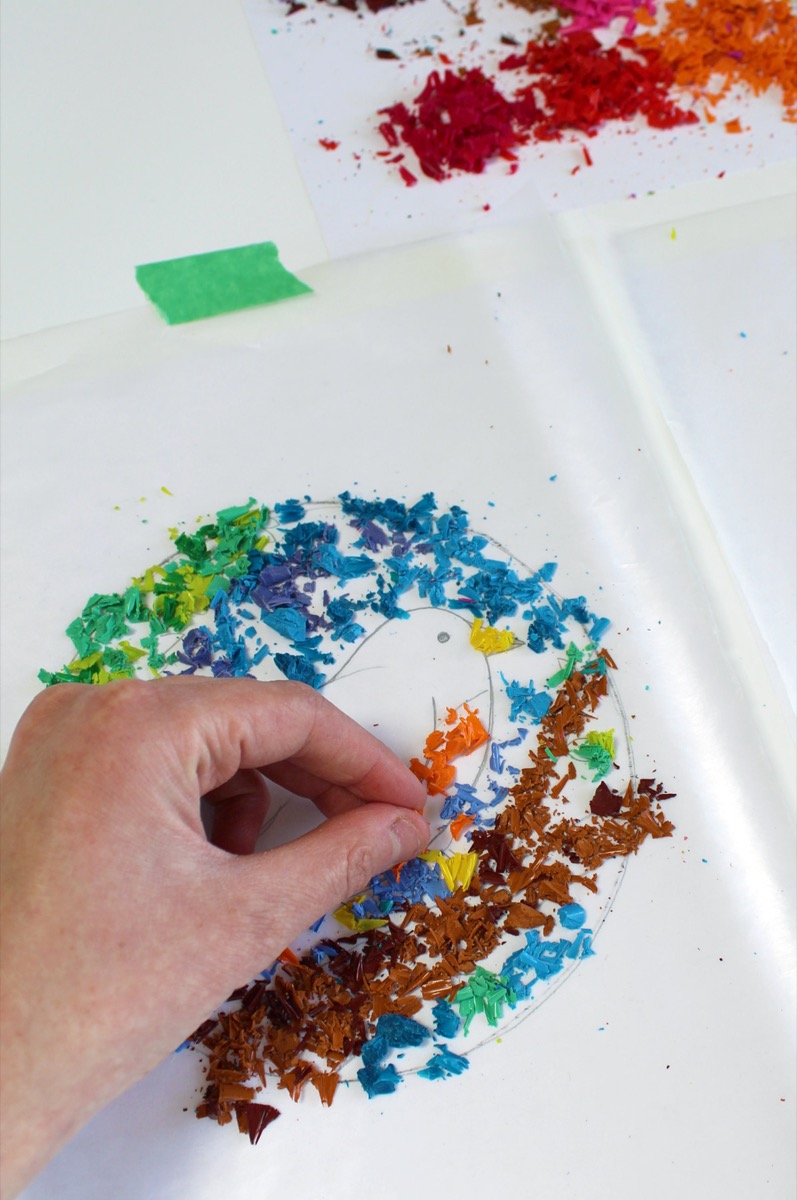 Step 6. If you’ve planned out your suncatcher on paper, tape a sheet of waxed paper over your drawing and arrange a layer of crayon shavings over top of it. Otherwise, simply place the shavings onto a sheet of waxed paper (you can trace the inside of the card stock ring onto the waxed paper in pencil first to give yourself a guideline). Keep the layer of shavings thin; you want the sun to find its way through your suncatcher.
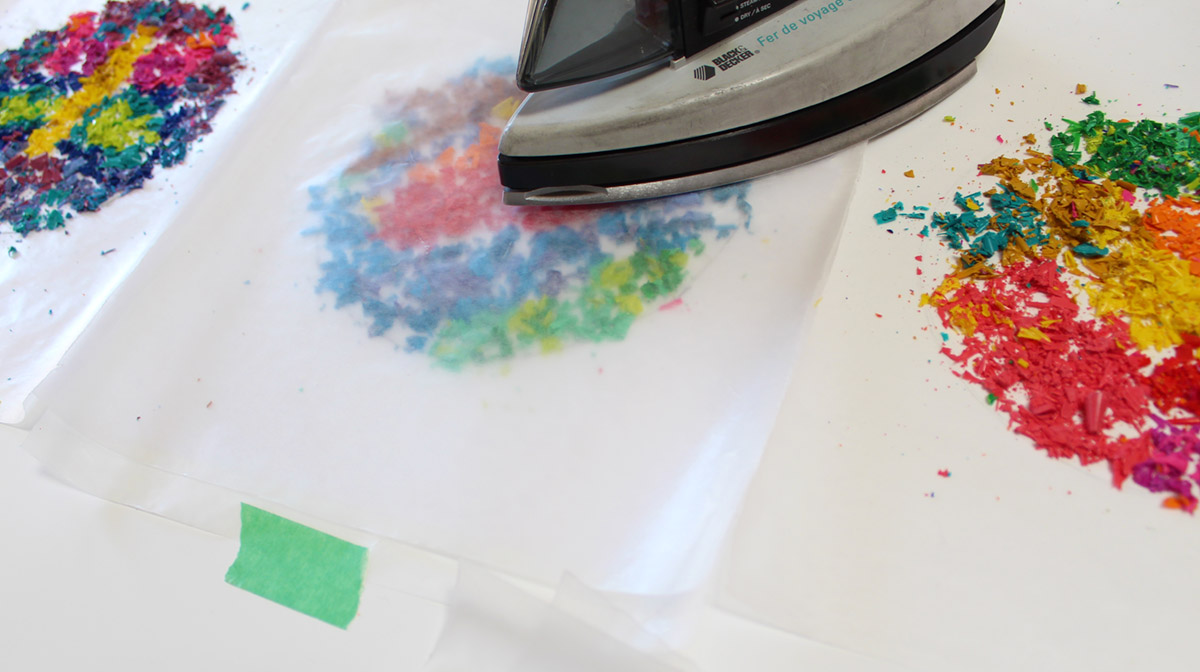 Step 7. You’ll want a set of grown-up hands for this step! Heat the iron on a low setting. Place the second sheet of waxed paper on top of the shavings and run the iron over top. The crayons will melt very easily; iron them quickly so that the colors don’t blend together too much.
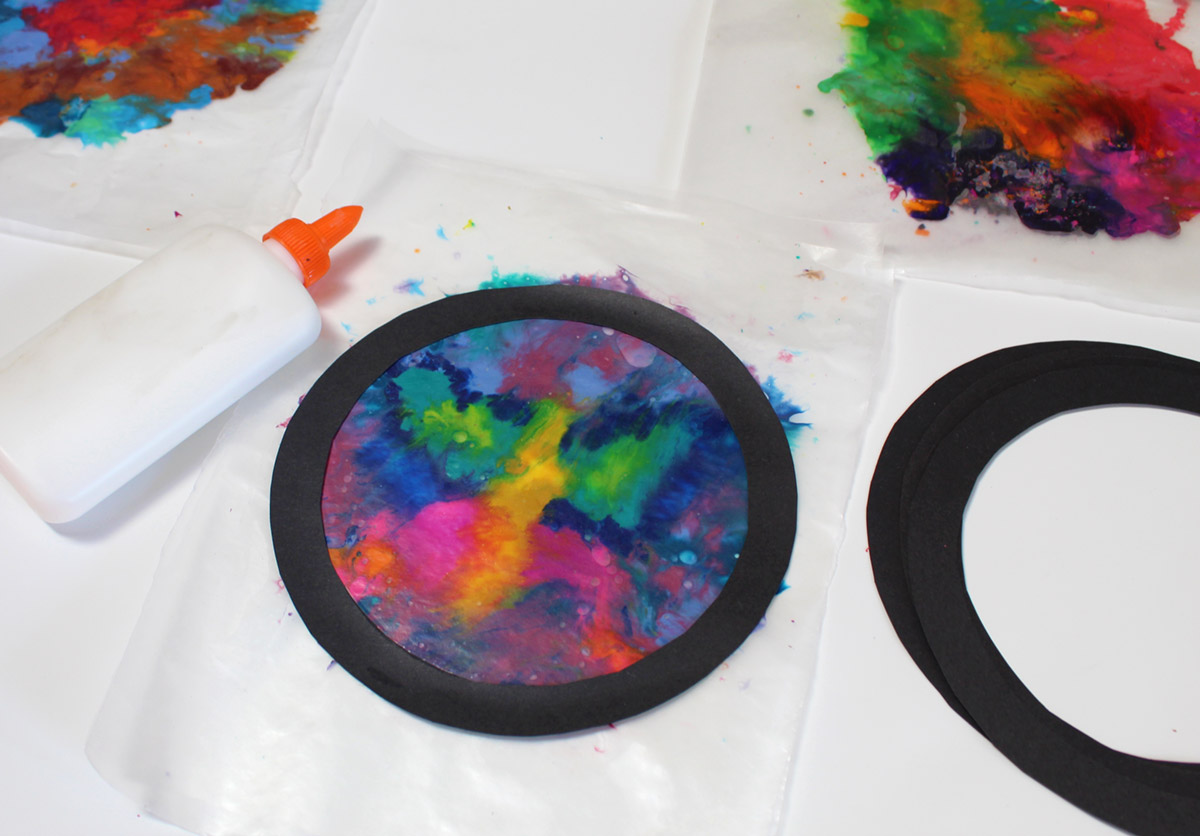 Step 8. Once the melted crayons have cooled and hardened, glue down the black ring. Trim the waxed paper around the edges.
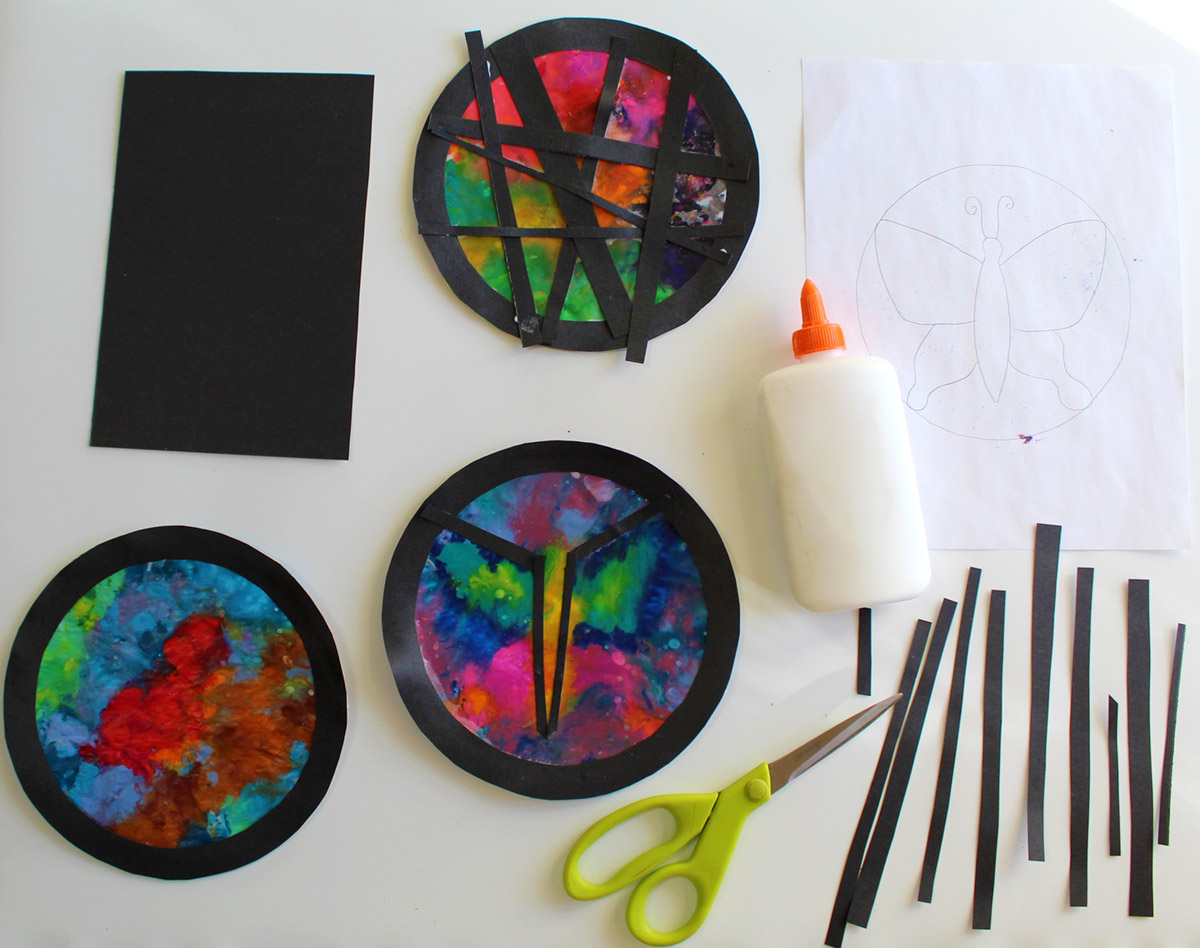
Step 9. Cut strips of black cardstock in varying widths and lengths. Glue them onto your suncatcher to create a stained glass effect. If you made a pencil drawing first, you can use it for reference.
Step 10. Punch a hole at the top of your suncatcher. Hang it in a window and wait for a sunny day!
Don’t forget to follow us on Twitter, Instagram, Pinterest, and Facebook!
 Contributor
Sara Williamson is an illustrator, designer, and content creator based in Victoria, British Columbia. She illustrates posters, articles, album covers, and in 2016 published her first children’s book, Holey Moley, written by Sam Chilton. She lives on an organic vegetable farm with a one-eyed chicken named Gatsby.
Original content © 2020 Super Simple. Not to be reprinted without express written permission. Terms of Service.