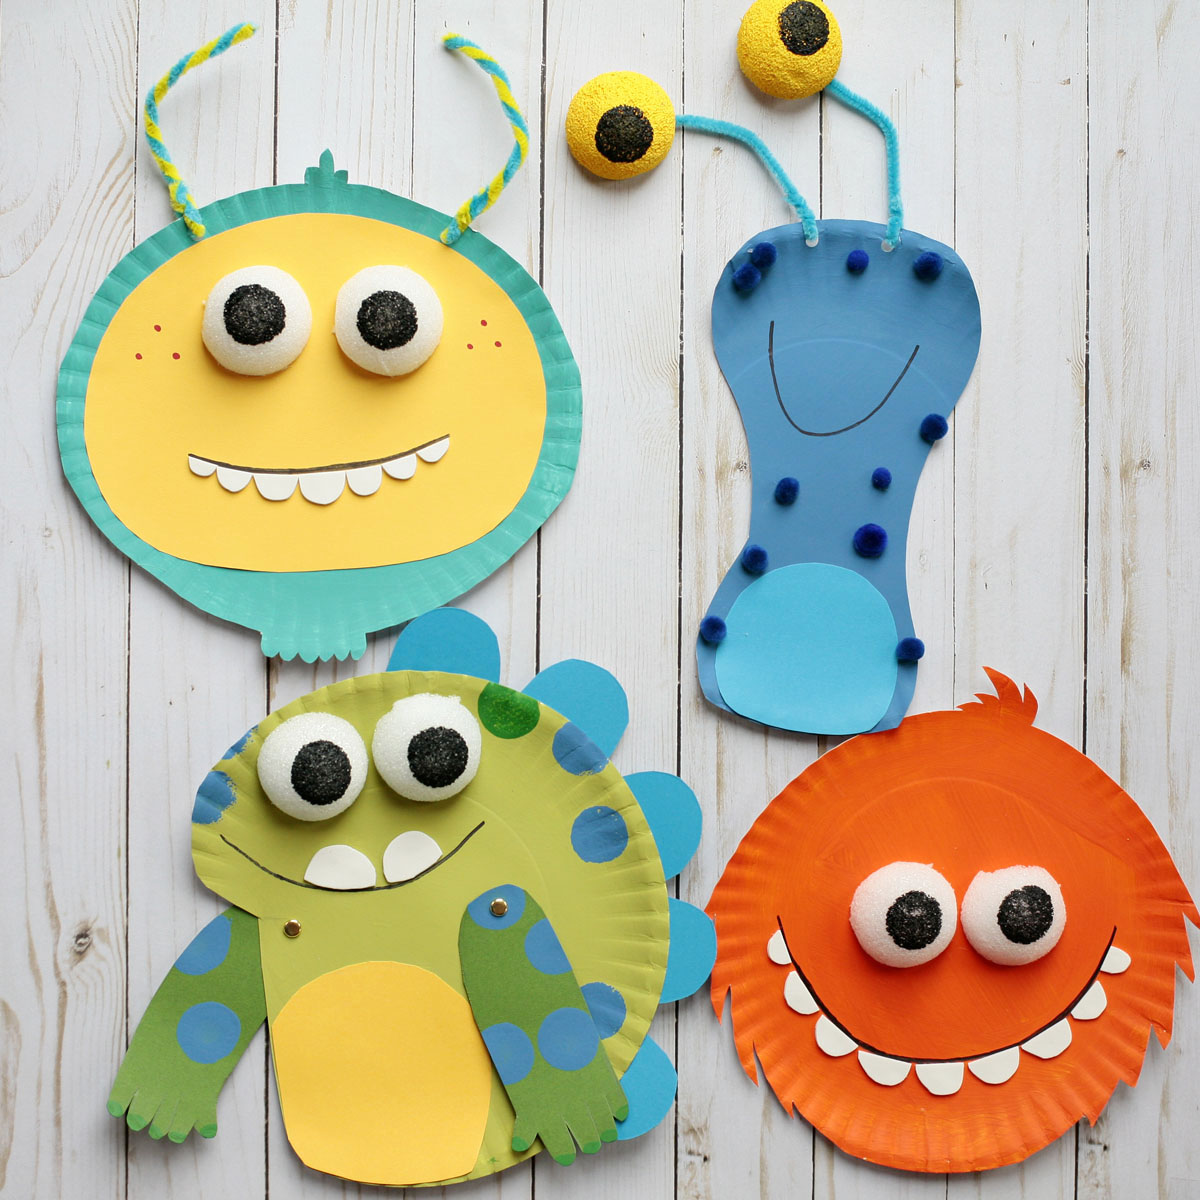
If you’re looking for a fun craft that will have the kids work with various materials and textures, our paper plate monsters are a perfect fit. Little ones will craft with a large variety of supplies, from cardstock paper and pom poms to pipe cleaners and styrofoam ornaments. They will also paint, cut and glue to help bring these colorful monsters to life.
Start by painting the paper plates. You can paint them all at once or create the monsters one by one. Once the paint has completely dried, use a pencil to trace the monster’s shape onto the paper plates and cut them.
The Blue Aqua Monster
Supplies:
- Paper plate
- Blue aqua and black paint
- Paintbrush and round paint sponge
- Styrofoam ball ornament
- Red and black markers
- White and yellow cardstock paper
- Blue and yellow pipe cleaners
- Hole punch
- Pencil
- Scissors
- Glue
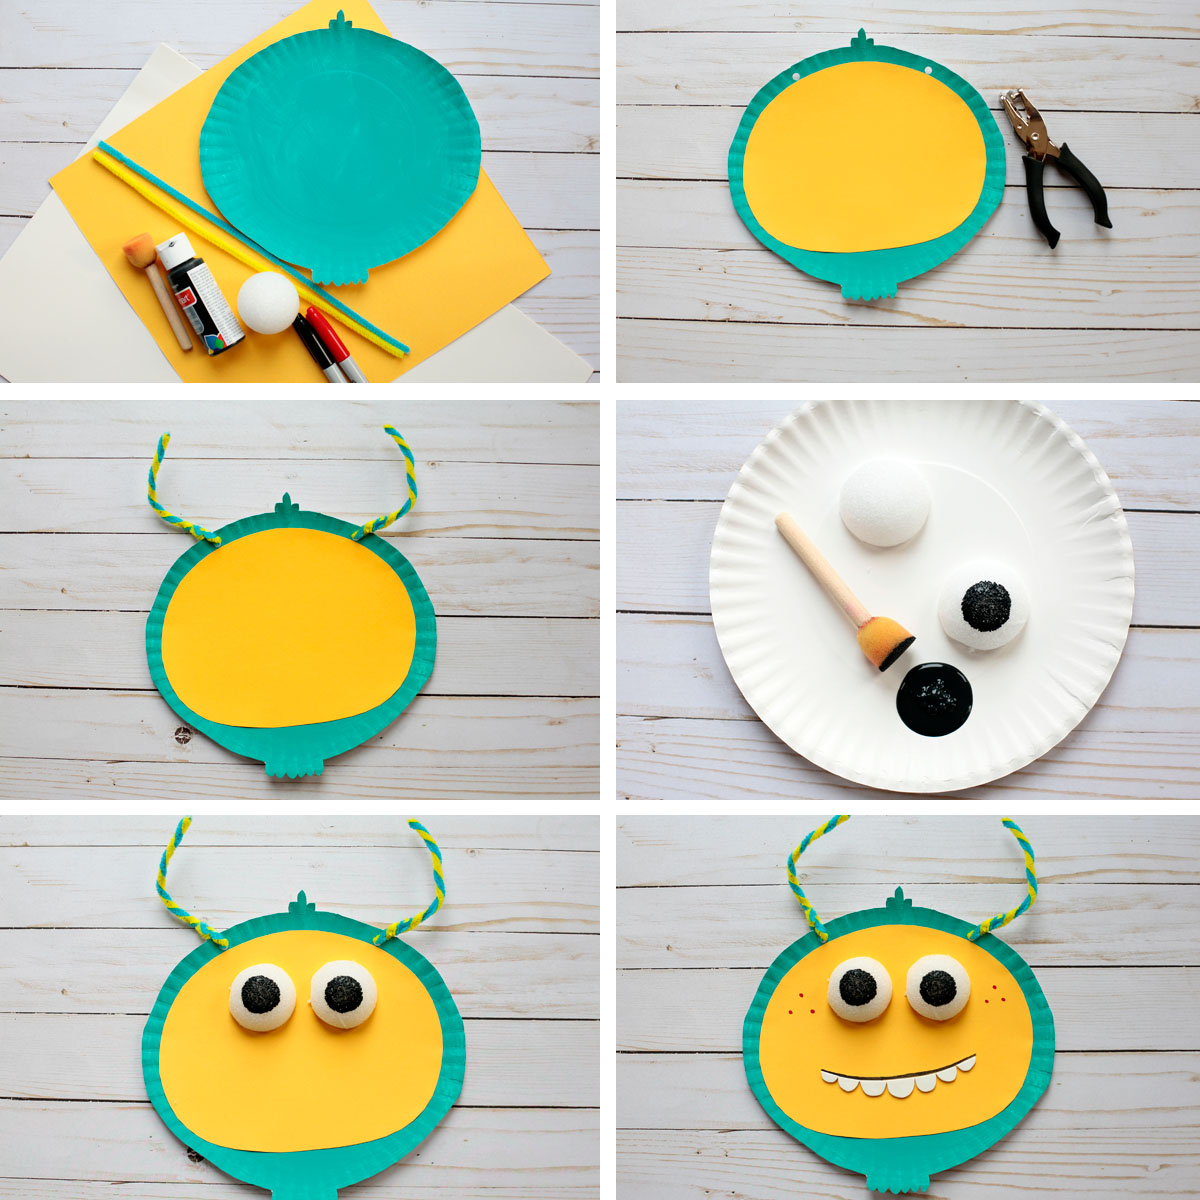
Use a pencil to trace an oval shape on a yellow cardstock paper and cut it out. To make sure it is the right size, you can start by tracing first the paper plate onto the cardstock paper, afterward go ahead with the oval.
Punch two holes at the top of the paper plate. Twist the yellow and blue pipe cleaners together and cut them in half. Thread each half pipe cleaner through one of the holes and secure them in place.
Cut a styrofoam ornament in half –adult only step- (tip: Don’t apply too much pressure as you may end up crushing the ornament). Paint the eyeballs with the help of a round paint sponge. Glue the eyes on the paper plate.
Trace the monster’s mouth with a black marker and use a red marker for his freckles. Cut out his teeth from white cardstock paper and glue them right under the black line.
The Orange Monster
Supplies:
- Paper plate
- Orange and black paint
- Paintbrush and round paint sponge
- Styrofoam ball ornament
- Black marker
- White cardstock paper or foam
- Glue
- Scissors
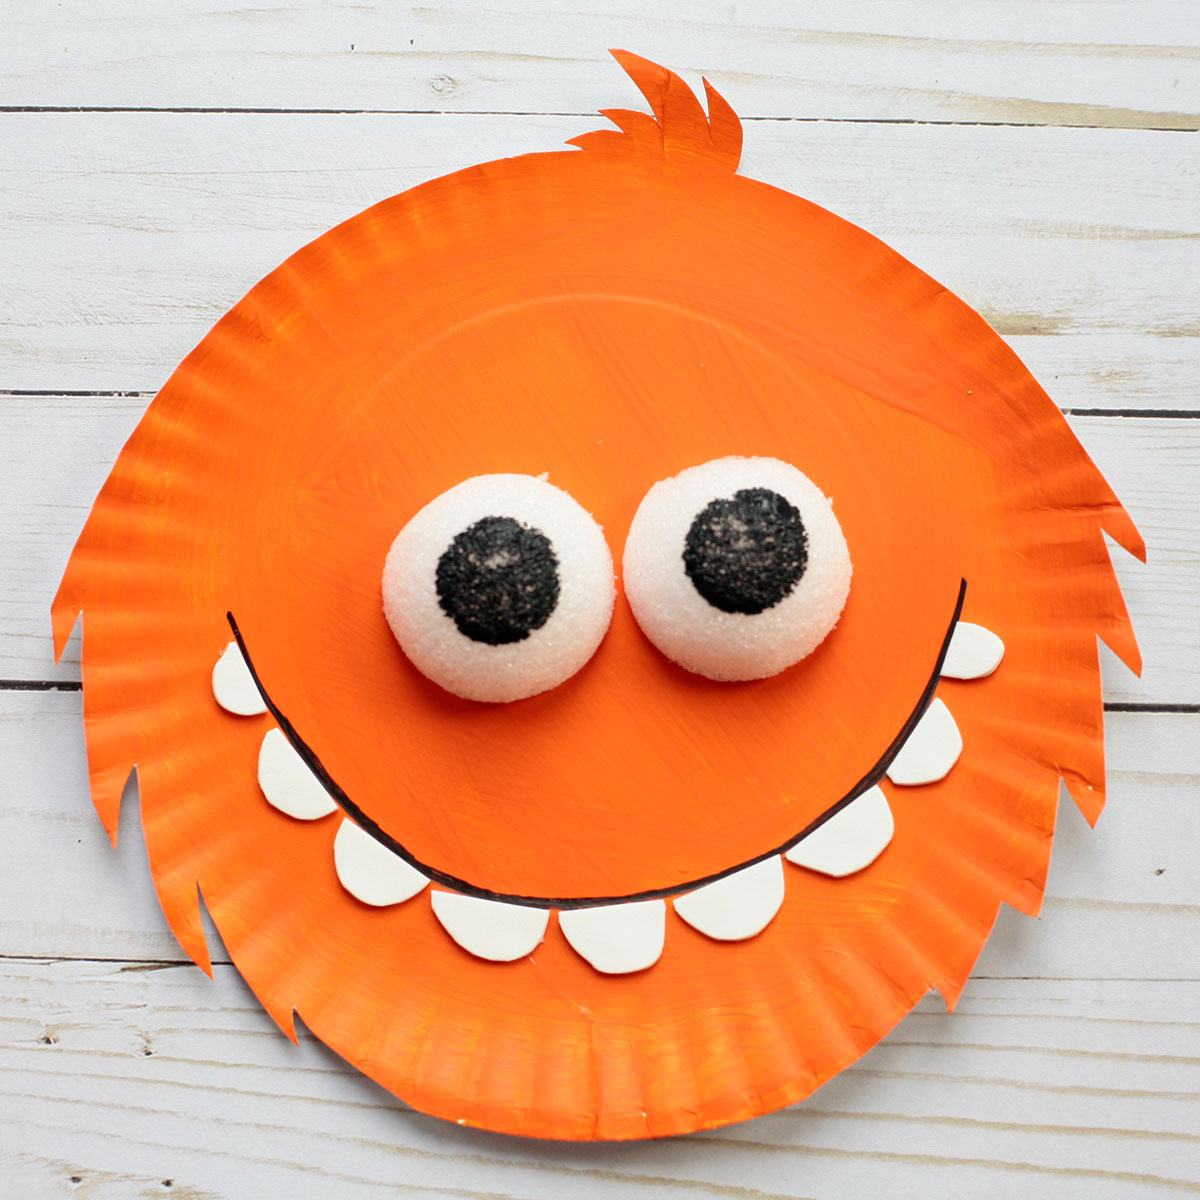
Cut a styrofoam ornament in half –adult only step- (tip: Don’t apply too much pressure as you may end up crushing the ornament). Create the eyeballs with just a little black paint and a round paint brush. Glue the eyes in the middle of the paper plate.
Use a black marker to draw a big mouth at the bottom of the paper plate and glue underneath white teeth, cut from cardstock paper.
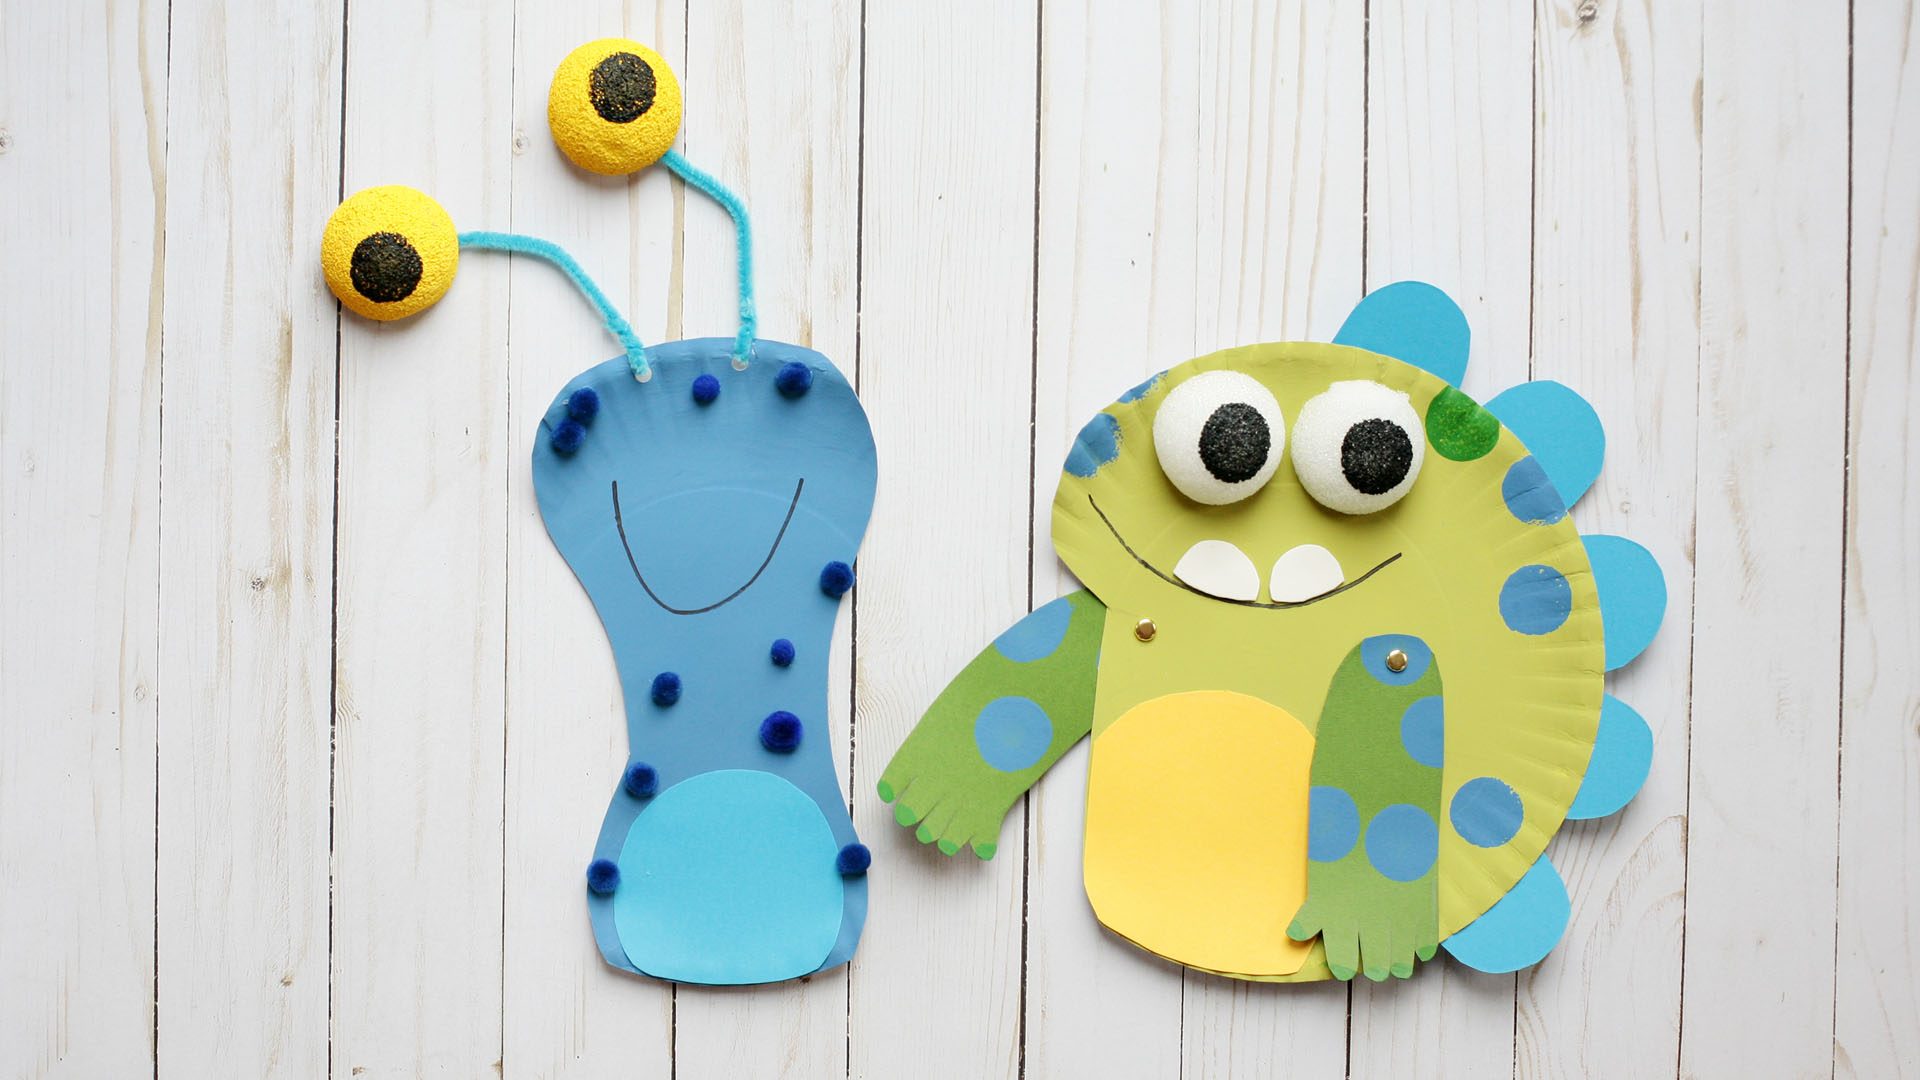
The Blue Monster
Supplies:
- Paper plate
- Blue, yellow and black paint
- Paintbrush and round paint sponge
- Styrofoam ball ornament
- Black marker
- Blue pom poms
- Blue pipe cleaner
- Glue
- Scissors
- Light blue cardstock paper
- Hole punch
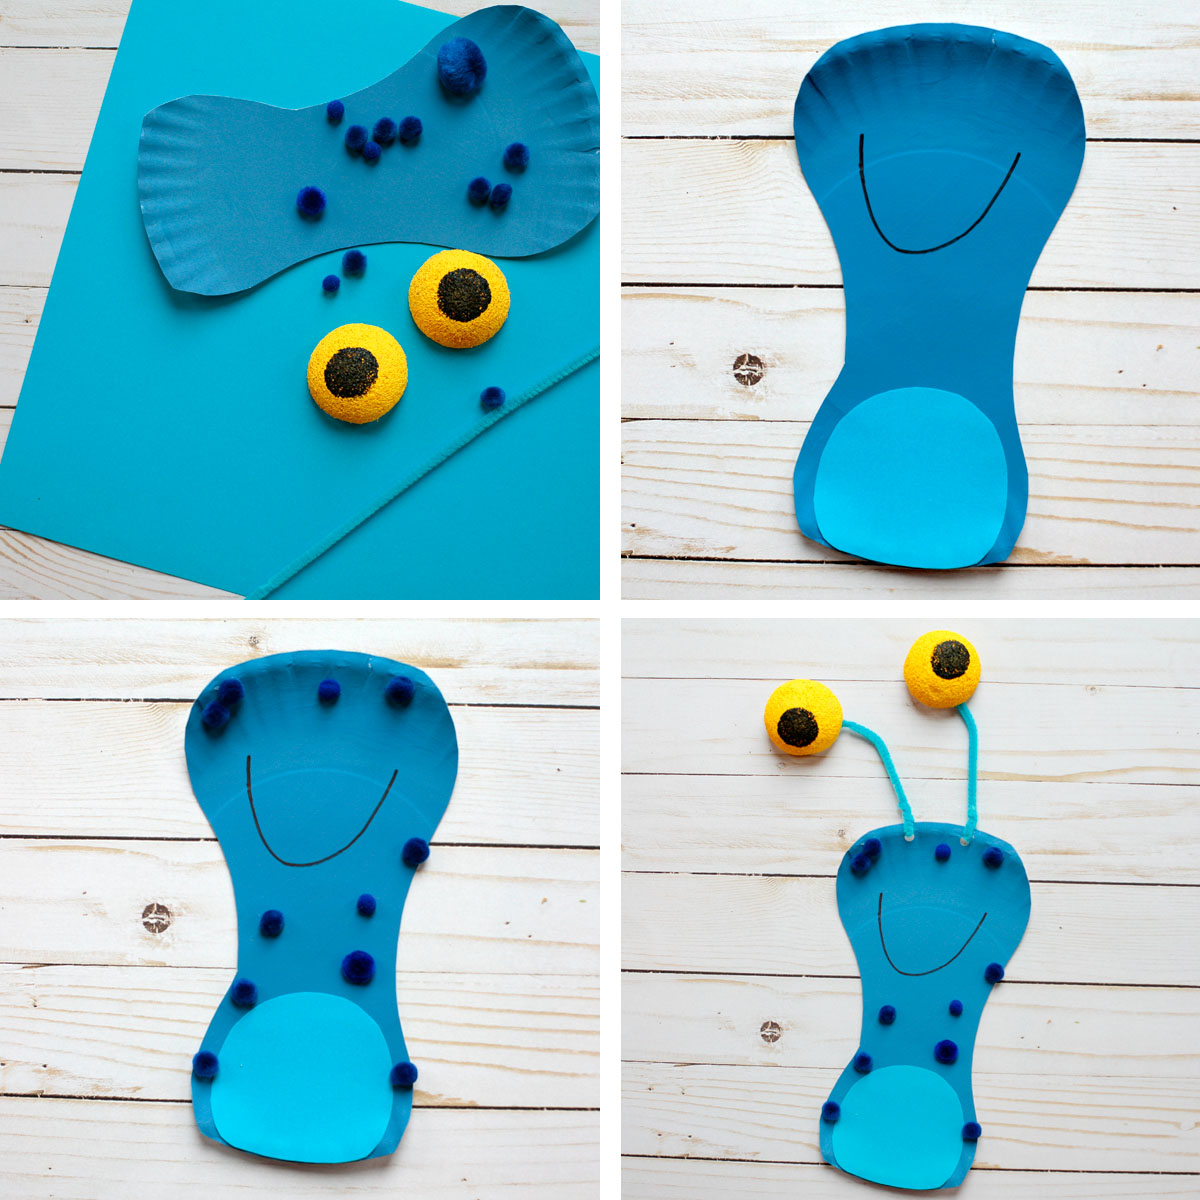
Use a pencil to trace a small oval shape on a light blue cardstock paper and cut it out. To make sure it is the right size, you can start by tracing first the paper plate on the cardstock paper and afterward go ahead with the oval.
Use a black marker to trace the monster’s smiley mouth. Glue blue pom poms all over his body.
Punch two holes at the top of the paper plate. Cut a blue pipe cleaner in half and thread each half through one of the holes. Secure the pipe cleaner halves in place.
Cut a styrofoam ornament in half –adult only step- (tip: Don’t apply too much pressure as you may end up crushing the ornament). Paint both halves yellow. Once the paint’s dried completely, make the eyeballs with black paint and a round paint sponge. Glue the eyes at the end of the pipe cleaners.
The Green Monster
Supplies:
- Paper plate
- Blue, green and black paint
- Paintbrush and round paint sponge
- Styrofoam ball ornament
- Black marker
- White, green, yellow and blue cardstock paper
- Glue
- Scissors
- 2 brass fasteners
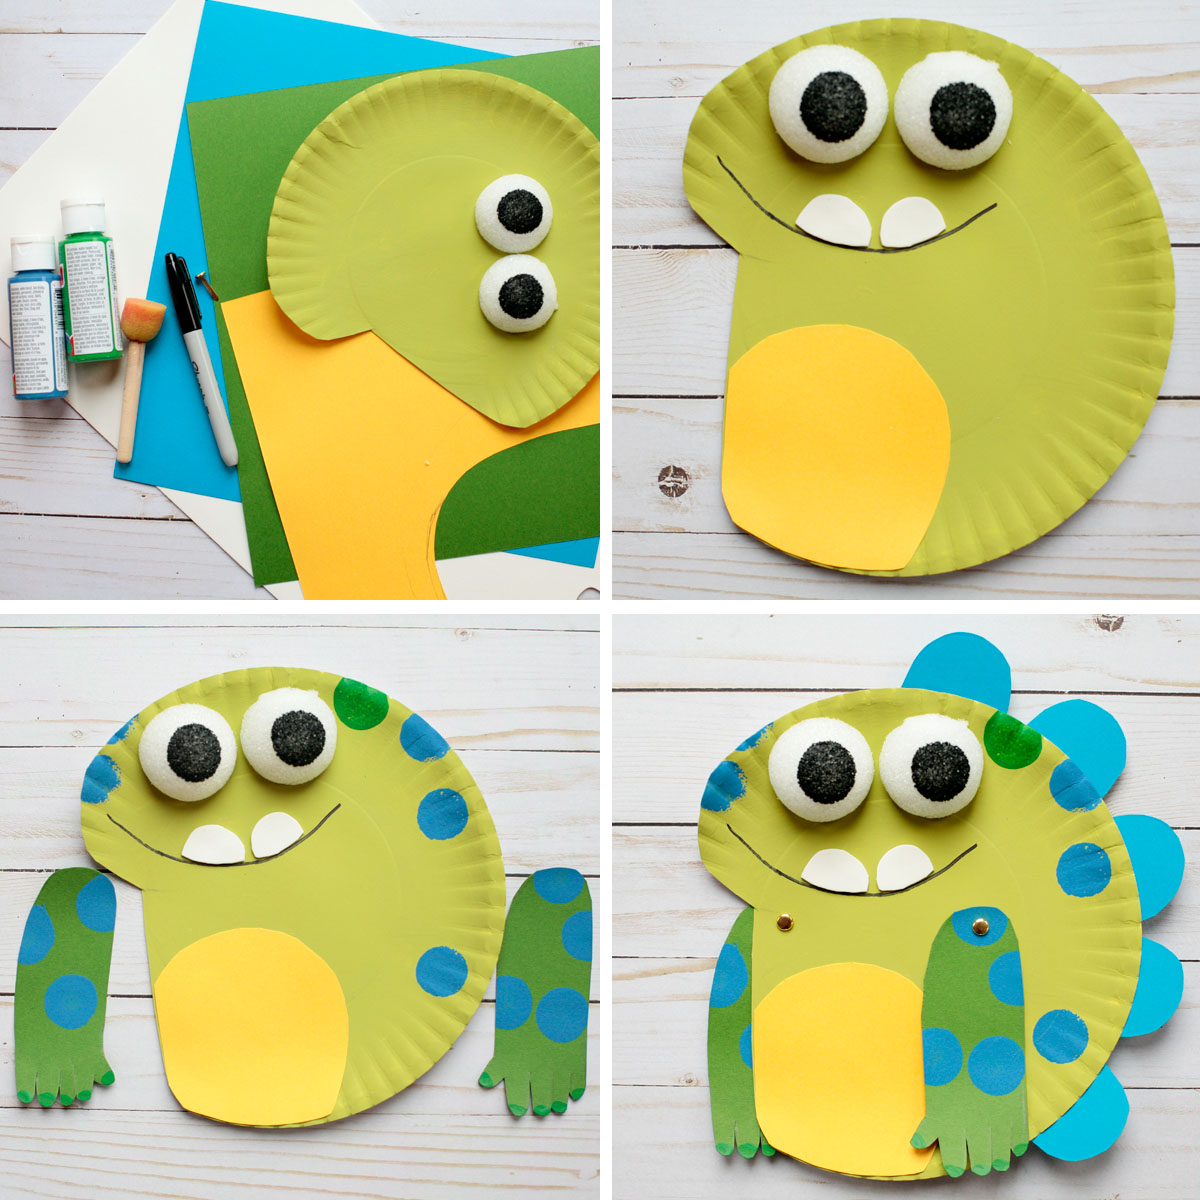
Start by cutting the monster’s yellow belly from cardstock paper and glue it at the bottom of the paper plate.
Use a black marker to trace the mouth and glue two big white cardstock paper teeth above the black line.
Cut a styrofoam ornament in half –adult only step- (tip: Don’t apply too much pressure as you may end up crushing the ornament). Create the eyeballs with just a little black paint and a round paint brush. Glue the eyes right above the mouth.
Trace the monster’s arms on green cardstock paper and cut them out. Use a round paint sponge to make green and blue dots all over the monster’s body and arms. Once the paint has dried, attach the arms to the paper plate with 2 brass fasteners. Kids will have so much fun moving the monster’s arms around.
Cut a few blue scales and glue them to the back of the paper plate.
Don’t forget to follow us on Twitter, Instagram, Pinterest and Facebook!
 Contributor
Stef is the mom of 2 little boys and the blogger behind Non-Toy Gifts. Here she shares fun and simple crafts and activities for young kids.
www.nontoygifts.com
Original content © 2018 Super Simple. Not to be reprinted without express written permission. Terms of Service.