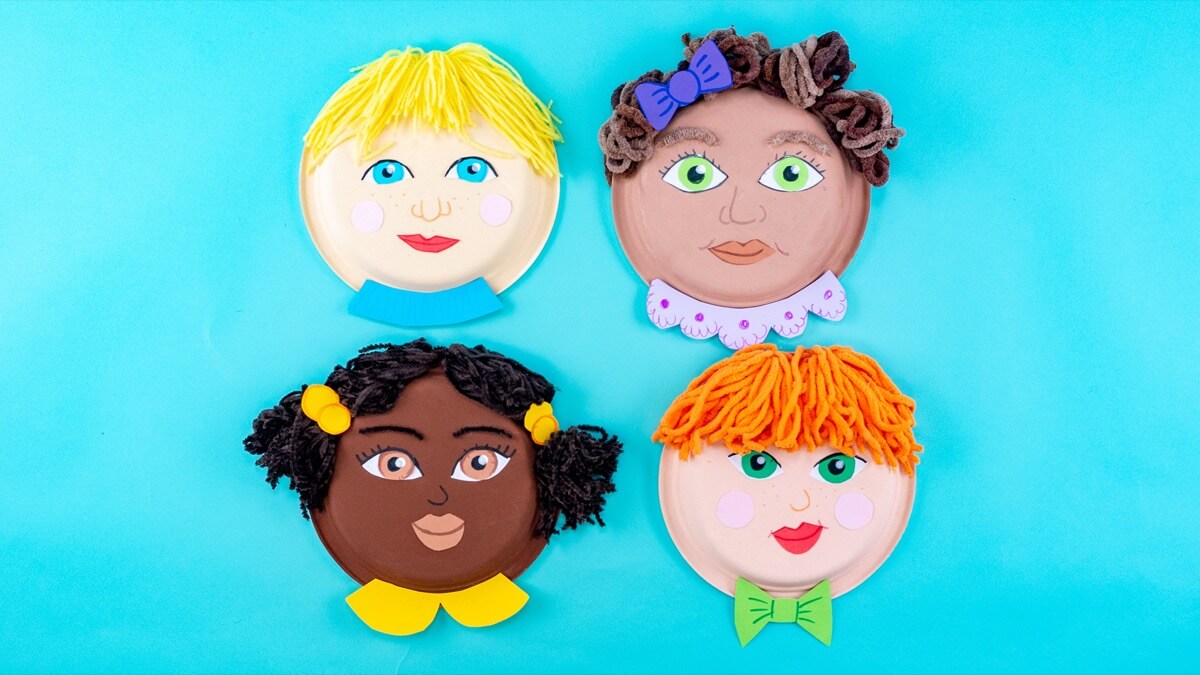
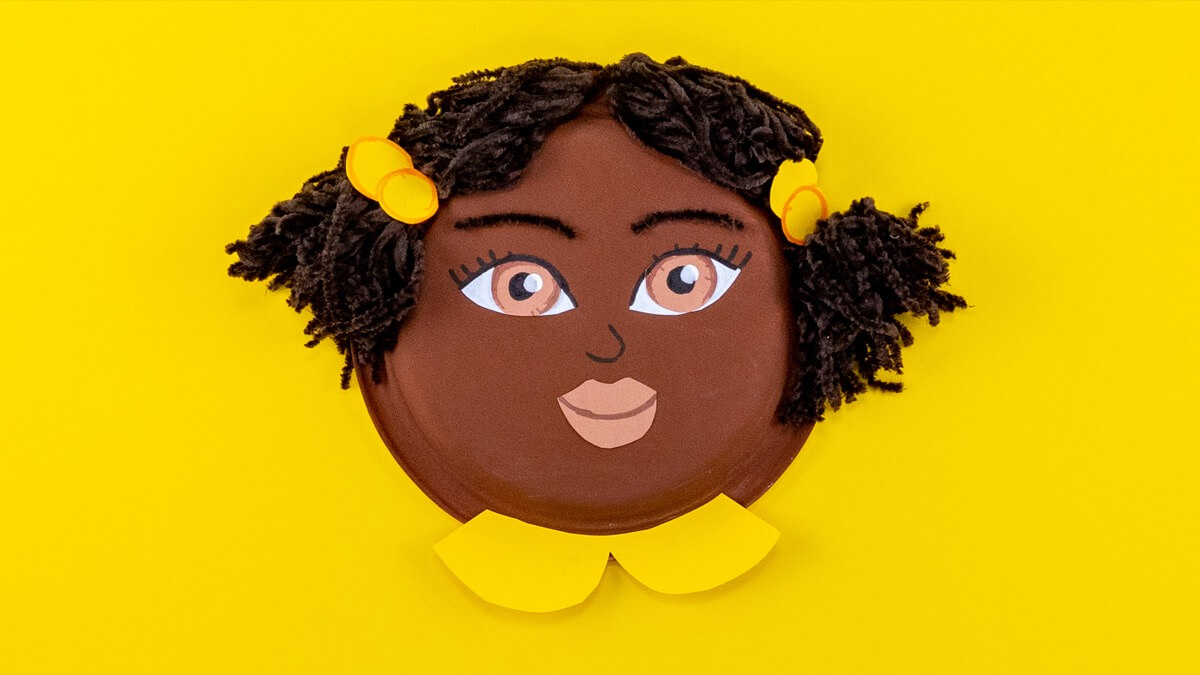
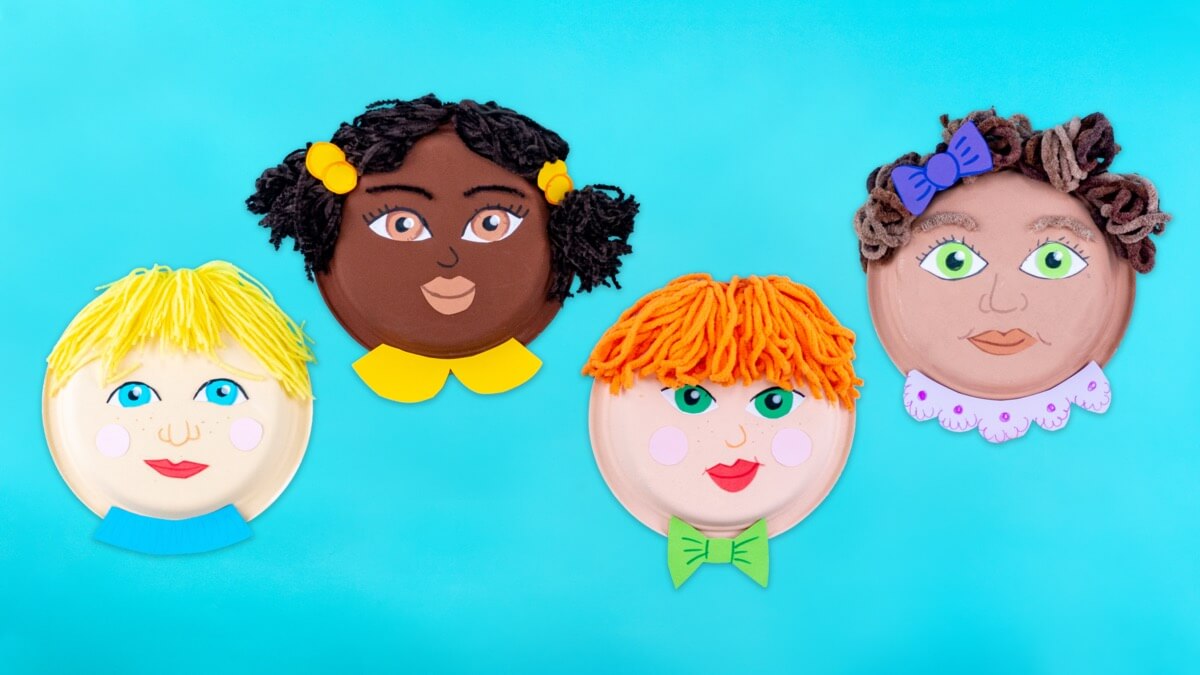
We love getting creative with paper plates, especially when it means we can pull out different craft supplies and mix it up. Self portraits are the ultimate crafty alternative to selfies, and a great way for students to get to know each other, review colors, notice details, and refine their motor skills. What makes you uniquely you? Can you turn those fantastic features into art? Scroll to the end to see these completed portraits paired with some daily affirmations for students, perfect for World Children’s Day!
TIP: provide students with some small mirrors so they can see their own features as they create.
Things you’ll need
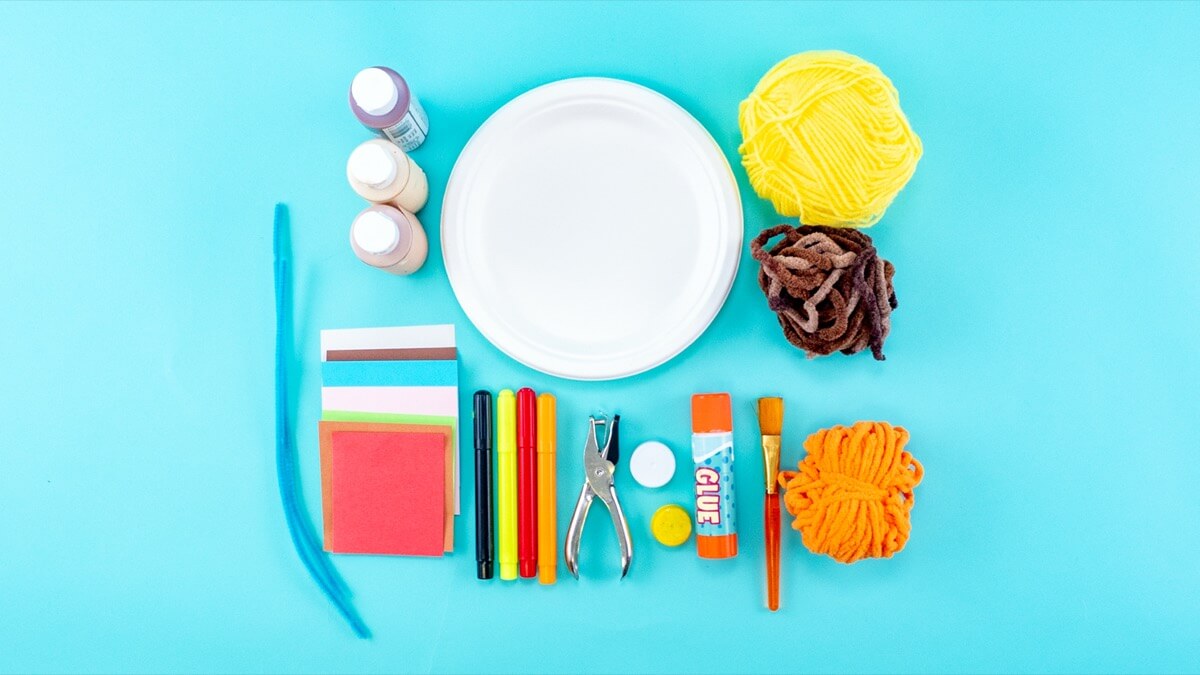
- Paper plates
- Craft paint
- Paint brush
- Construction paper
- Yarn
- Bottle cap
- Pencil
- Markers
- Hole punch
- Glue stick or white glue
Steps
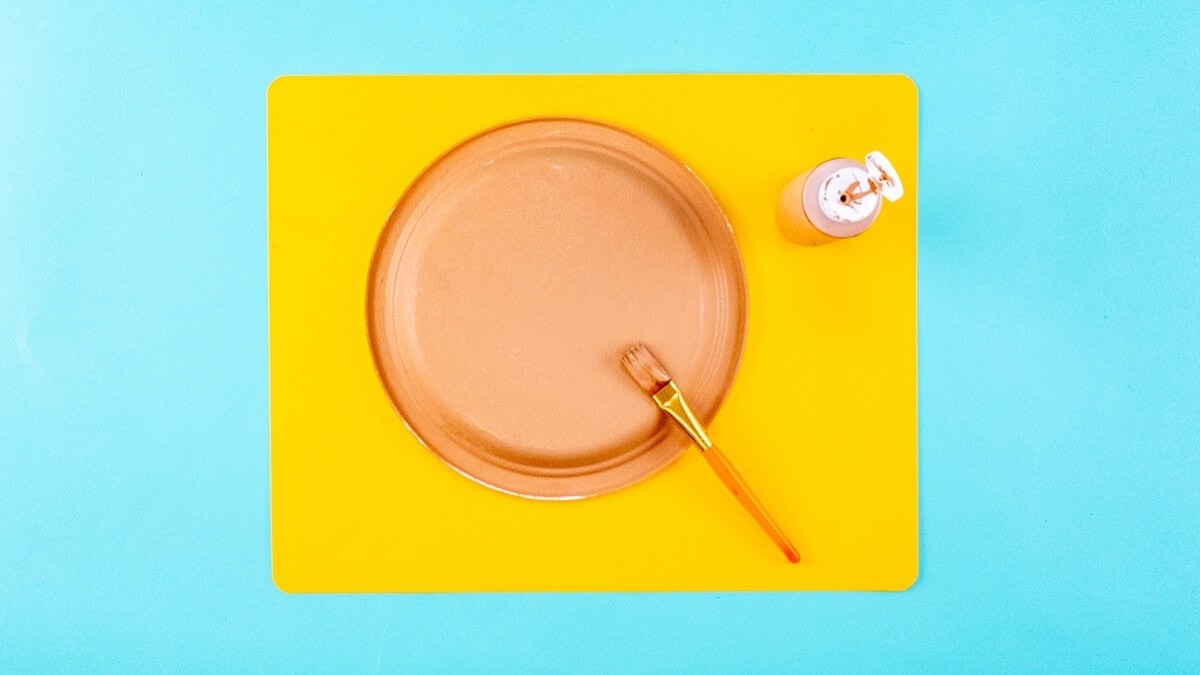
Start by painting the underside of your paper plate with a skin tone that suits you or the person you are creating a portrait of. Set it aside to dry.
Notice what color your iris is. Trace a bottle cap to make some beautiful eyes.
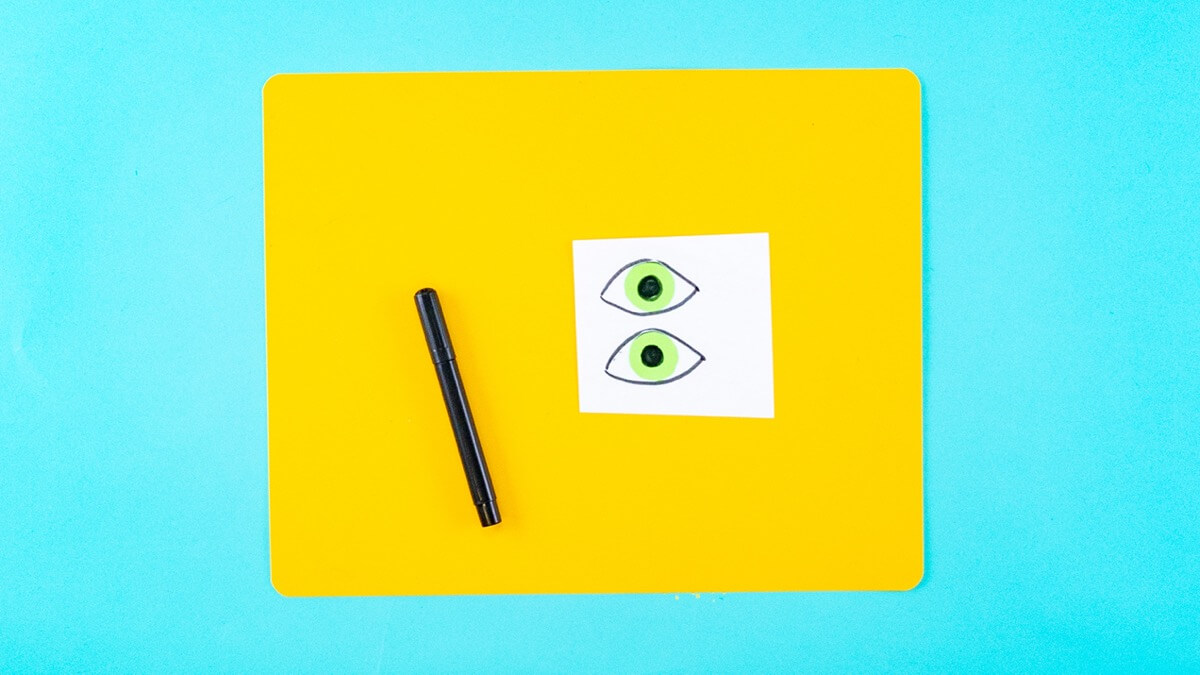
Glue your irises onto some white paper and use a marker to trace the whites of the eyes. Draw some pupils. These are your eyes!
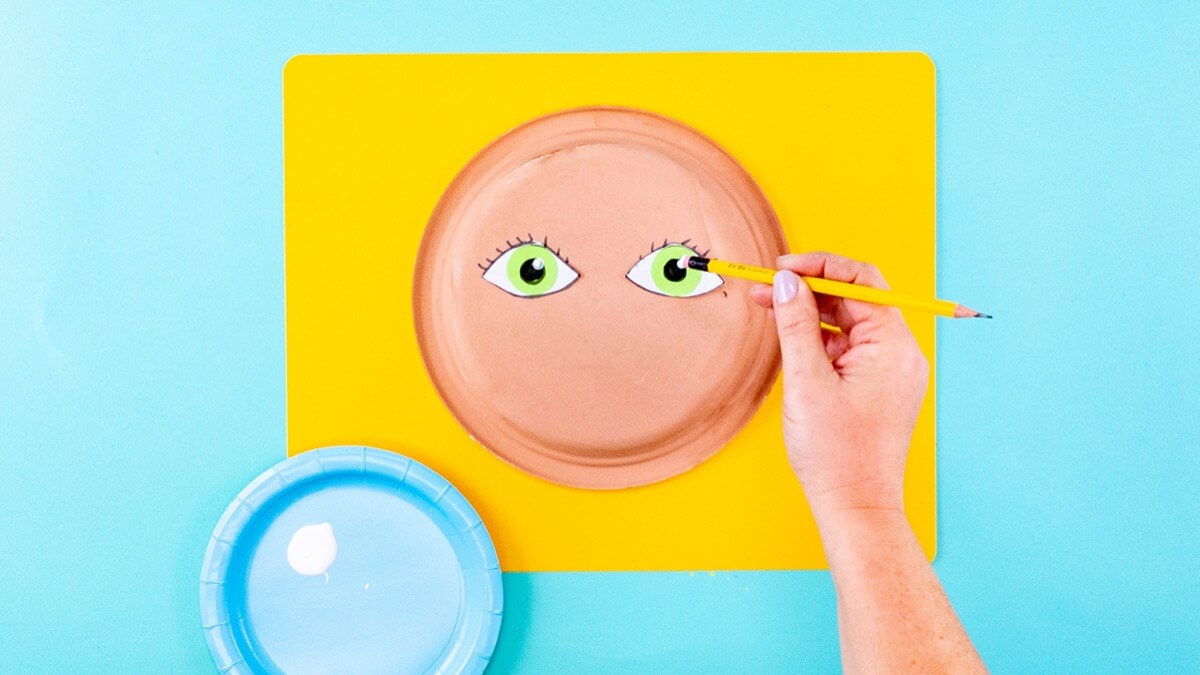
When your paper plate is dry, glue your eyes halfway down the plate. Your eyes are about one eye-width apart from each other, cool right? We made our eyes big for a more cartoon effect. Tip: you can add a dot of white paint on the eye to create a realistic effect. We used the end of our pencil.
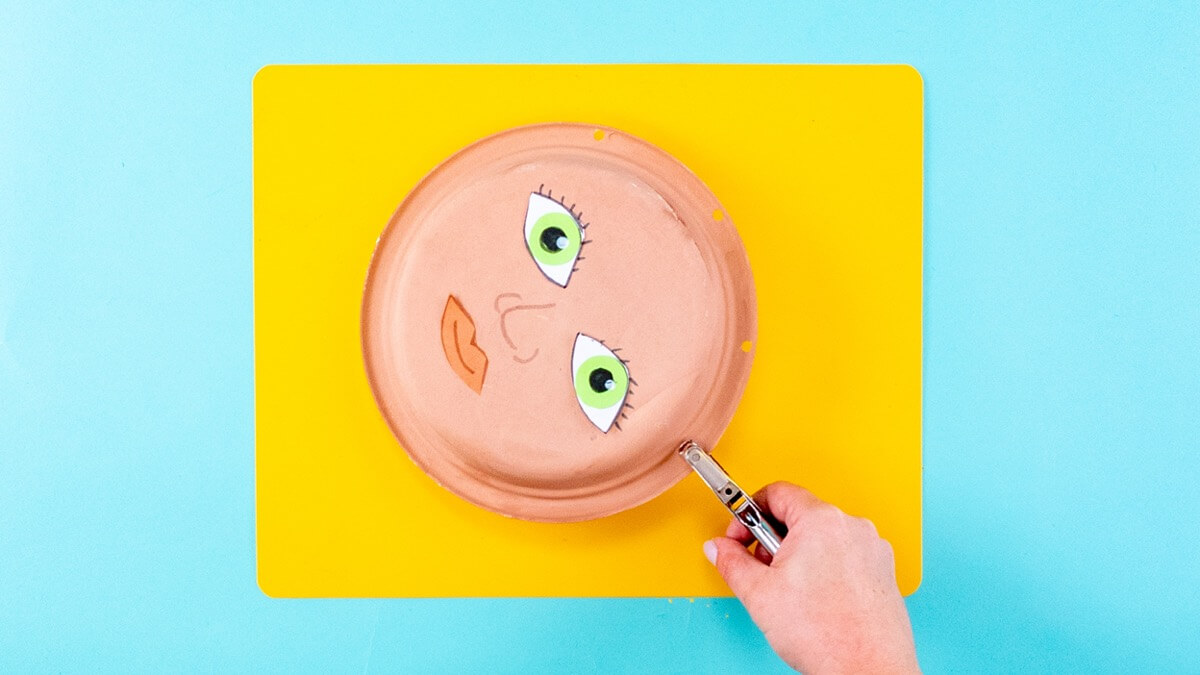
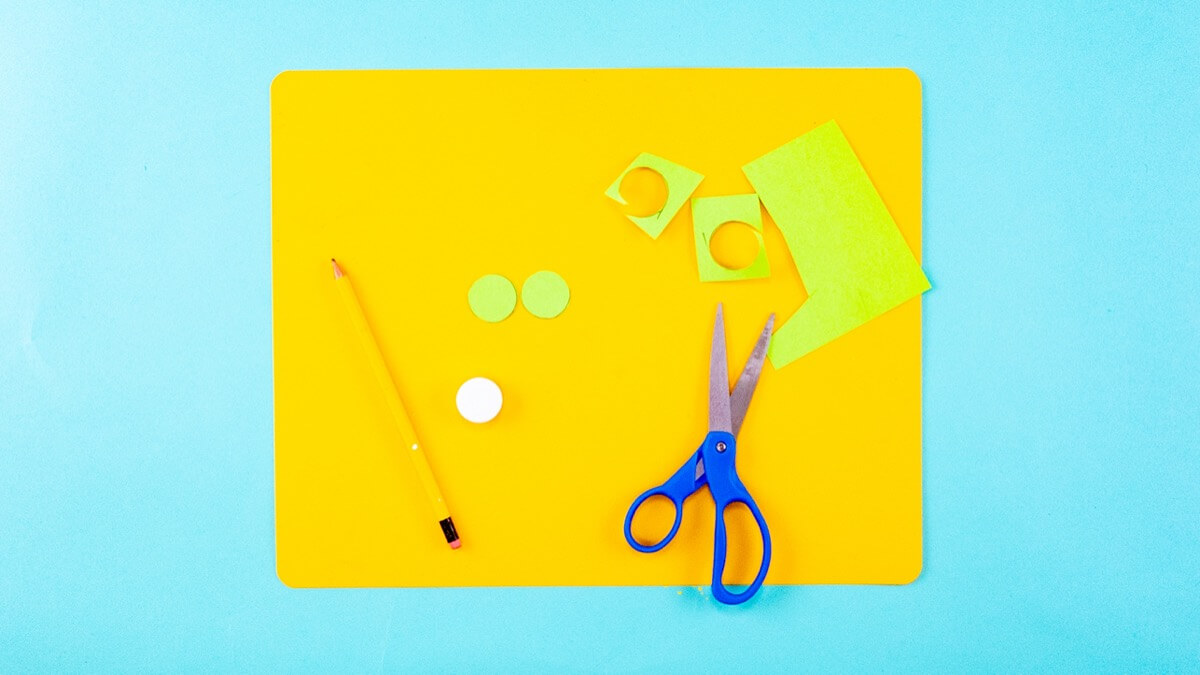
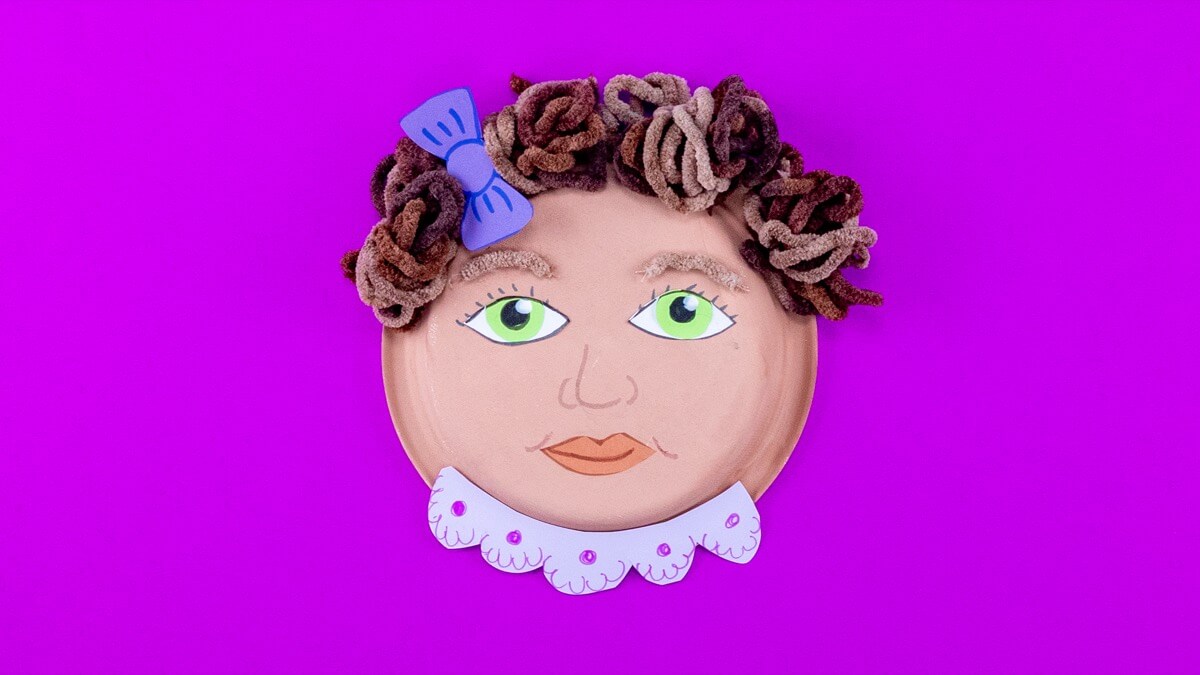
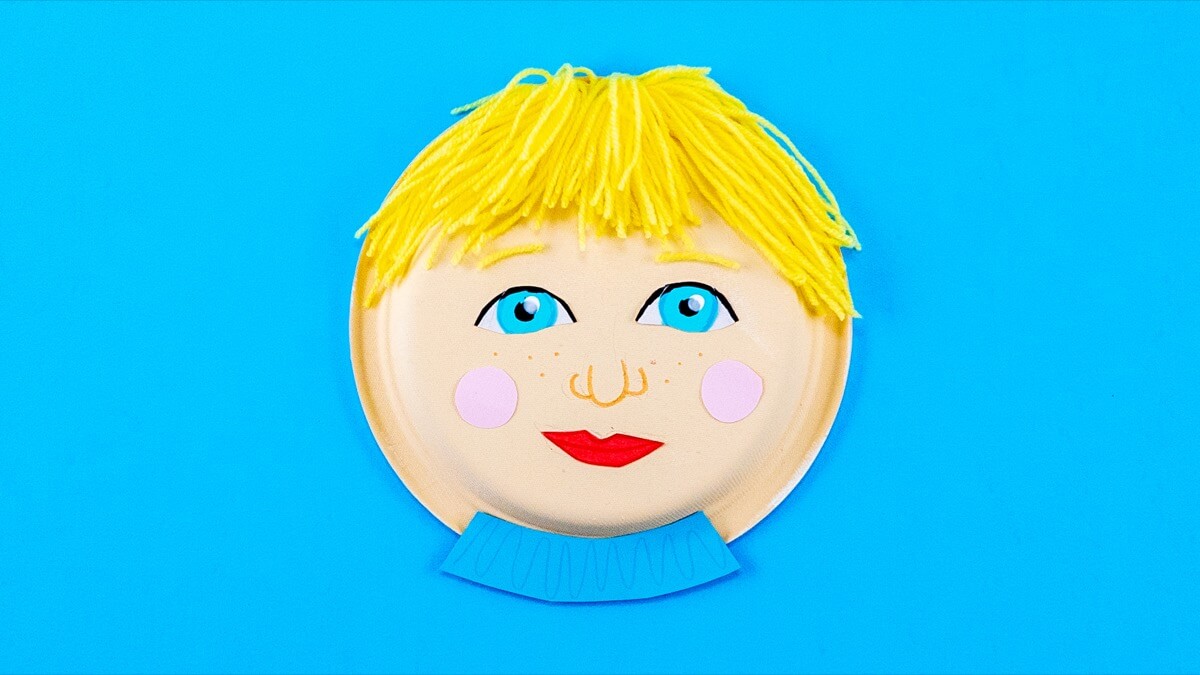
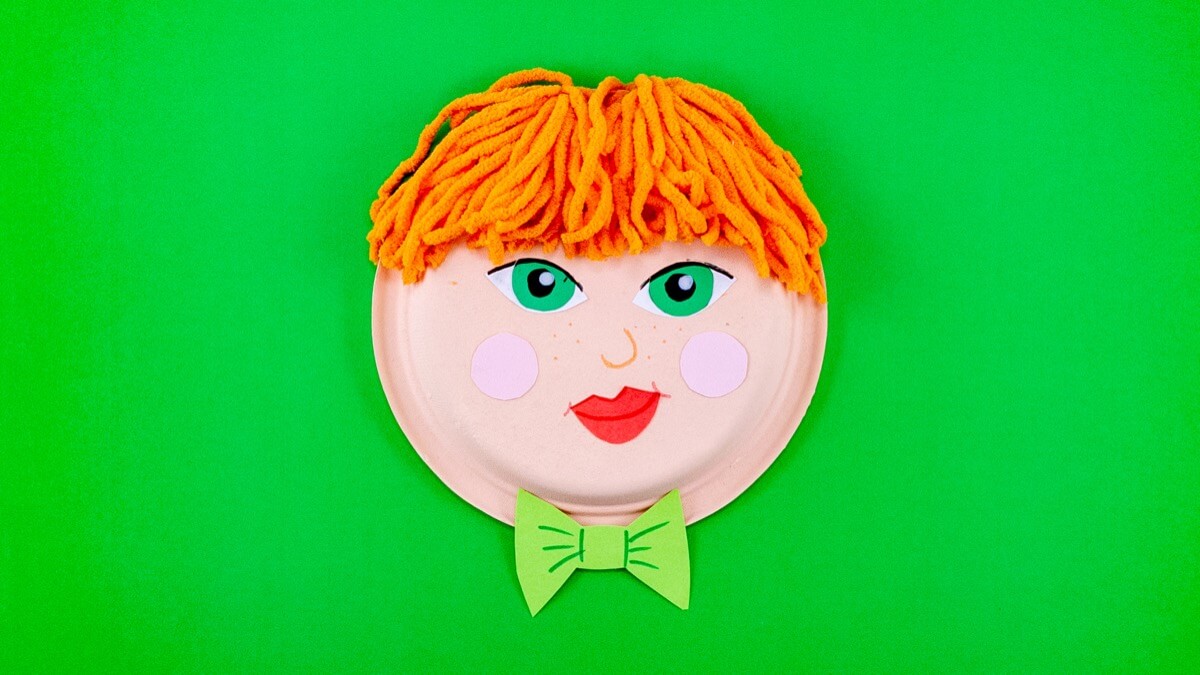
To make the nose, mouth, cheeks, and eyebrows, get creative! We used a marker to draw a nose, cut out a mouth, and glued two short pieces of yarn in place for the eyebrows. We made cheeks with some construction paper and a bottle cap. To make the hair, use a hole punch to punch holes around the top half of your head.
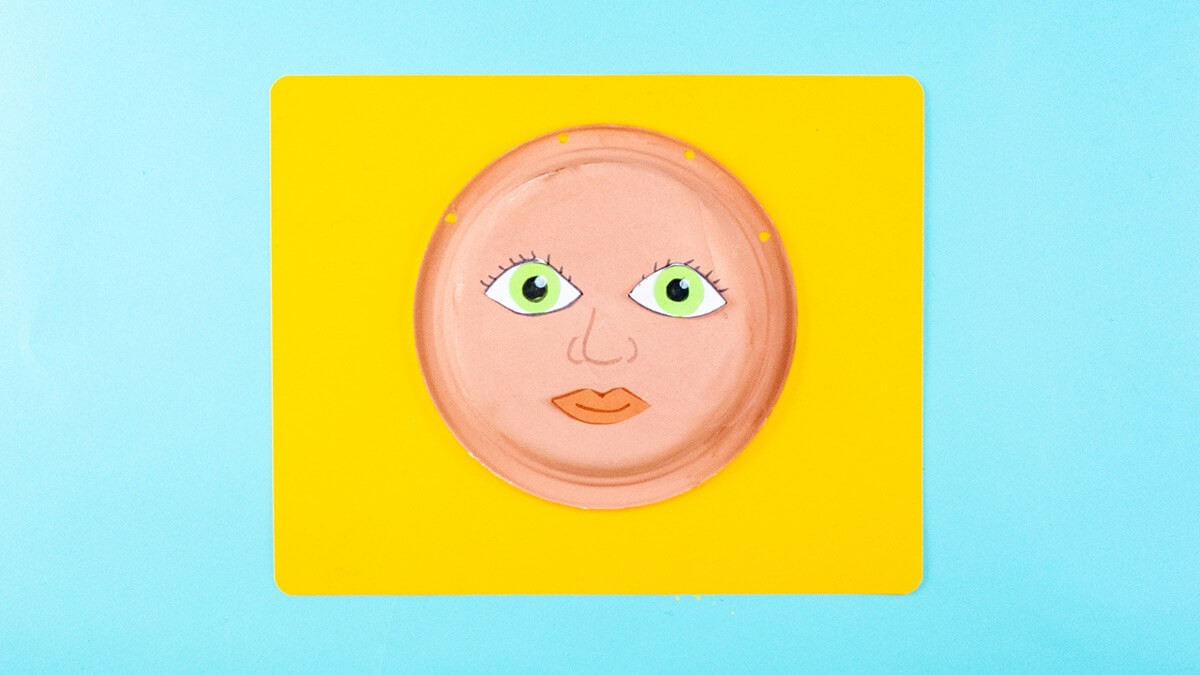
Ready for hair!
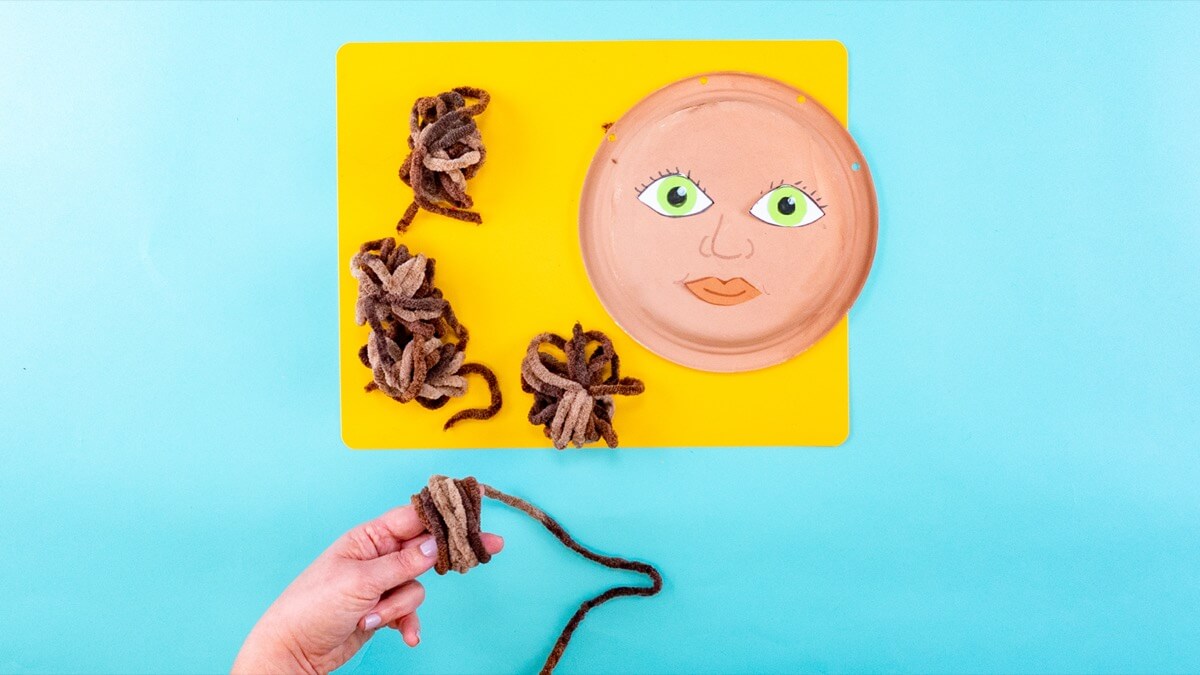
Next, take some yarn and wrap it around your fingers. Wrap around two fingers for curls, four fingers for longer locks. Once you have a nice bundle, wrap the length of yarn through the bundle and tie it in a knot.
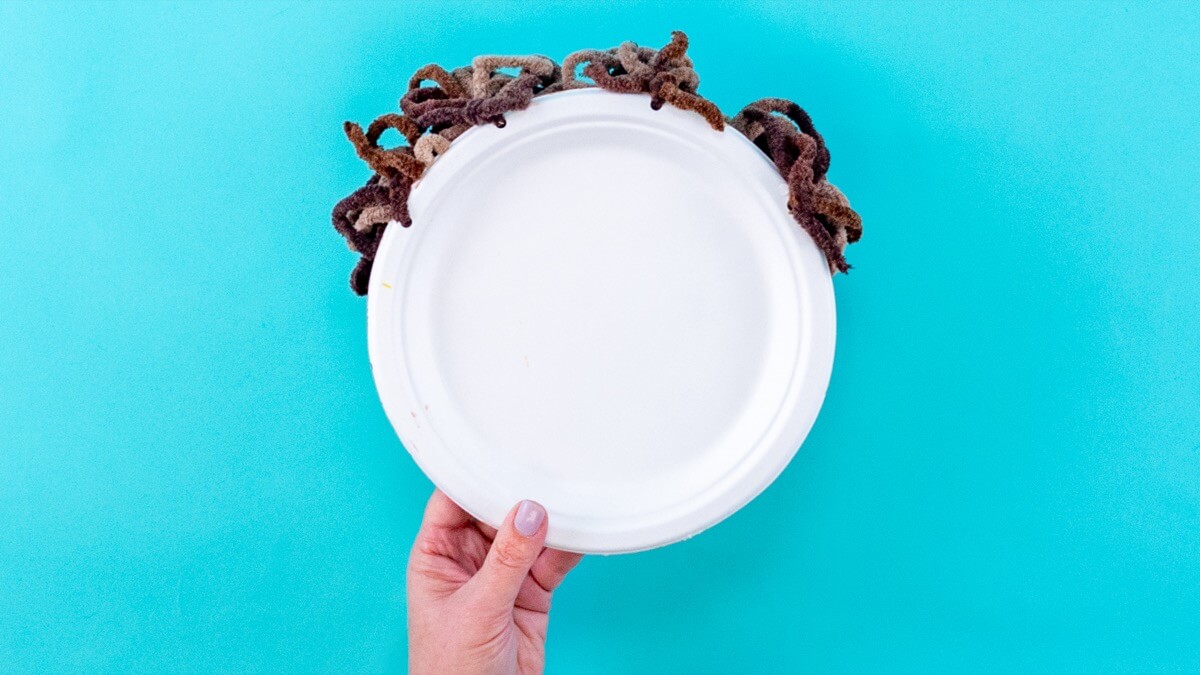
Use the same ends to tie through the hole made by the hole punch on the paper plate. Leave as is for curly hair, or cut the bottom of the looped yarn for straight hair.
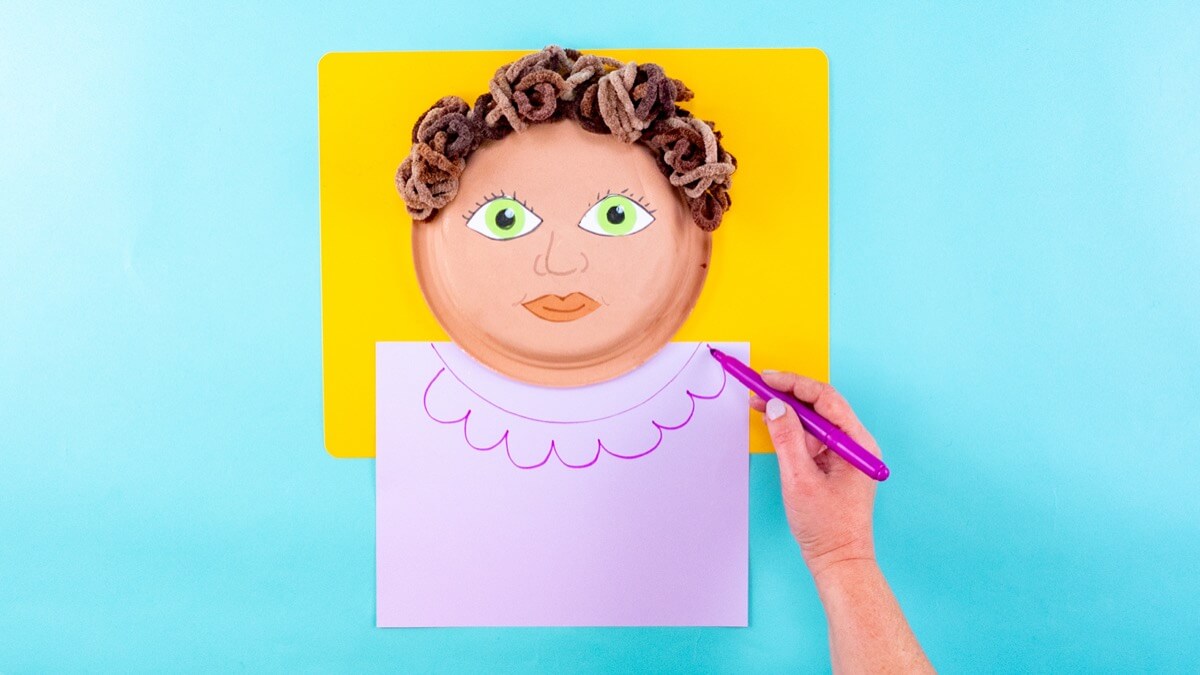
Make a collar around the neck. Trace the bottom edge of the paper plate onto some construction paper, then draw your detailed collar or bowtie. Cut it out and glue it in place.
I am brave! I believe in myself! I am enough!
I can do hard things! I like me! I am strong!
I am patient! I am important! I care about others!
I accept myself! I accept others! I make friends easily!
#WorldChildrensDay #PaperPlateCrafts #KidsActivites
Don’t forget to follow us on Twitter, Instagram, Pinterest, and Facebook!
Original content © 2022 Super Simple. Not to be reprinted without express written permission. Terms of Service.