Rabbits are a sure sign of spring. Their cheerful leaps and crunchy carrot munching make bunnies a fun animal for kids to watch and learn about animals from. If you have lessons planned about rabbits or farms or habitats, be sure to hop into this craft!
Things you’ll need
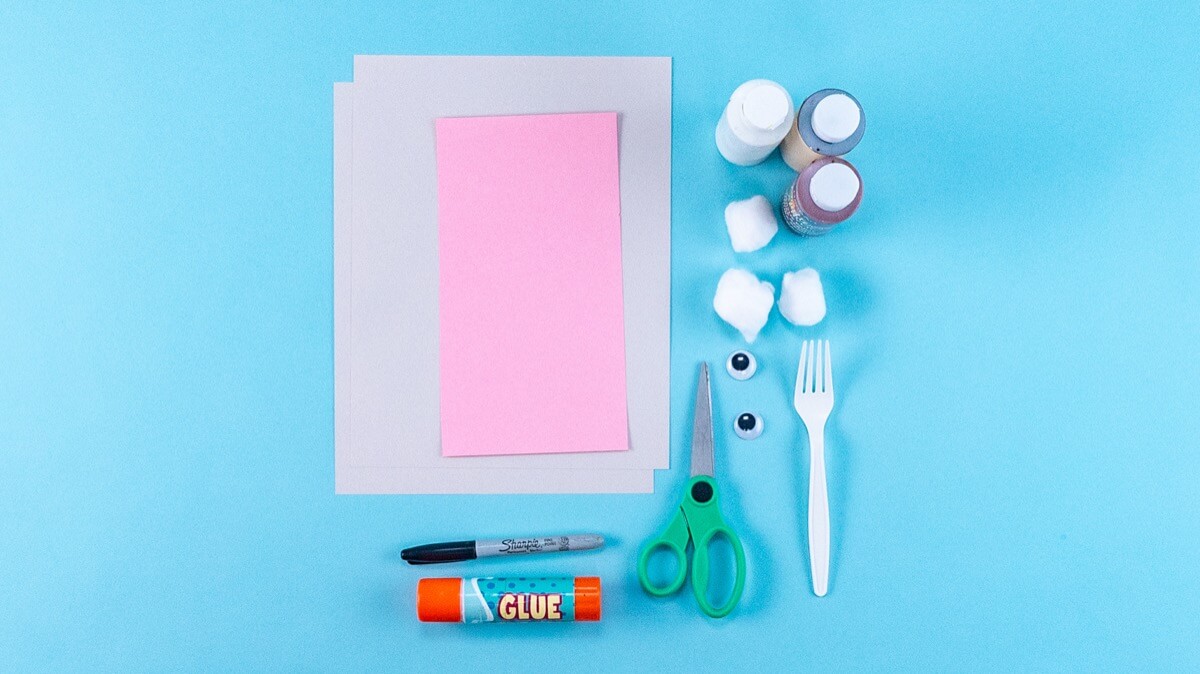
- Construction paper
- Cotton balls
- Craft paint
- Disposable fork
- Glue stick
- Scissors
- Black marker
- Googly eyes
Steps
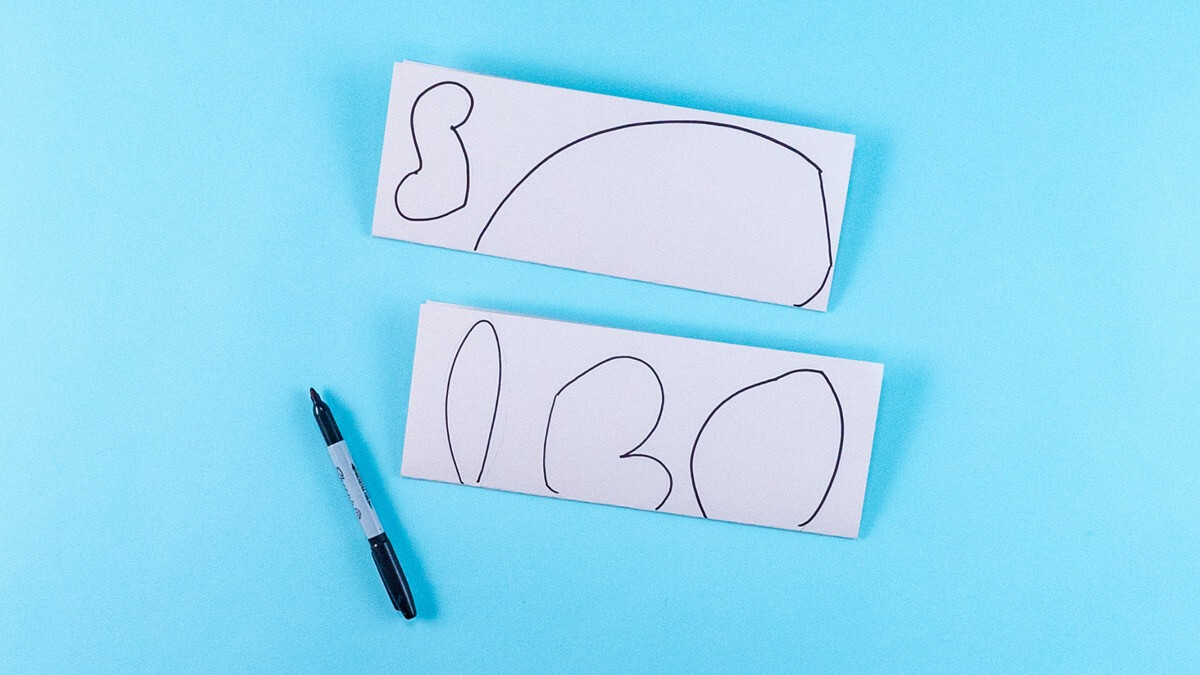
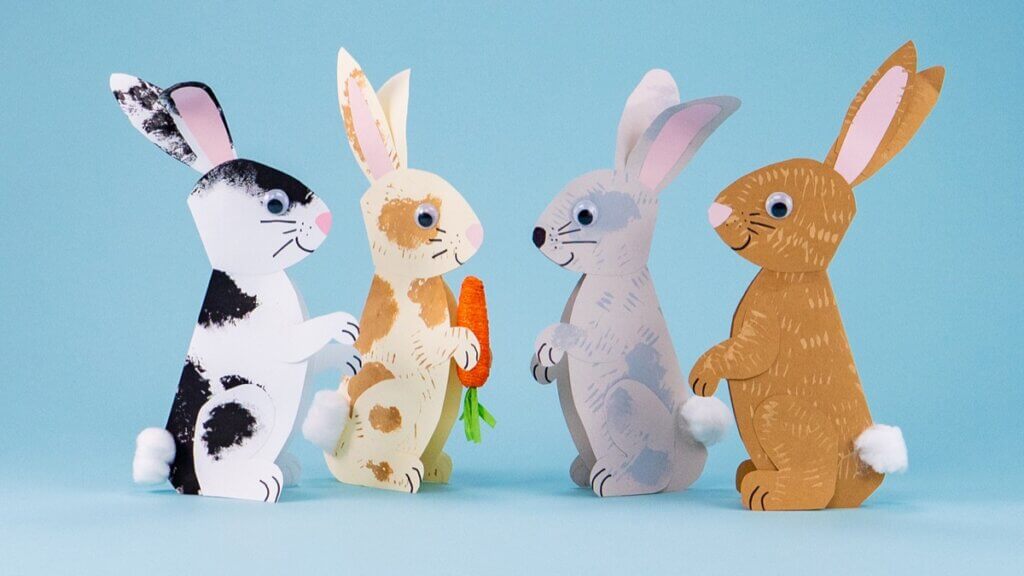
Fold two sheets of construction paper in half. On the first sheet, draw the shape of the body connected to the folded edge. Note: angle the bottom edge, this will help your bunny stand up. Next, draw the arms. On the second sheet draw the head, legs, and ears all connected to the folded edge.
Cut out two inner ear shapes from pink paper and set aside for later.
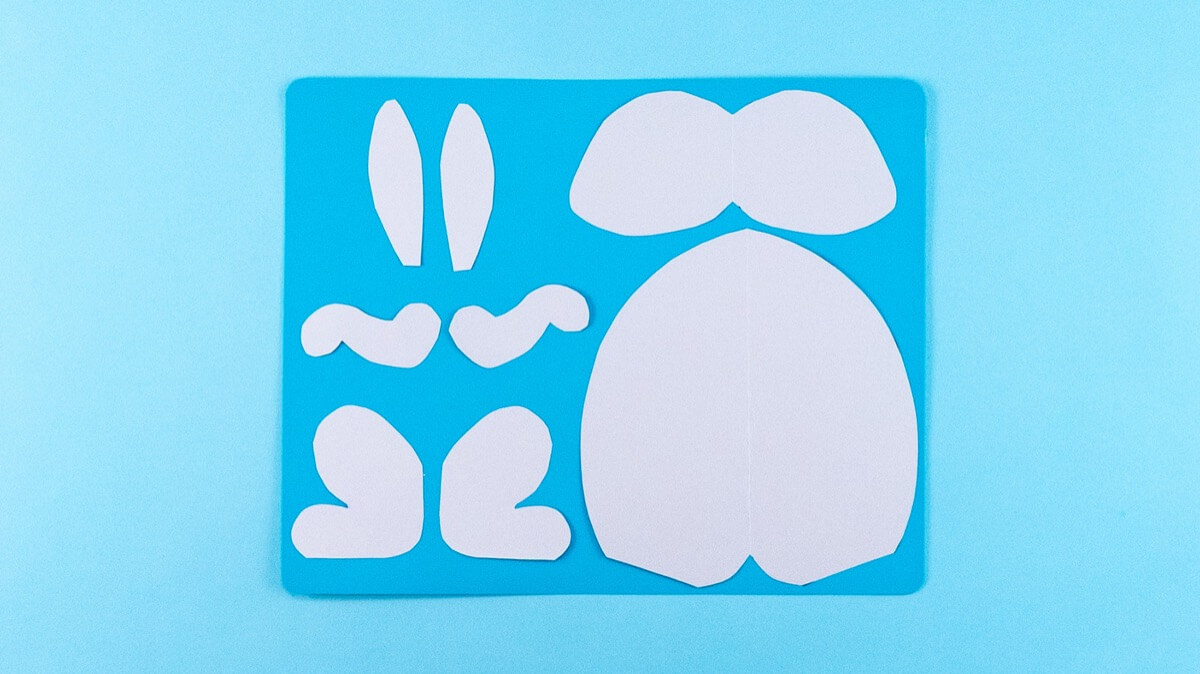
Cut out all of the shapes.
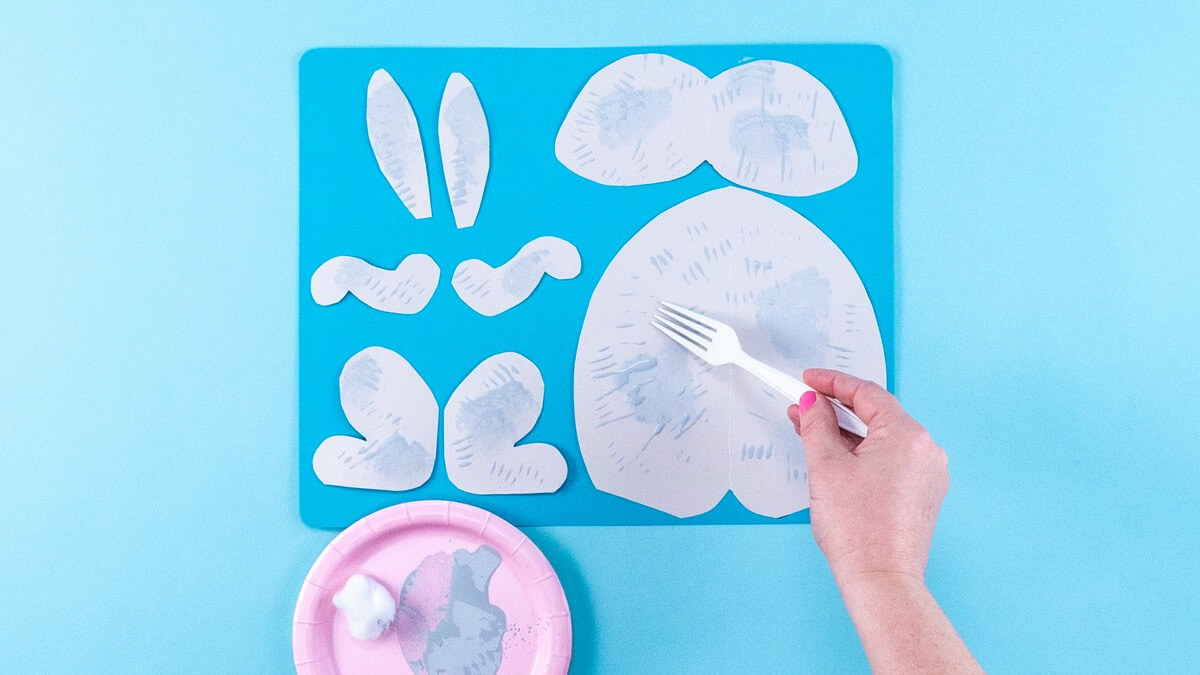
Next, paint the bunny’s fur by using a cotton ball dipped in paint or a fork to make a nice texture.
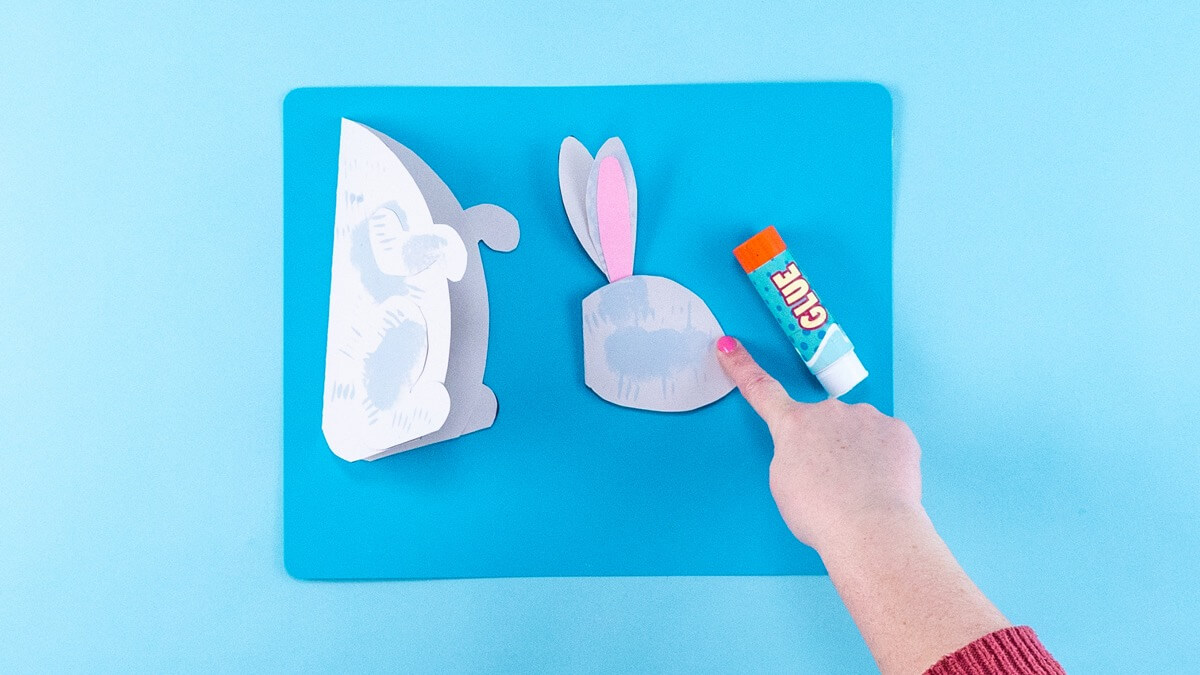
Once dry, it’s time to assemble the bunny. Glue the legs and arms on either side of the body. Glue the pink inner ears into place. For the head glue the bottom of the ears together and place in-between the folded paper for the head. Next add glue along the inside top edge down to the nose and stick both sides together. The head should remain open on the bottom.
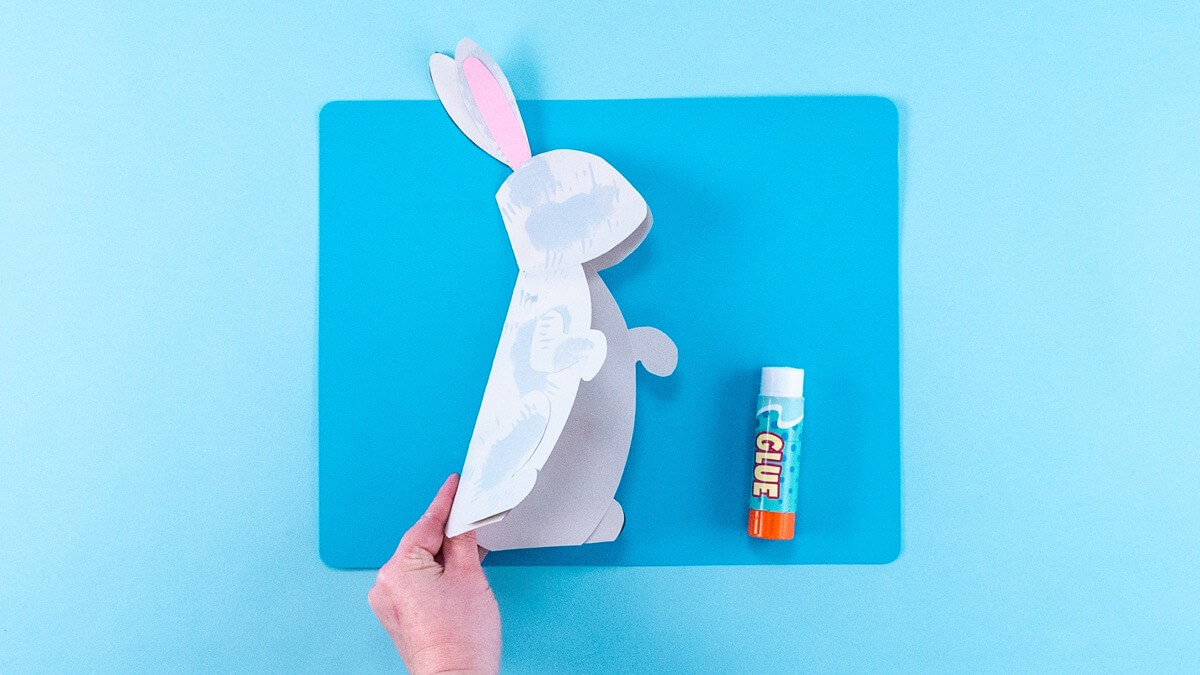
Add glue to the top of the body at the neck, then place the head overlapping. Press down into place. The bunny should be open in the center and be able to sit up on its own.
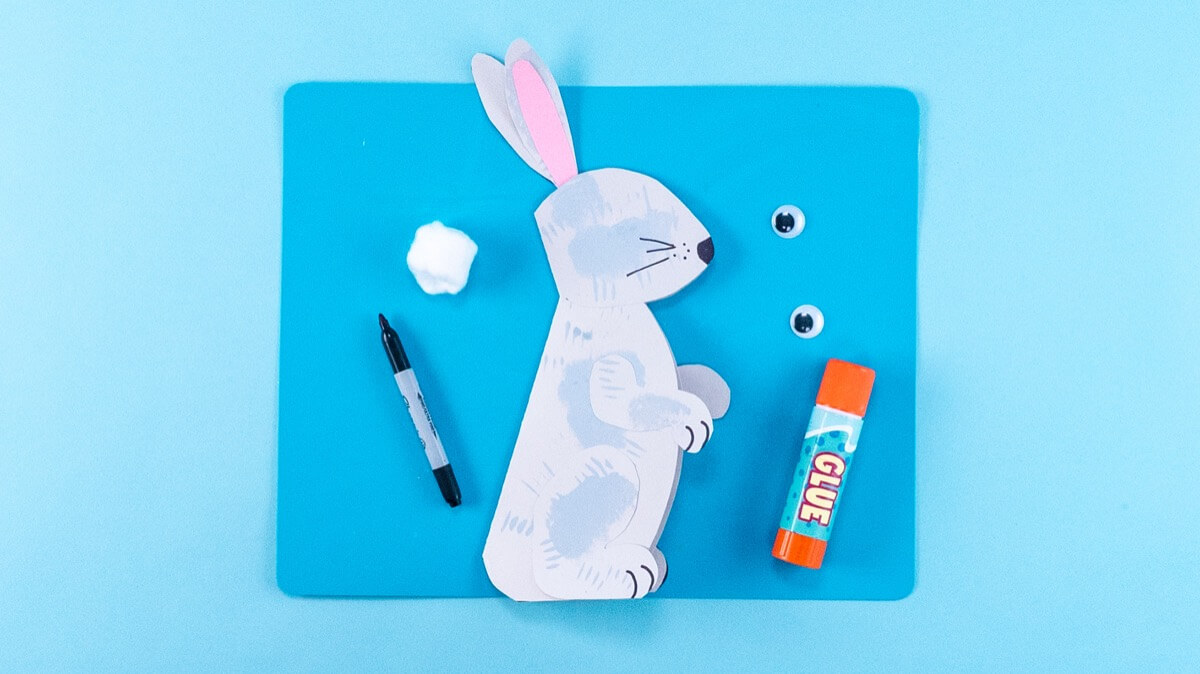
With a black marker, draw the nose, mouth, whiskers, fingers and toes. Next, stick on the googly eyes or draw them in.
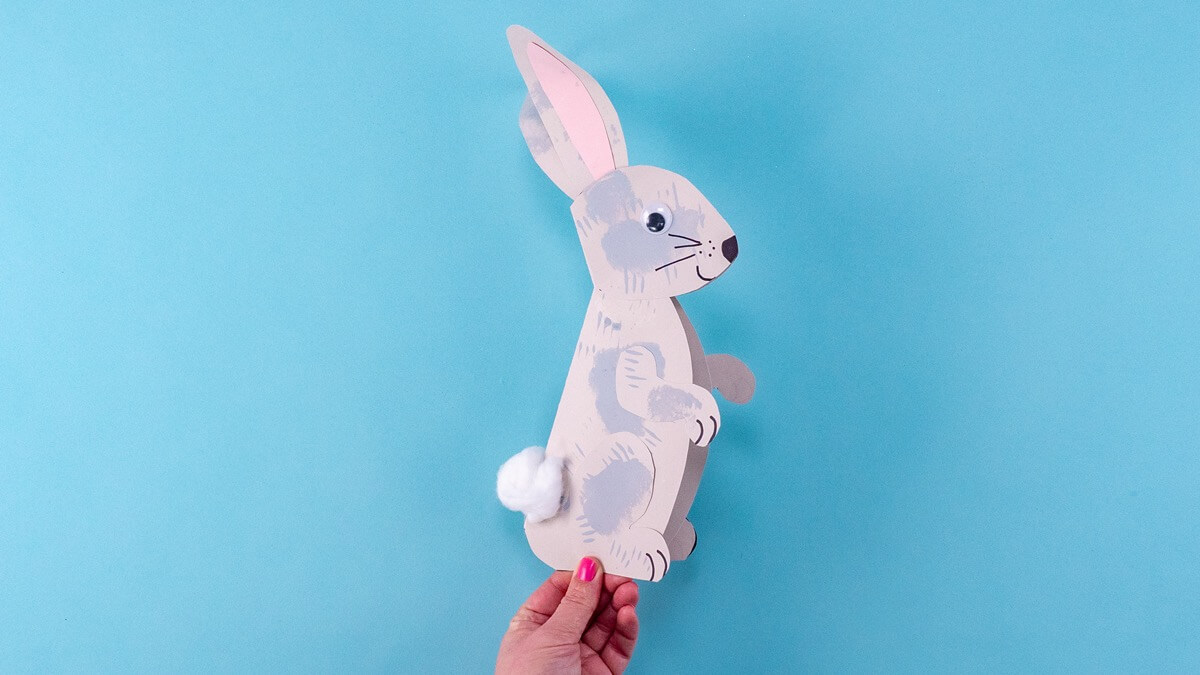
Glue a pompom or cotton ball in place, squeezing it on both sides of the bunny. Don’t forget to make some carrots!
Hoppy Spring!
Don’t forget to follow us on Twitter, Instagram, Pinterest, and Facebook!
Original content © 2024 Super Simple. Not to be reprinted without express written permission. Terms of Service.