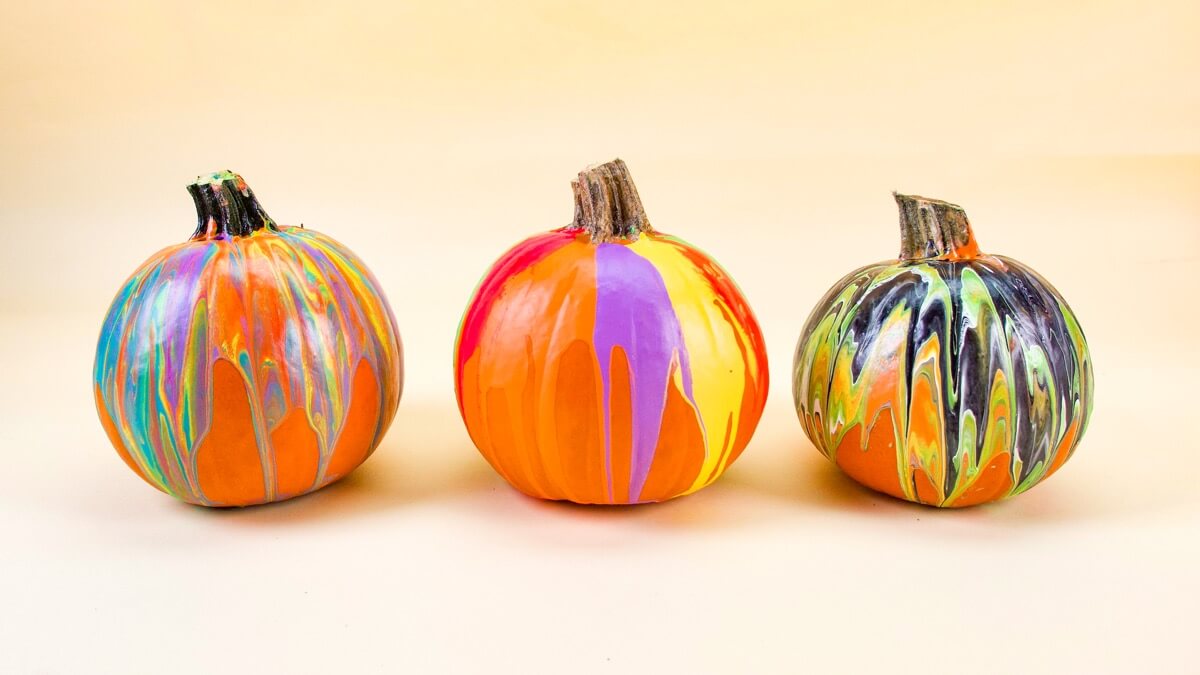
Halloween decor has never been easier – or more fun! Pumpkin painting is a great fall activity for kids of all ages since carving is not required.
There are two ways to make your rainbow pumpkin. Both the “Direct Pour” and the “Marble Pour” technique will require the same supplies.
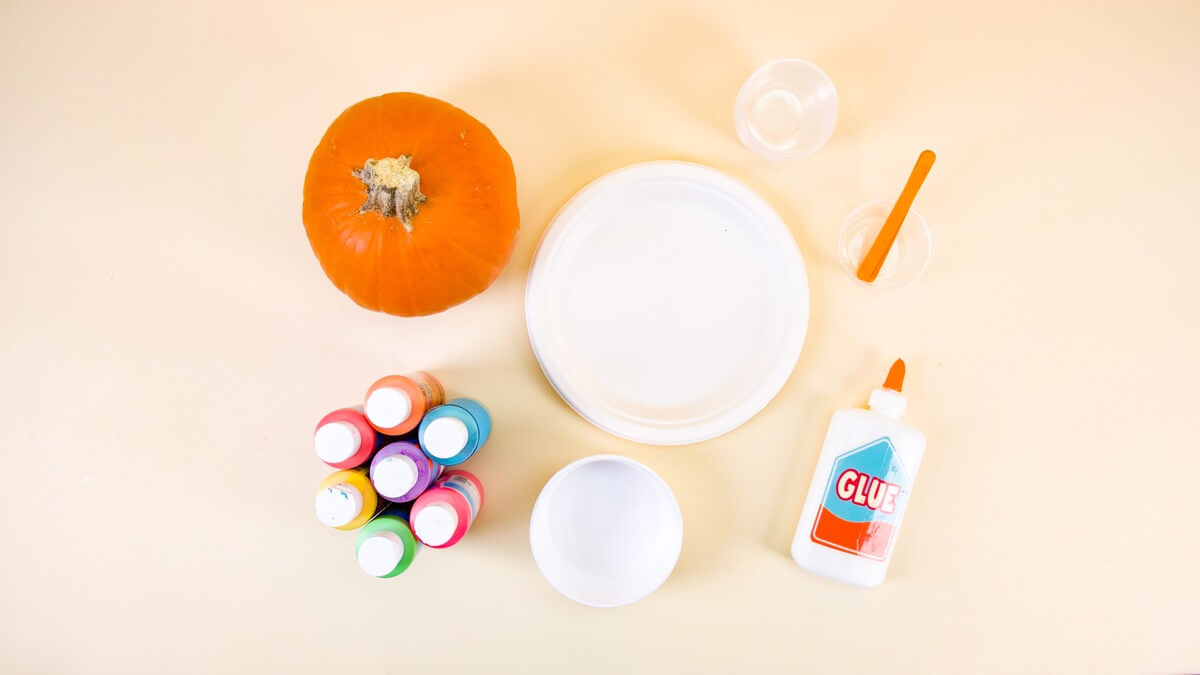
Things you’ll need
- A special pumpkin or two or three
- Craft paint
- White glue
- Paper plate
- Disposable cups
- Disposable bowl / container
- Stir sticks
- Optional: clear gloss lacquer spray

Direct Pour technique
Set your pumpkin on top of a disposable bowl with a paper plate underneath to catch the extra paint drips.
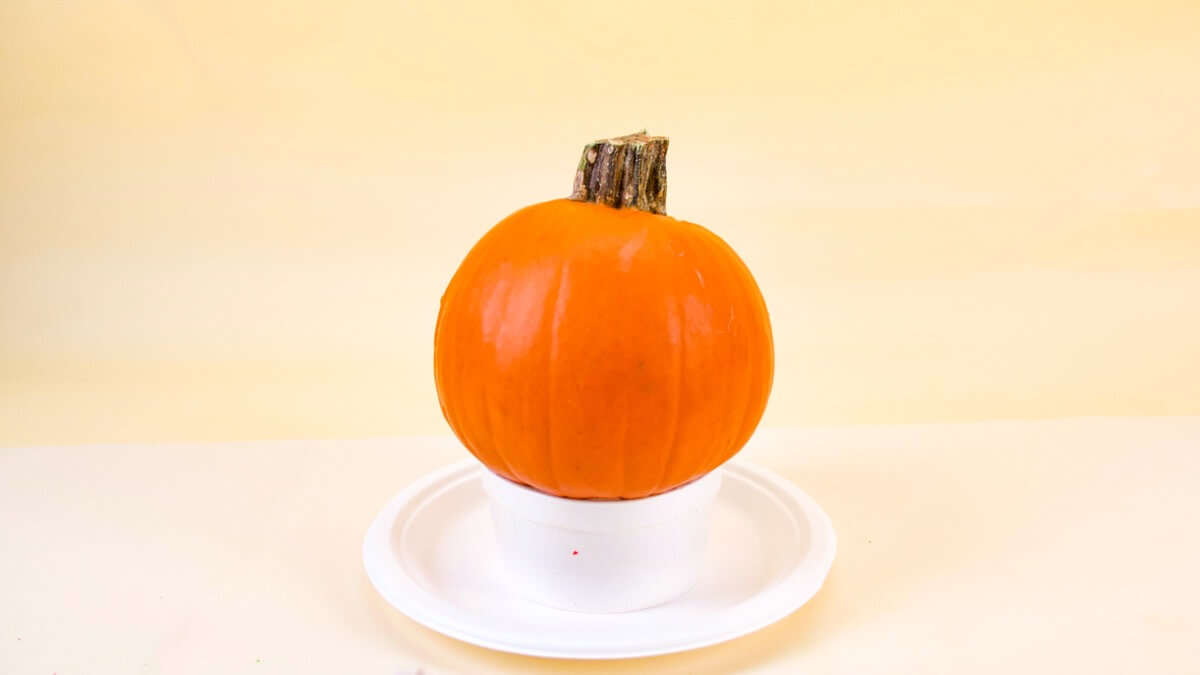
Like this!
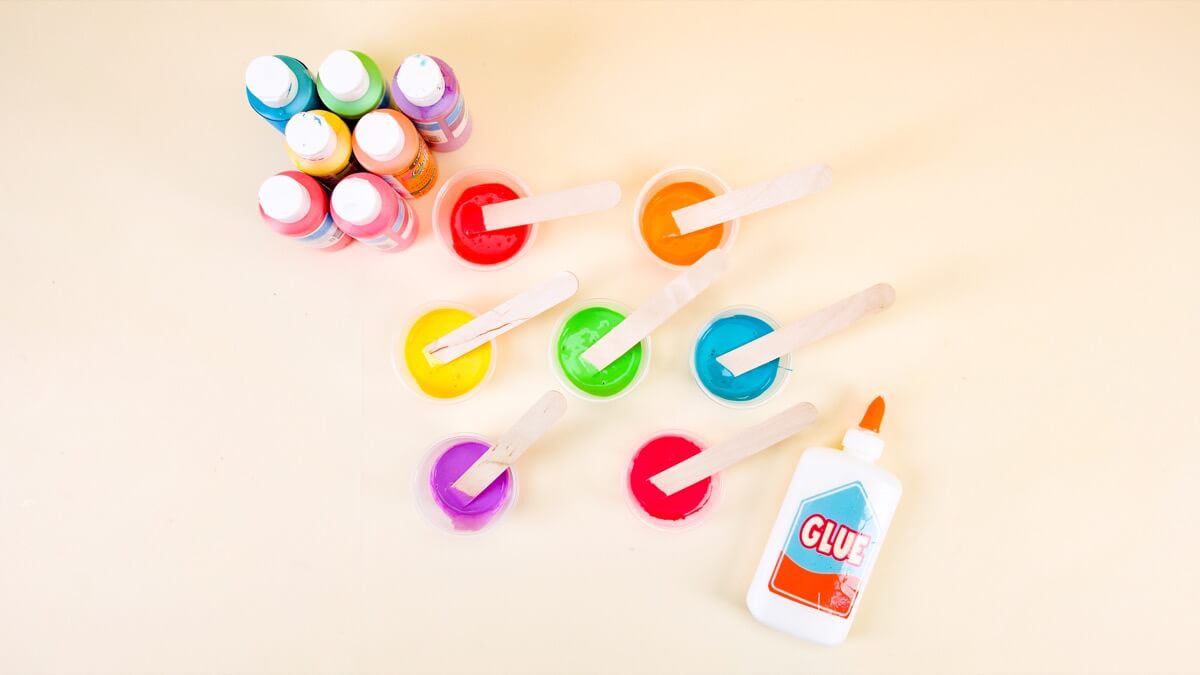
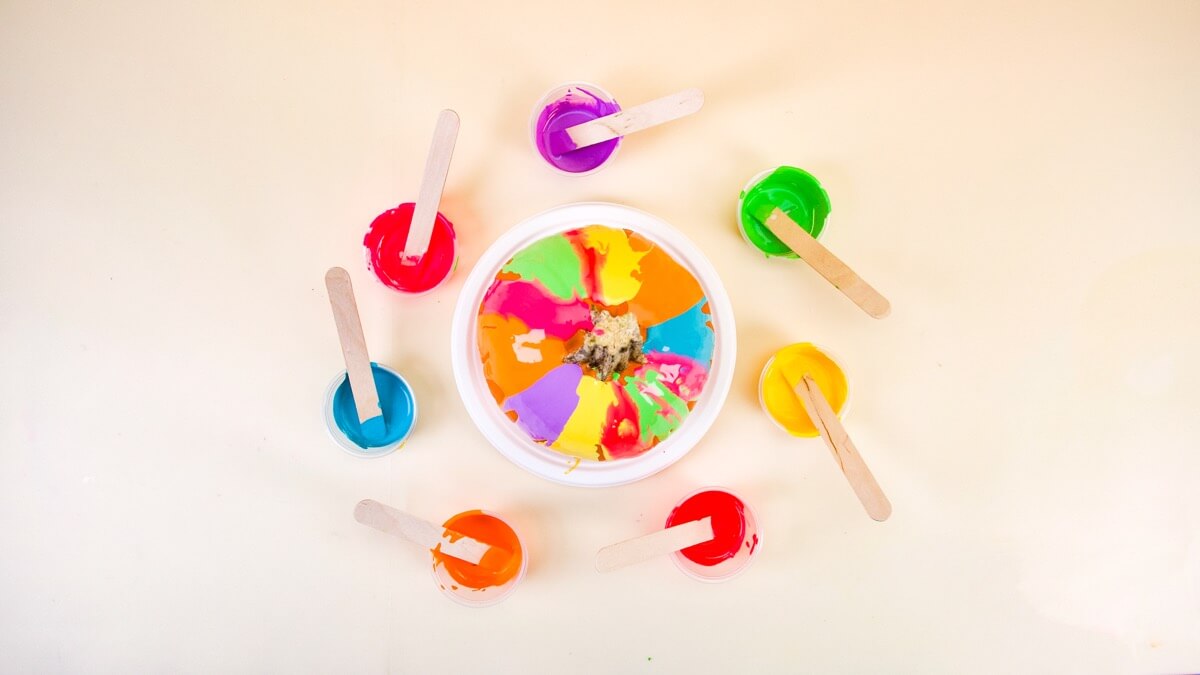
Prepare your colors by mixing paint and glue into individual cups. The glue will help the paint run smoothly and slowly so you can control the effect. Mix, mix, mix!
Pour each color one at a time around the pumpkin.
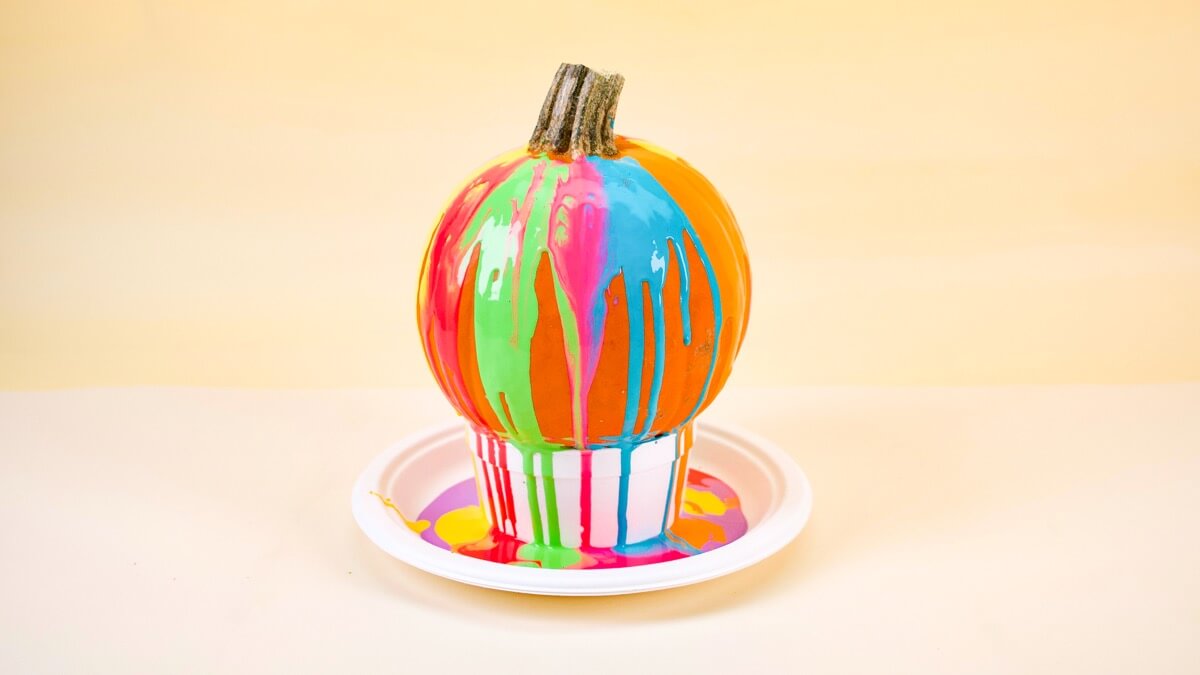
When your pumpkin is dry, spray it with a clear lacquer finish for a professional look that makes your paint colors stand out!
Marble Pour technique
Set up your pumpkin as you did before. Mix up your paint and glue mixtures as well.
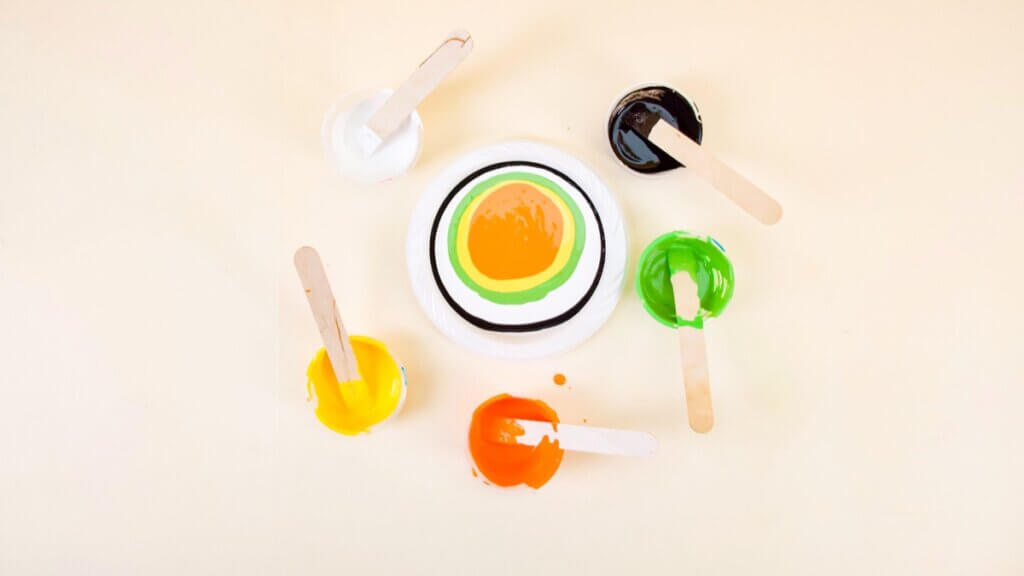
Once your paint colors are mixed, pour the colors one a time onto a disposable plate. Pour each color at the centre of each previous color.
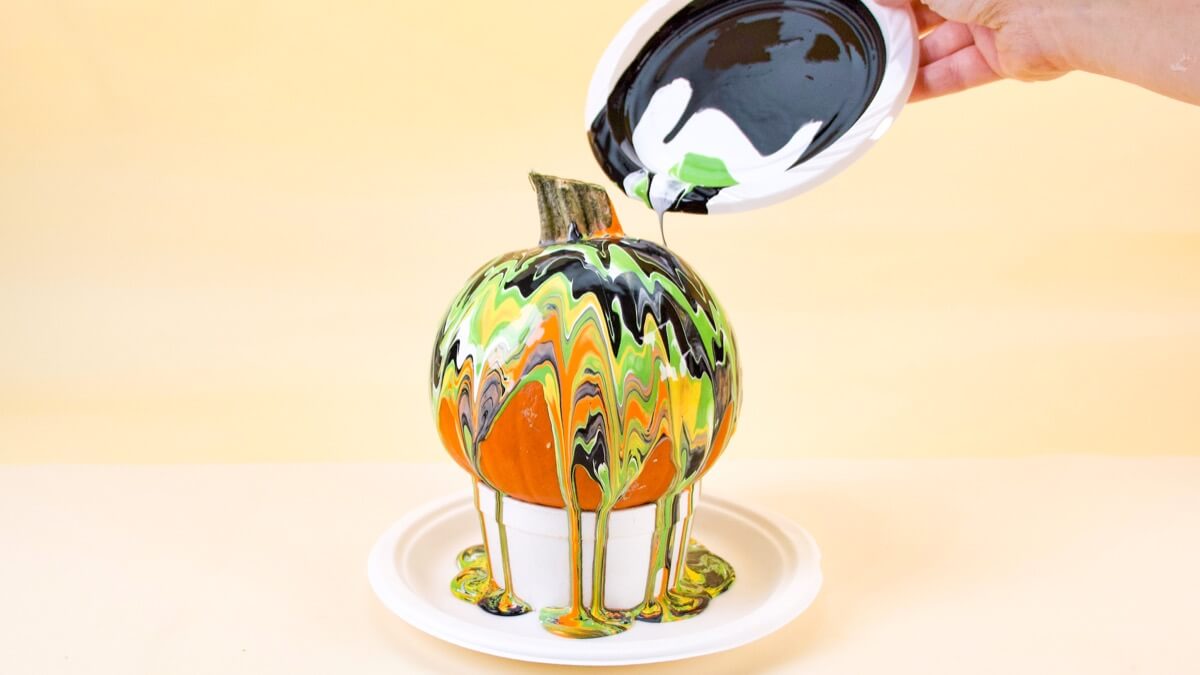
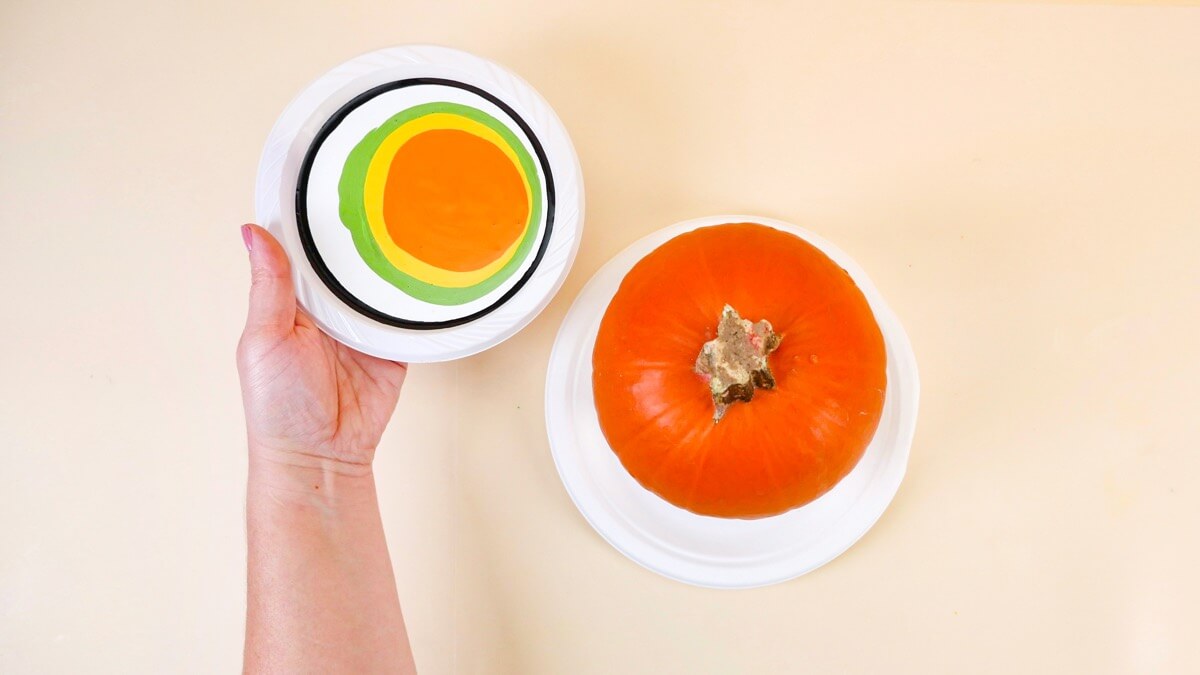
Pour the paint from the paper plate onto the pumpkin surrounding the stem.
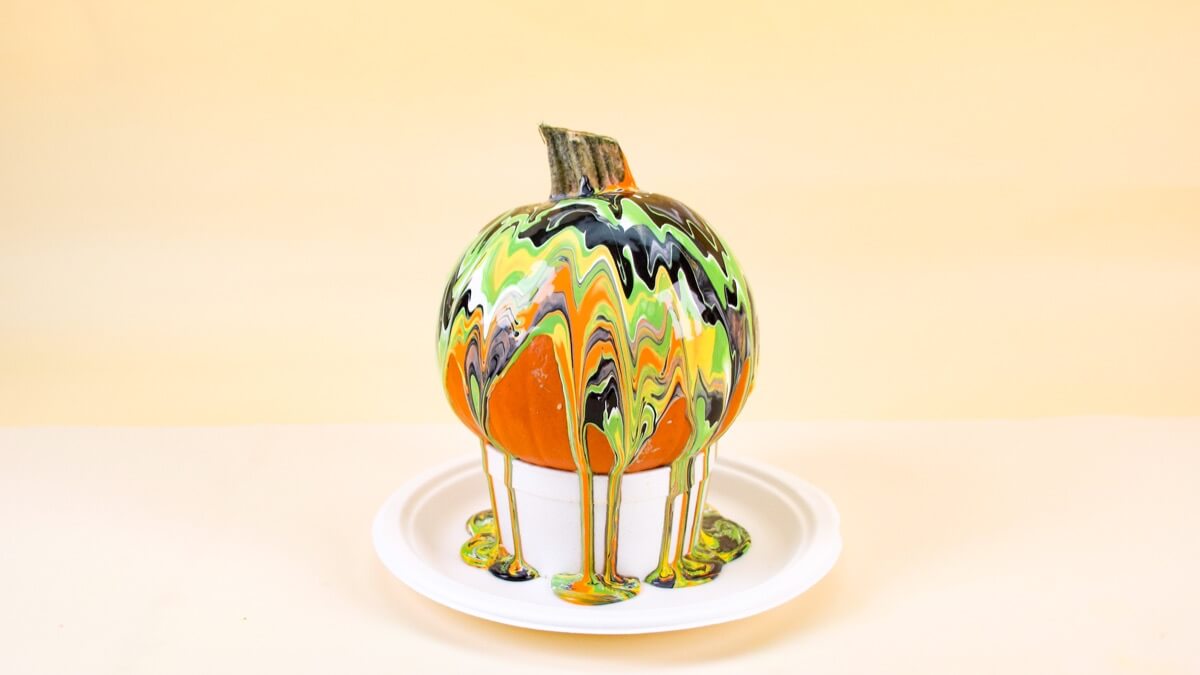
When your pumpkin is dry, spray it with a clear lacquer finish for a professional look that makes your paint colors stand out!
Happy Halloween!
Looking for the perfect playlist? Check out Super Simple’s list of Halloween songs!