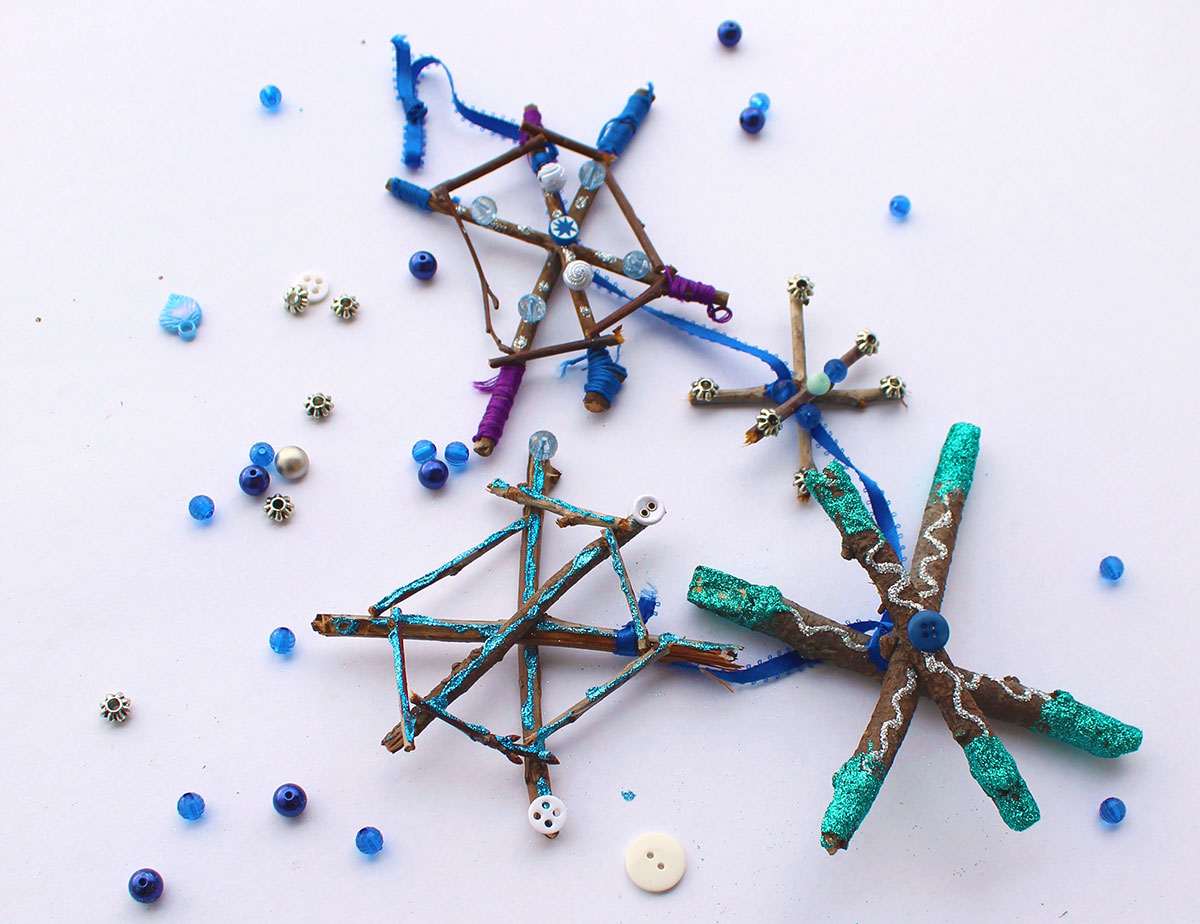
You’ve probably heard it said that no two snowflakes are alike; as they fall through the Earth’s atmosphere and are exposed to different temperatures and humidities, they develop complex, unpredictable, and wildly varying patterns. The snowflakes in this craft are especially unique! We’re going to start by gathering twigs to build them out of; then we’ll get creative and decorate them with embroidery floss, buttons, beads, and glitter. They’re a great way to explore different materials and add some colour and sparkle to a winter day!
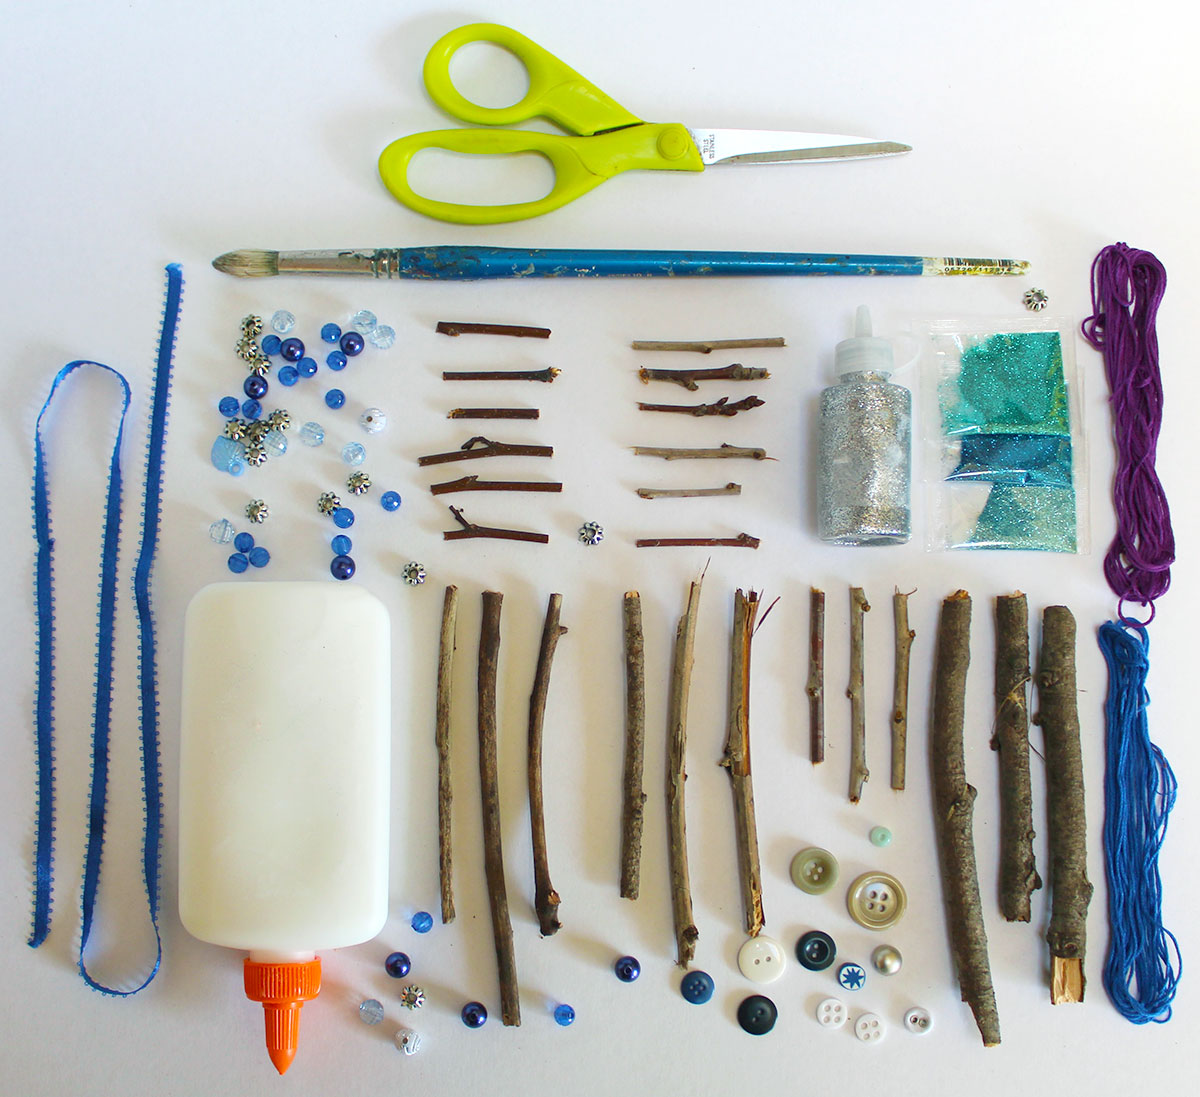
Materials:
- Twigs: For each snowflake, look for a set of three twigs of similar length and width. Optionally, you can add six smaller twigs for a more complex snowflake shape.
*Alternatively: Popsicle sticks also work great for this craft and provide a flatter, easier surface for smaller hands to glue onto. - White glue
- Scissors (to cut embroidery floss and ribbon)
- Paintbrush for glue
- A length of ribbon for hanging
To Decorate:
- Glitter glue
- Glitter
- Embroidery floss
- Beads
- Buttons
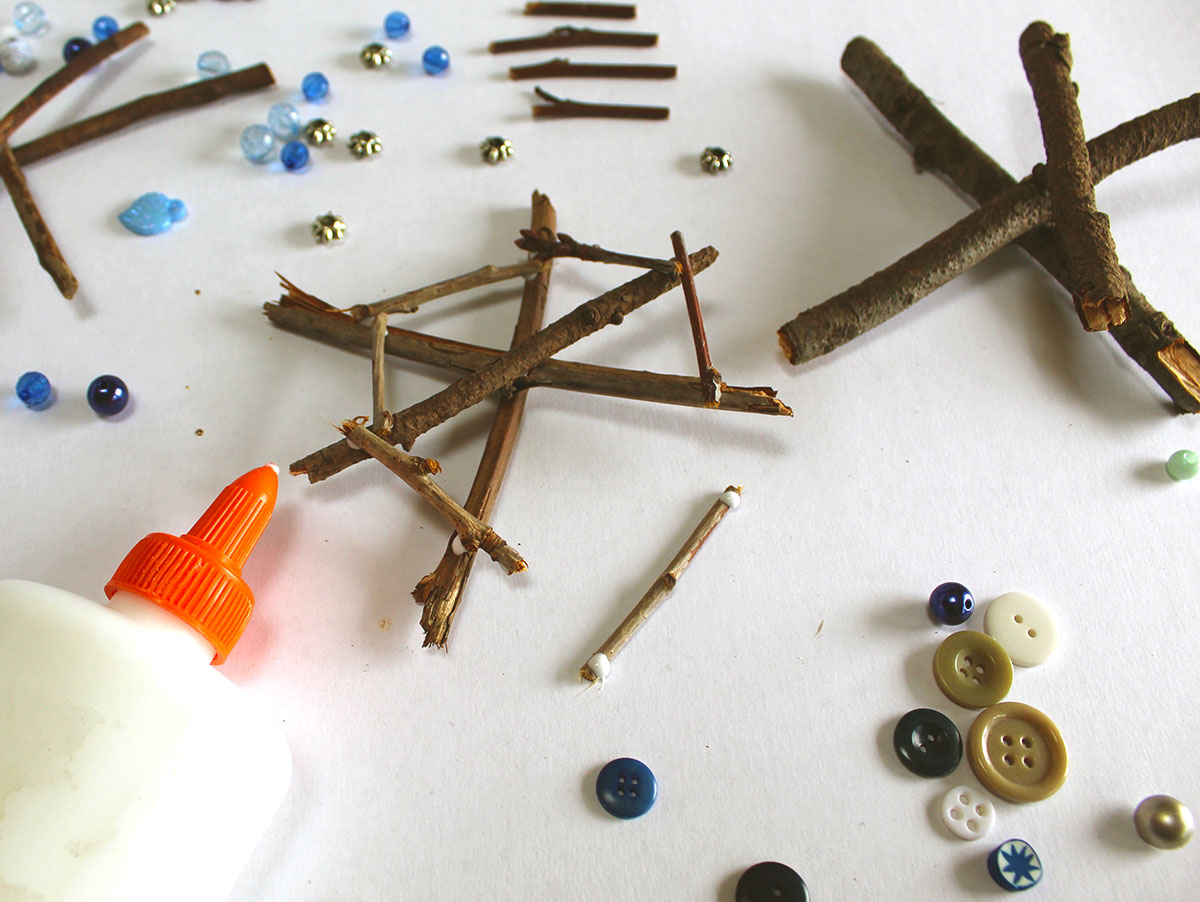
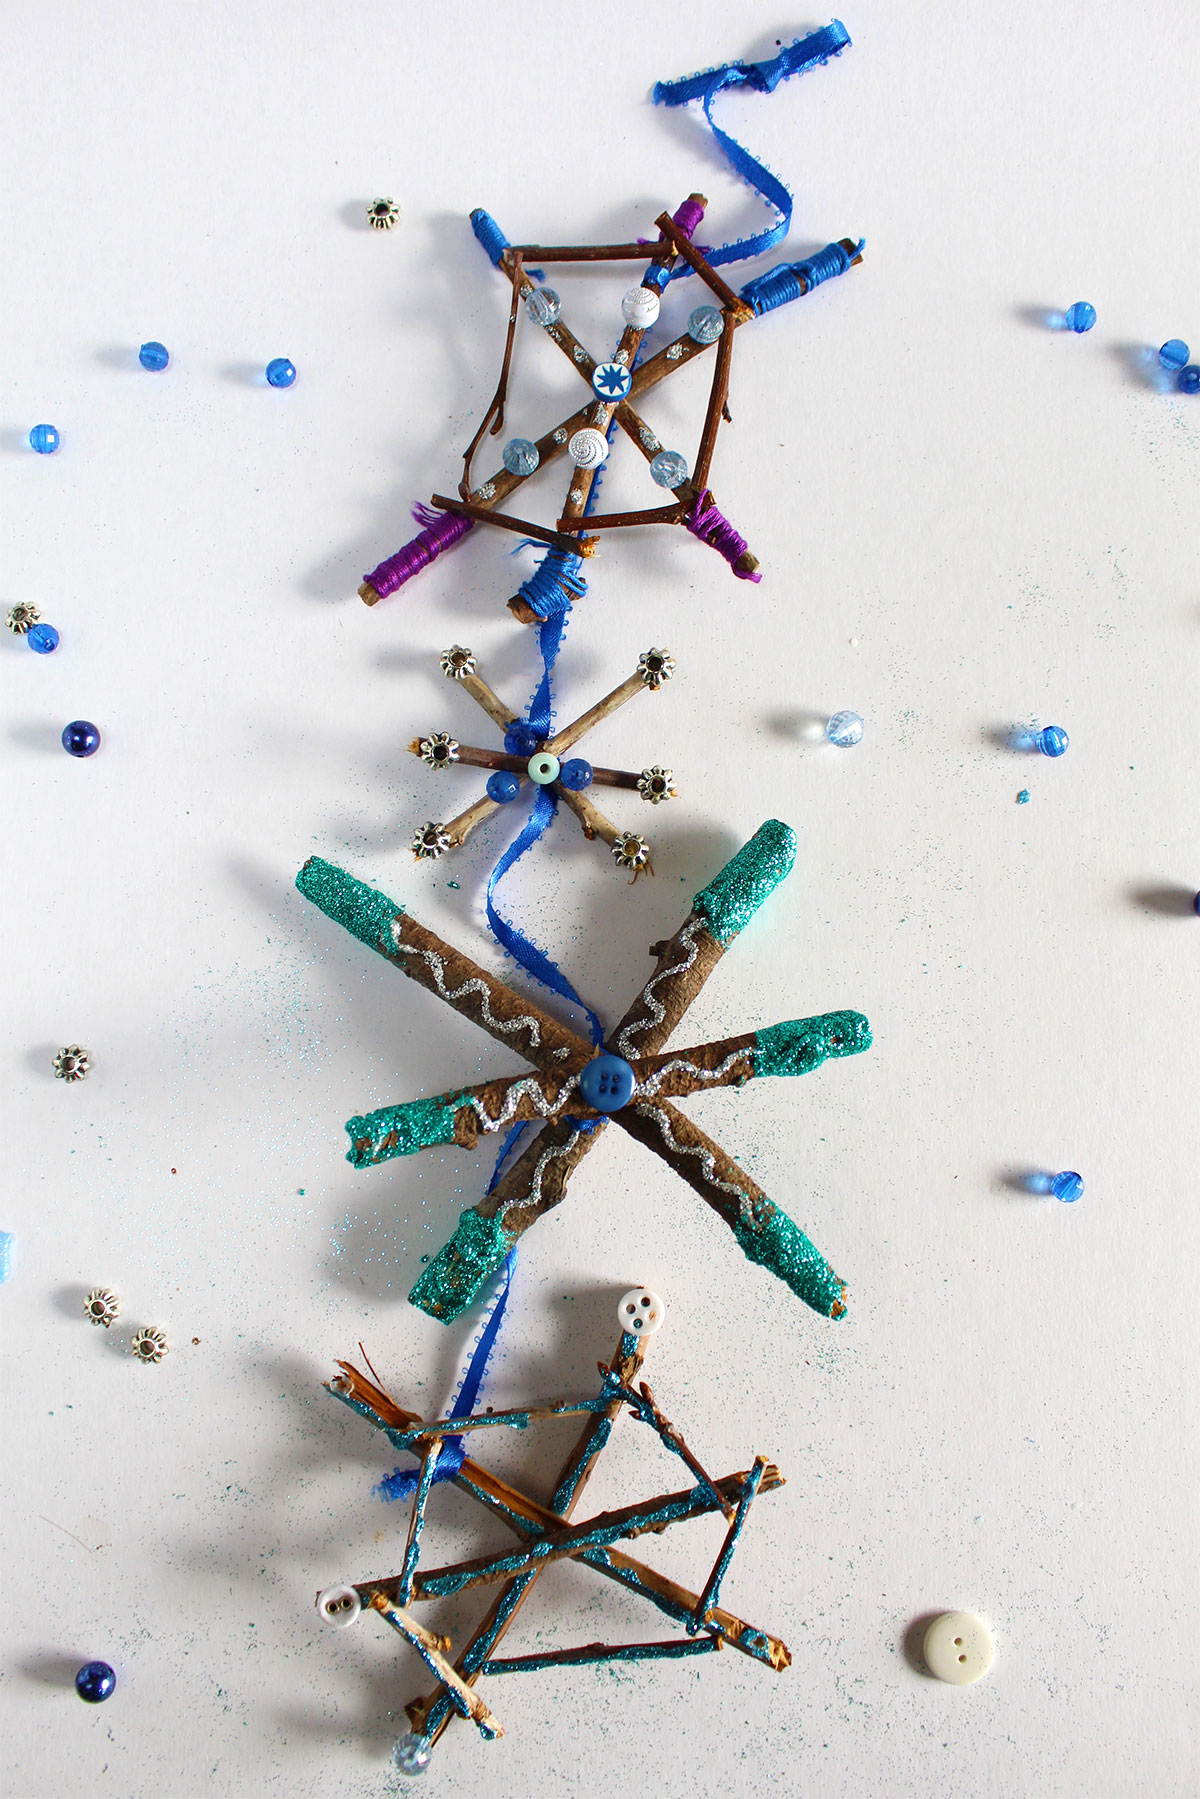
Step 1. For each snowflake, dab some glue in the middle of a twig, add a second twig, and then repeat to add a third. Allow the glue to dry fully. Then, if adding smaller twigs, dab glue on each end of a twig and place it down carefully to connect two larger twigs; repeat this all the way around, then leave the snowflake to dry again before you begin decorating.
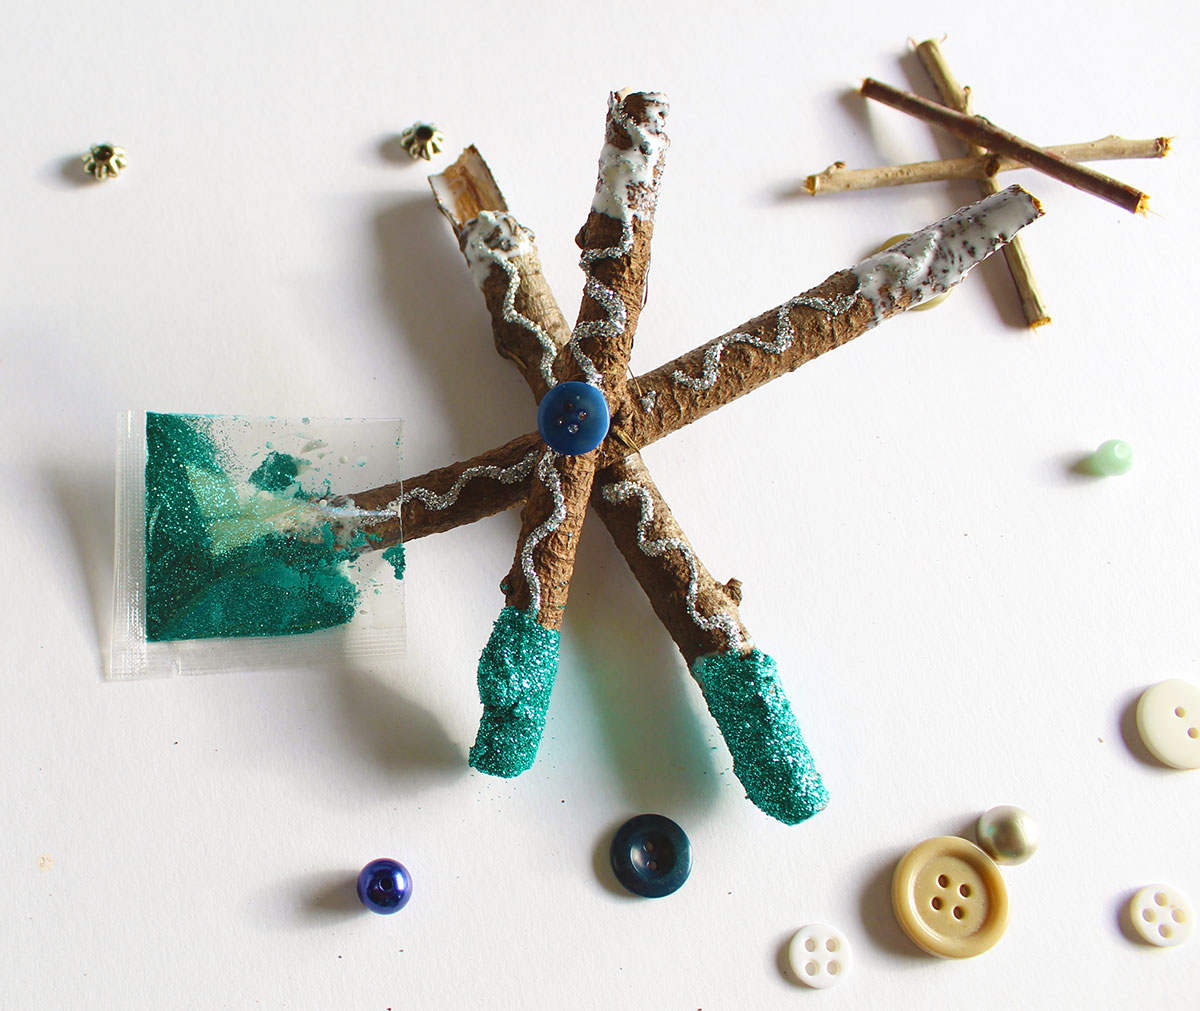
Step 2. Decorate your snowflakes! Experiment with your materials; there are so many different designs you can make by drawing with glitter glue, painting glue onto sections of a snowflake and then covering with glitter, and gluing on beads and buttons.
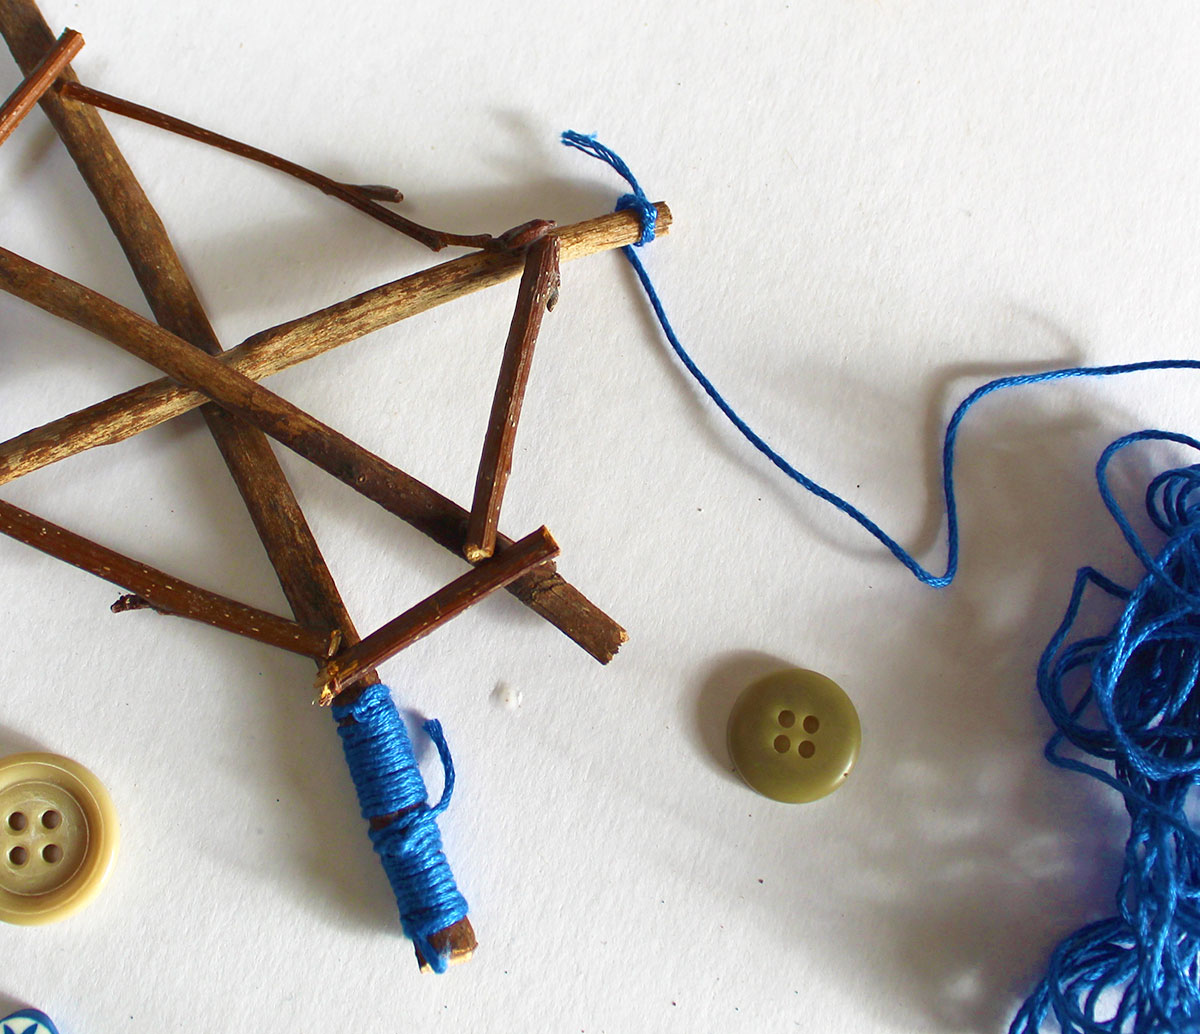
Step 3. You can wrap the tips of a snowflake by tying the end of a piece of embroidery floss around the tip, then winding down the twig (hold the loose end against the twig so that you end up wrapping around it, too). Tie and snip the floss when you reach the end of the section you want to wrap.
Step 4. Tie a loop at the end of the ribbon. Then, a little farther down, tie the ribbon once near the top of a snowflake. Repeat this for each snowflake, leaving a little space between them, then snip any extra ribbon at the bottom. Hang your snowflake garland on a wall, door, or to catch the light in a window!
Don’t forget to follow us on Twitter, Instagram, Pinterest, and Facebook!
 Contributor
Sara Williamson is an illustrator, designer, and content creator based in Victoria, British Columbia. She illustrates posters, articles, album covers, and in 2016 published her first children’s book, Holey Moley, written by Sam Chilton. She lives on an organic vegetable farm with a one-eyed chicken named Gatsby.
Original content © 2019 Super Simple. Not to be reprinted without express written permission. Terms of Service.