
O Christmas tree, O Christmas tree
How lovely are thy branches
O Christmas tree, O Christmas tree
How lovely are thy branches
Your boughs so green in summertime
Stay bravely green in wintertime
O Tannenbaum, O Christmas tree
How lovely are thy branches
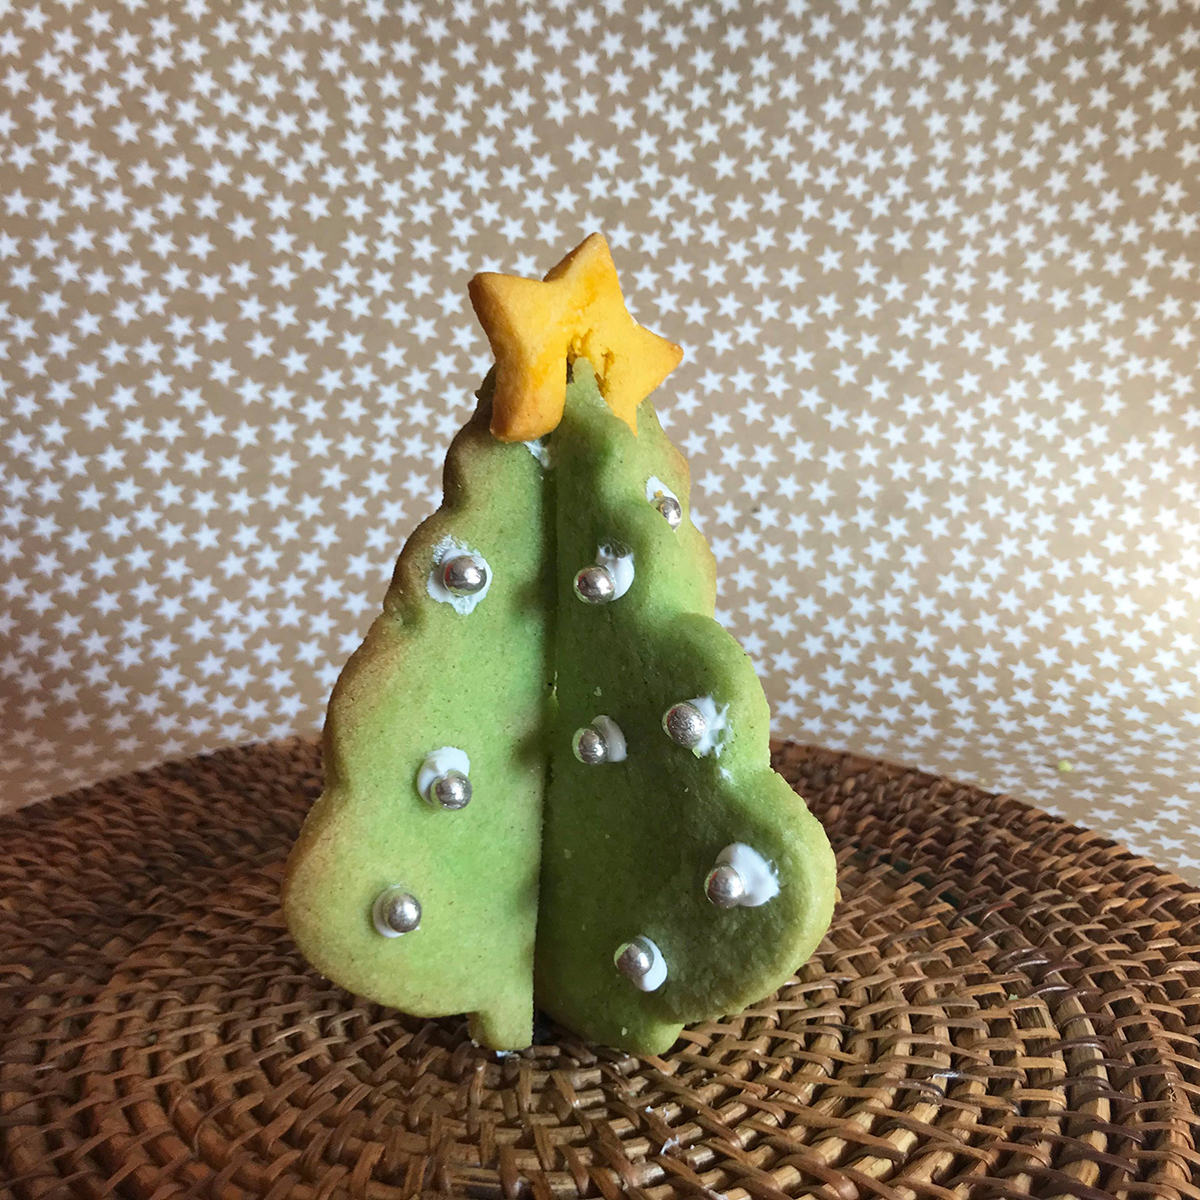
Perhaps you have a Christmas party you want to impress your guests with, or simply that you want your children to get involved with Christmas baking this year. We have just the thing for you. Do something different this year and create some 3D Christmas tree cookies. Your kids will love them and they will bring wow factor to any food spread or cup of tea! Use your favourite sugar cookie recipe, or if you don’t have one we have provided the one we used. We also tried out and included a gluten-free sugar cookie option too which held together and wasn’t crumbly at all.
3D Christmas Tree Cookie Recipe
Ingredients:
- 1 cup Unsalted butter
- 1 cup Sugar
- 1 Egg
- 1 tsp vanilla extract
- 1 tsp of cinnamon powder
- 3 cups plain flour
- 1 1/2 tsp baking powder
- 1/2 tsp salt
- Green gel food colouring
- Yellow gel food colouring
- Cake decorating silver balls
- White icing tubes
Gluten Free Recipe
Ingredients:
- 1 cup sugar
- 1/2 cup butter
- 1 tbsp water
- 1 1/2 vanilla essence
- 1/4 tsp salt
- 1 tsp cinnamon powder
- 1/2 tsp xanthum gum
- 2 cups plain gluten free flour
- Green gel food colouring
- Yellow food colouring
- Cake decorating silver balls
- White icing tubes
Follow the recipe below and just add your 1 tbsp of water in with your wet mixture and then your xanthum gum with your dry flour mixture.
Tools:
- Christmas tree cookie cutter
- Star cookie cutter, small
- Baking parchment
- Scissors
- Baking tray
- Rolling pin
- Sharp knife
Instructions:
- Turn your oven on at 350F/ 180 C/ Gas 4.
- In a mixer or bowl, mix the sugar, butter and vanilla extract together until creamed.
- Add egg. Mix well.
- In a separate bowl mix the rest of the dry ingredients until well combined.
- Add the dry ingredients a little at a time to the wet mixture. Keep mixing until it comes together in a dough.
- Remove a quarter of the dough from the dough ball and add a dab of yellow gel food colouring to it. Massage it into the dough until it all becomes yellow.
- Add some green gel food colouring to the remaining dough and massage into it until it is all green.
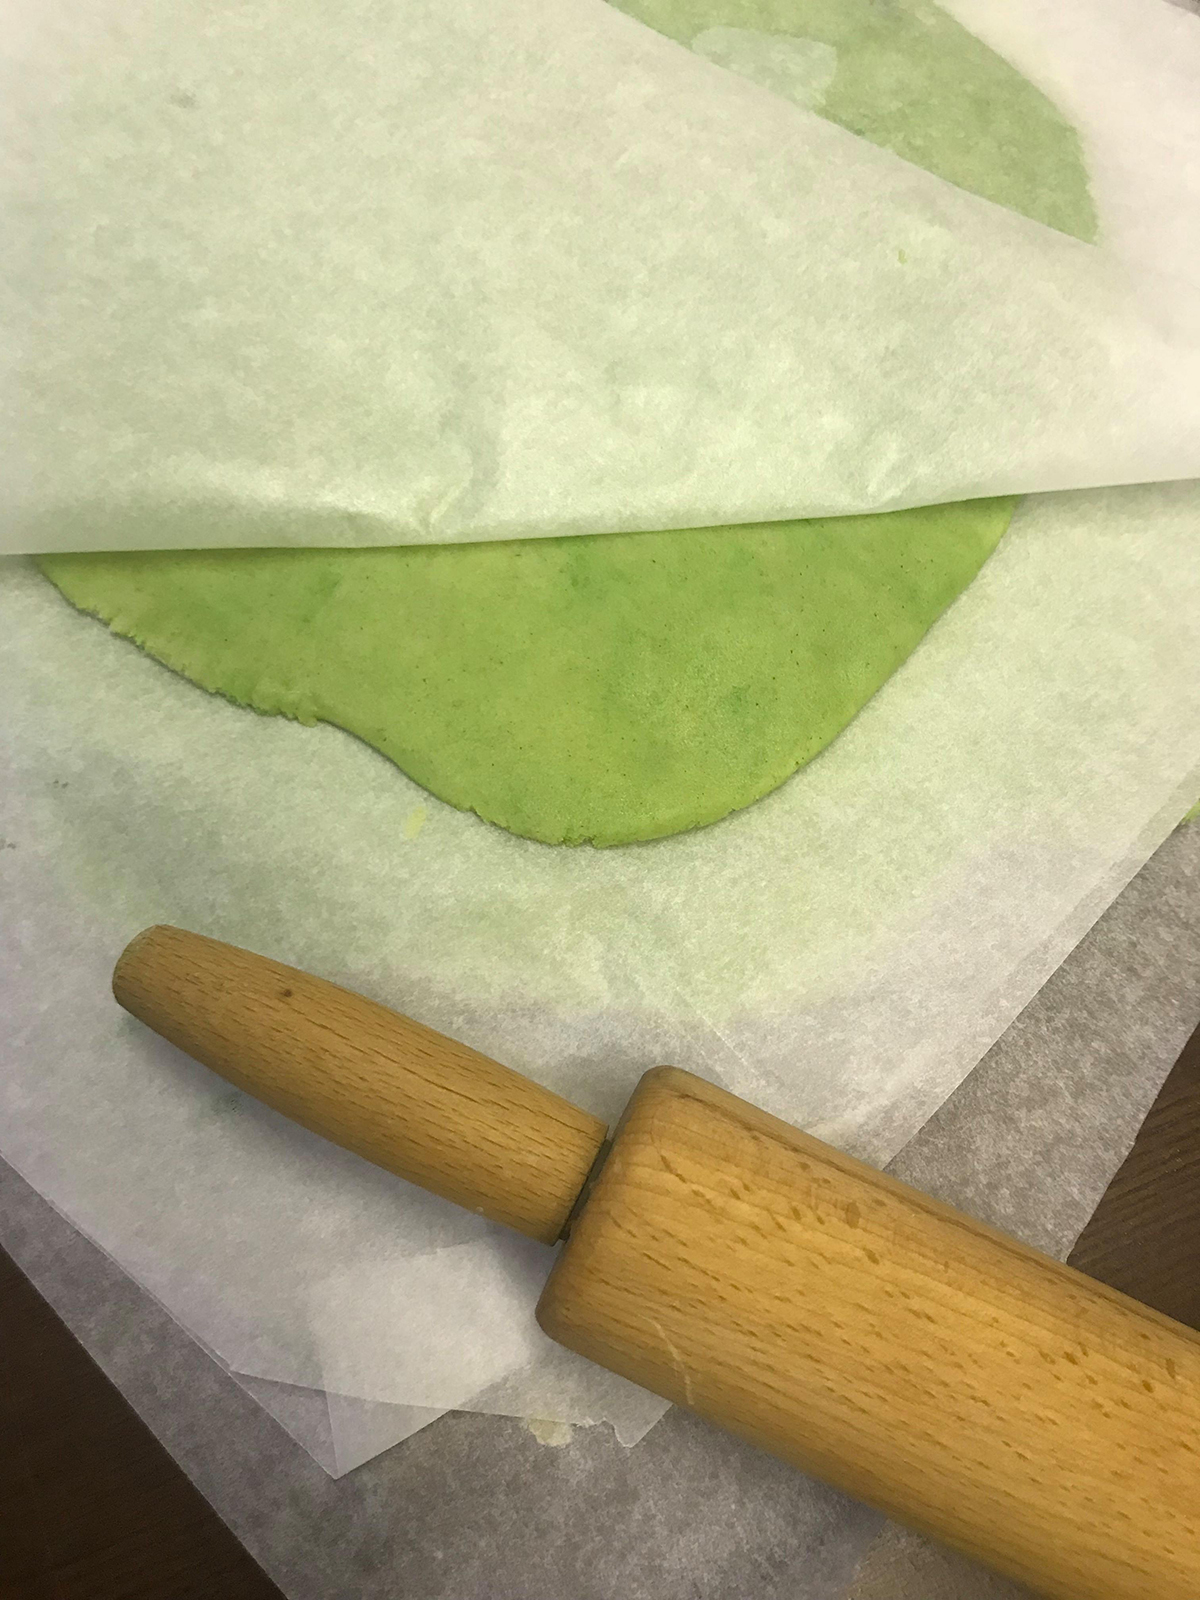
- Cut four large rectangles of baking parchment. Put the two balls of dough onto the baking sheets and sandwich them between two baking sheets. Roll them out with your rolling pin. Don’t make them too thin.
- Put them into the refrigerator for at least an hour. This is a really important part. You need the butter in the dough to be cold when you cut them and bake them otherwise they will lose their shape.
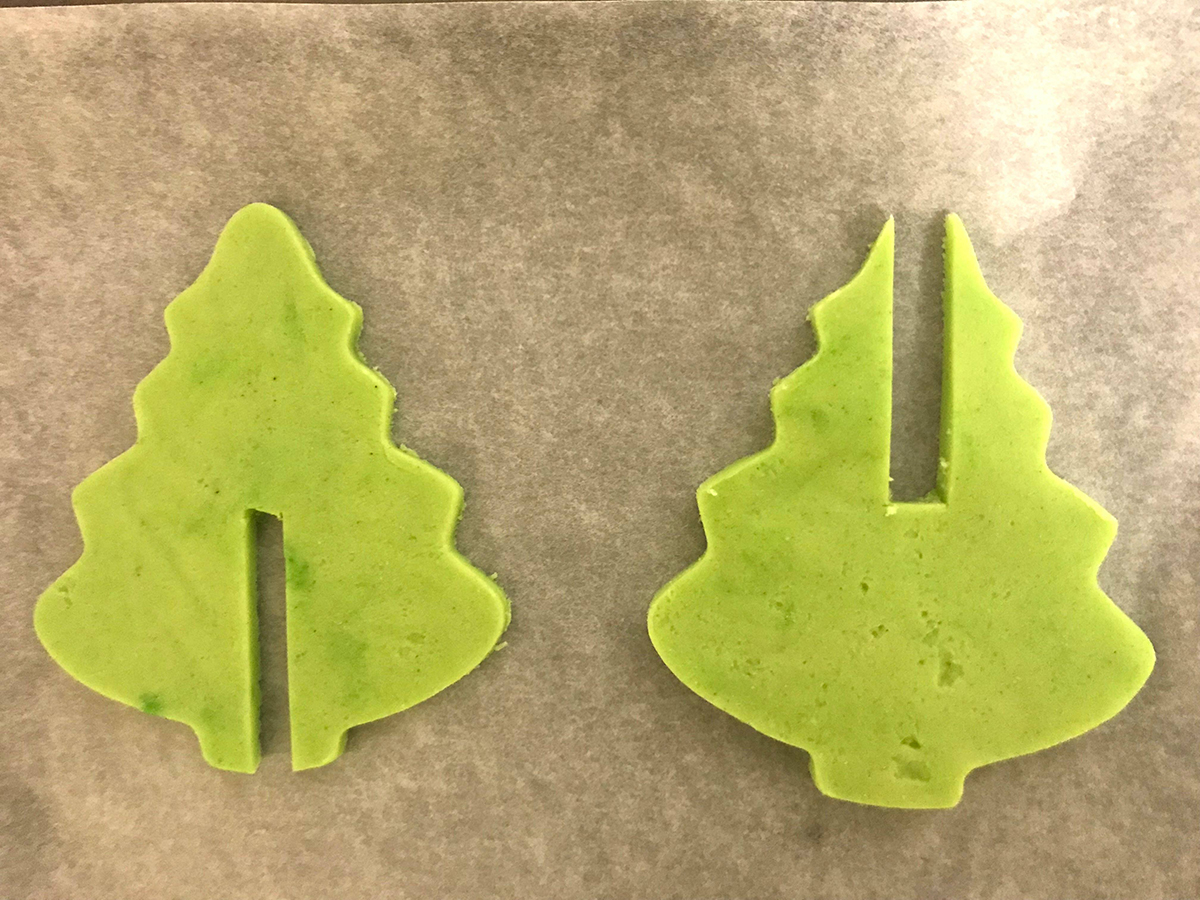
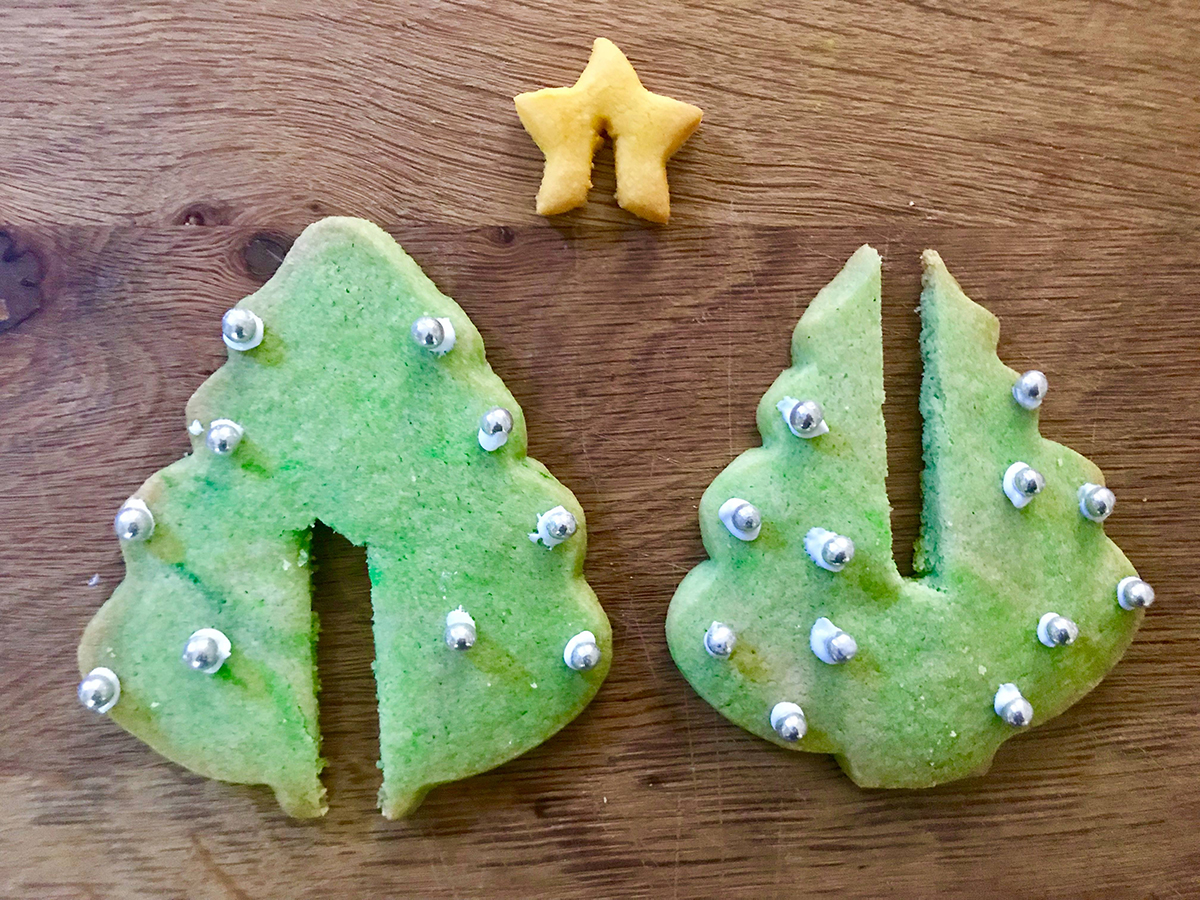
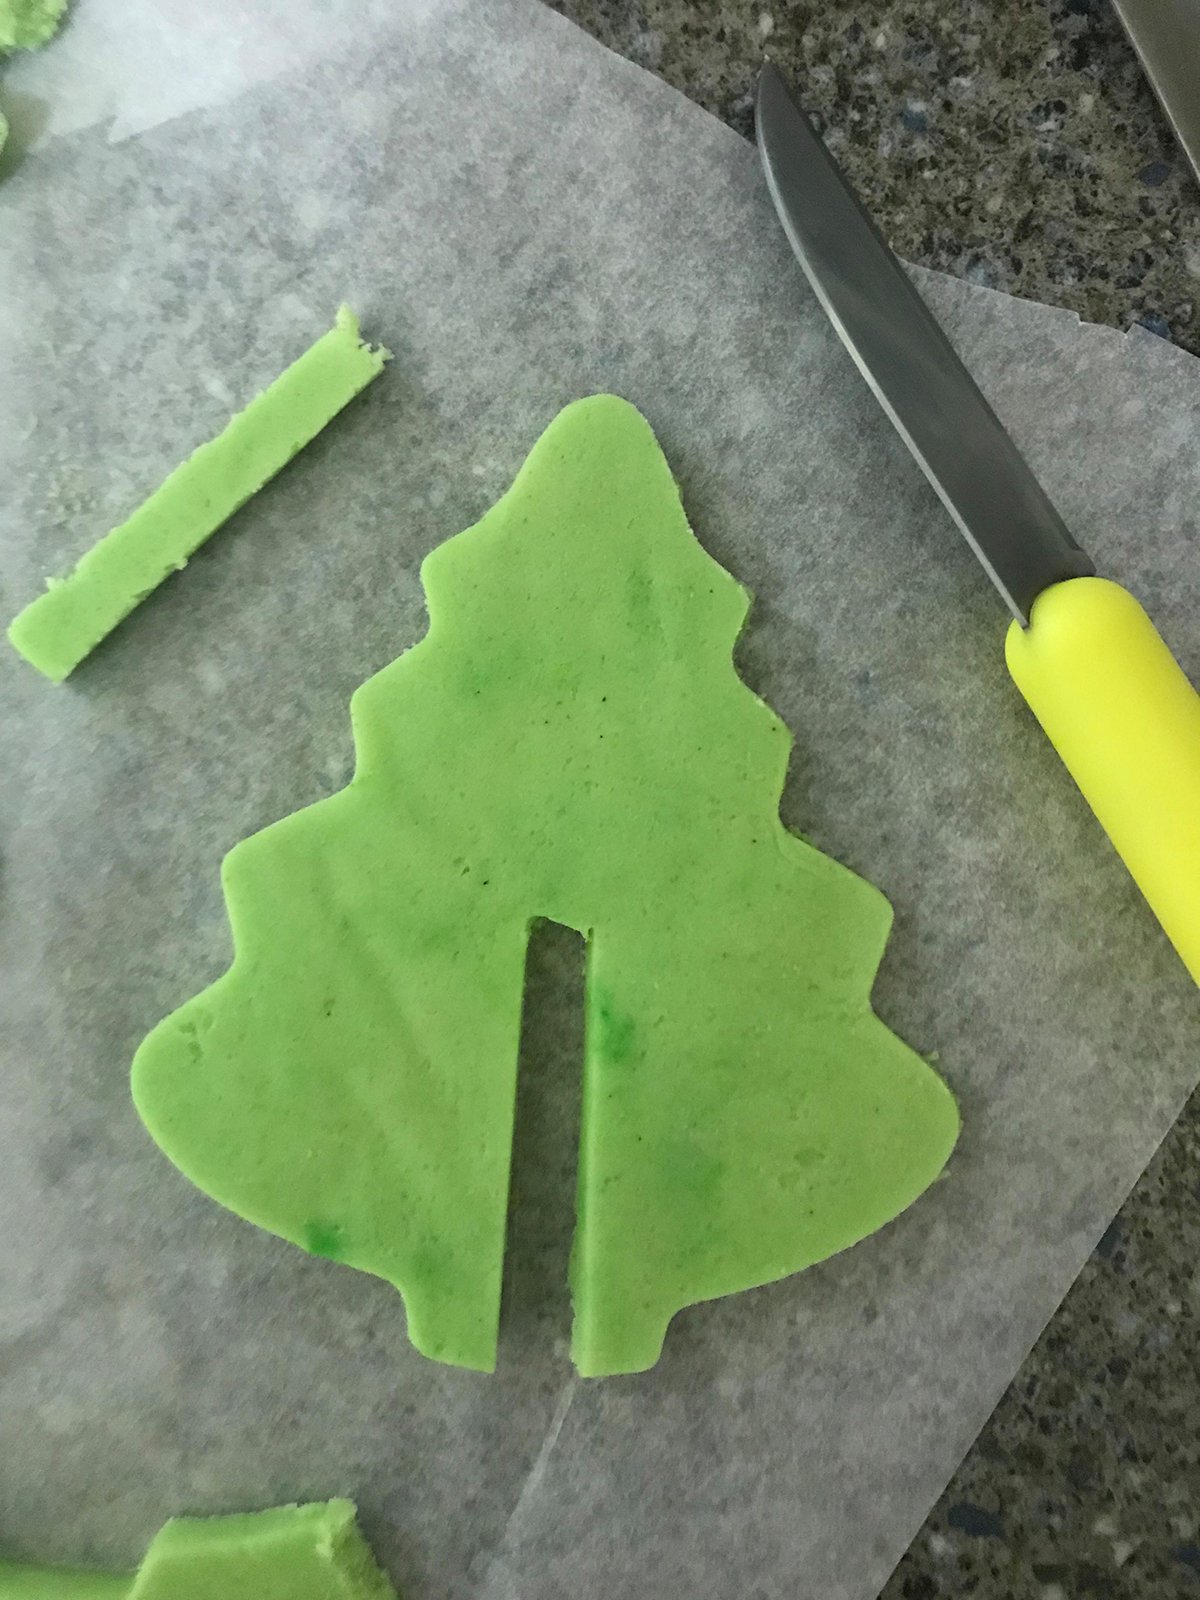
- When ready, take the dough out of the fridge, one at a time. With the green dough cut out as many Christmas trees you can. Separate them with the rest of the dough and then in half of them, using a sharp knife, cut a thin rectangle from the tree trunk halfway up to the top. With the other half of trees do the same but this time from the tip of the top of the tree down to the halfway point. Put the disregarded pieces back into the rest of the dough and re-roll. Keep cutting until all used up.
- Put all the cut Christmas trees back into the fridge to get cold again.
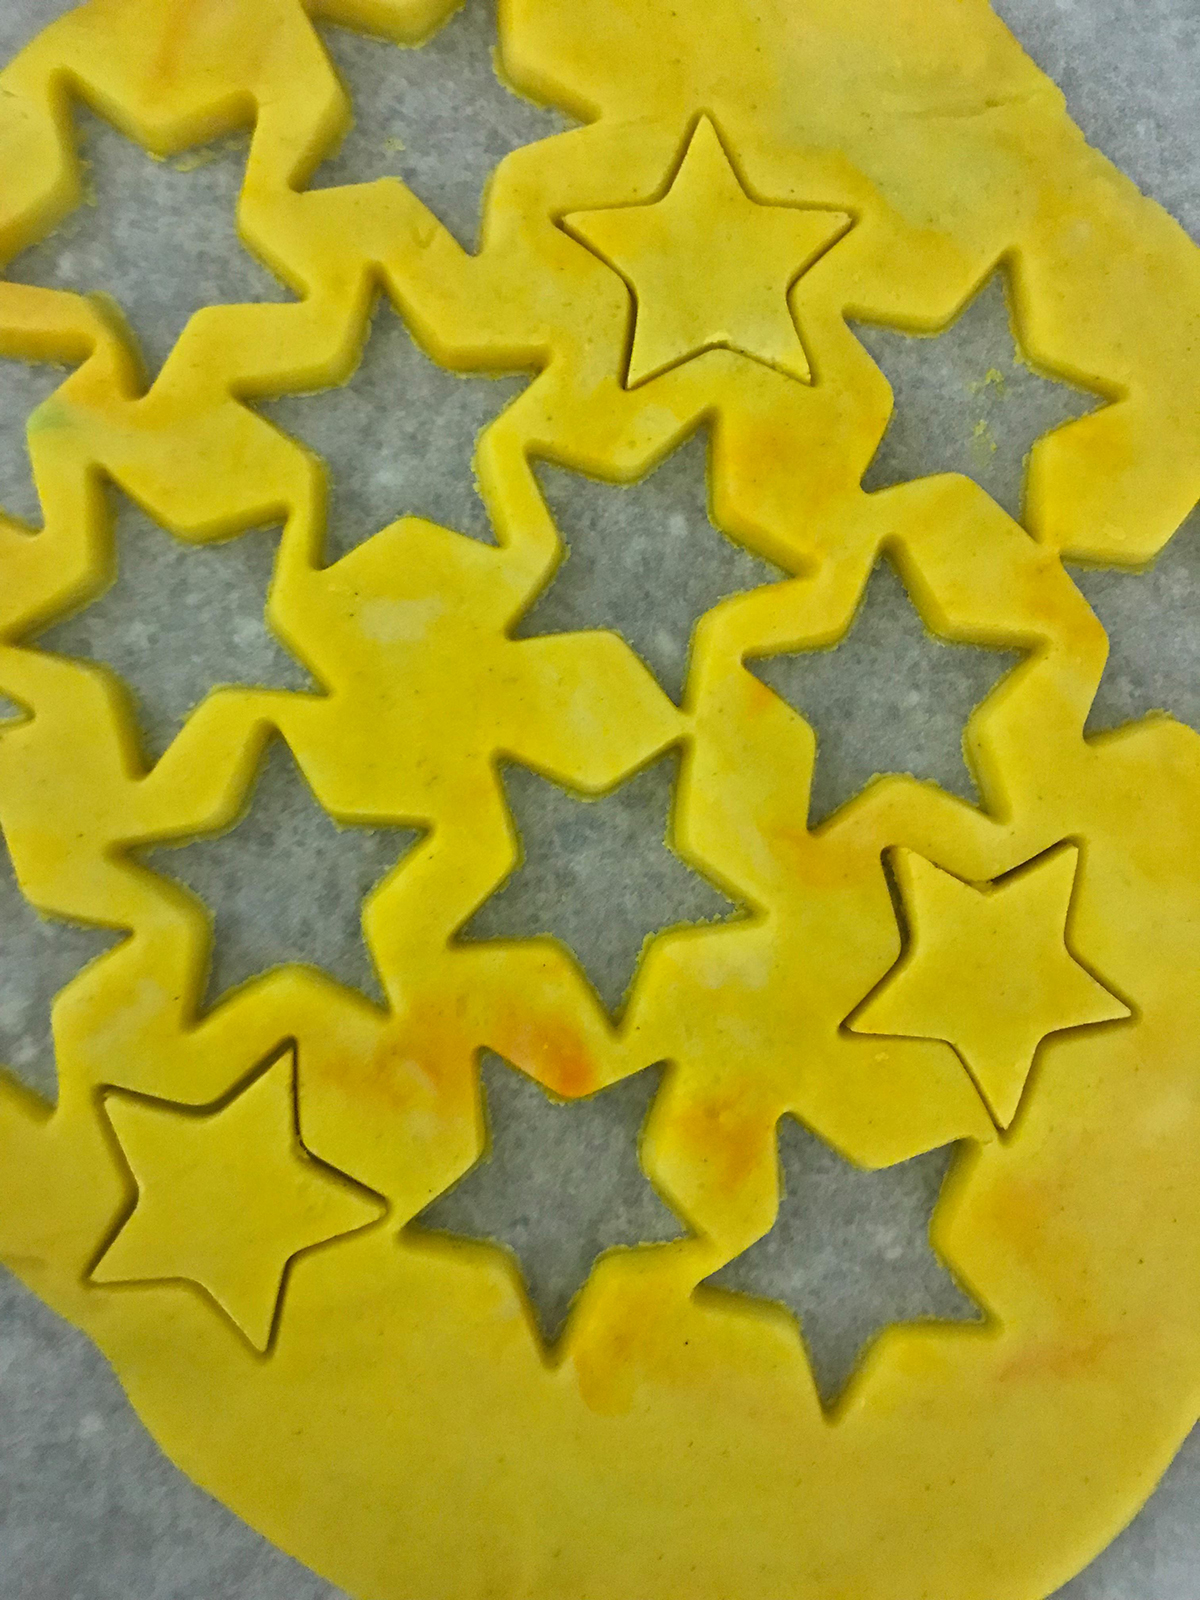
- Take the yellow dough out of the fridge and cut out as many stars as you can. Then using the knife cut a wide rectangle in the stars. Put them back in the fridge.
- Lay out your Christmas trees on your baking tray. Space them out so they don’t touch. They will expand in the oven.
- Put them in the oven for 12 minutes.
- When they come out of the oven, you will need to work swiftly. The rectangles that you cut will need to be recut. Work quickly while the cookies are still warm. Then leave to cool.
- Repeat with steps 13-15 with the stars.
Decorating them
- When they are cold, get your children to decorate them using the white icing as a glue substitute so you can stick the silver balls on them.
- When they have dried, slot one of the Christmas trees with the cut trunk slowly onto a Christmas tree with the top cut from it. Gently stand it upright on the table and take a star and slot it on to the top of the Christmas tree. Ta Da!
TIP:
The two most important parts of making these cookies are making sure the dough is kept cool and secondly, to work fast to recut the rectangle slots when they come out of the oven.
As always share your makes on social media and tag us so we can see them!
Don’t forget to follow us on Twitter, Instagram, Pinterest, and Facebook!
 Contributor
Grace Selous Bull is an arts education author and freelance blogger. Her book, ‘Potty About Pots: arts and crafts for home and school’ is aimed at children from 5-12 years old and takes them through a journey of ceramics through time. She is a full time Mummy of two girls, both of whom love being creative, and is married to her husband, Andrew, who does not.
Original content © 2018 Super Simple. Not to be reprinted without express written permission. Terms of Service.