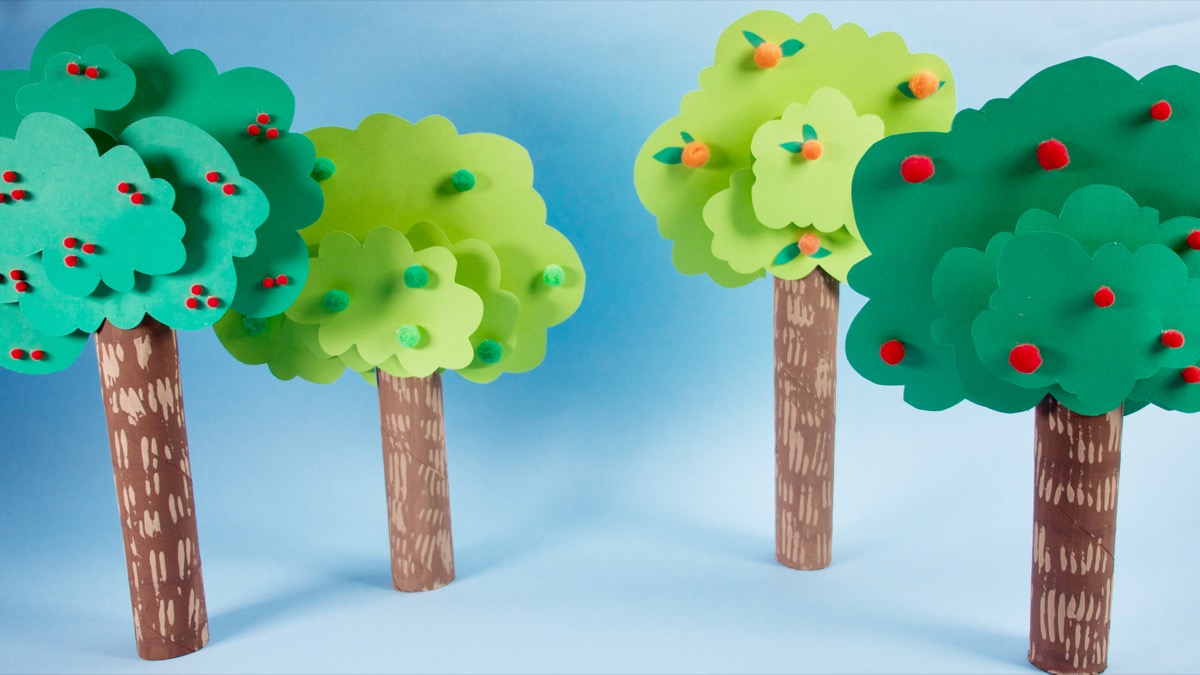
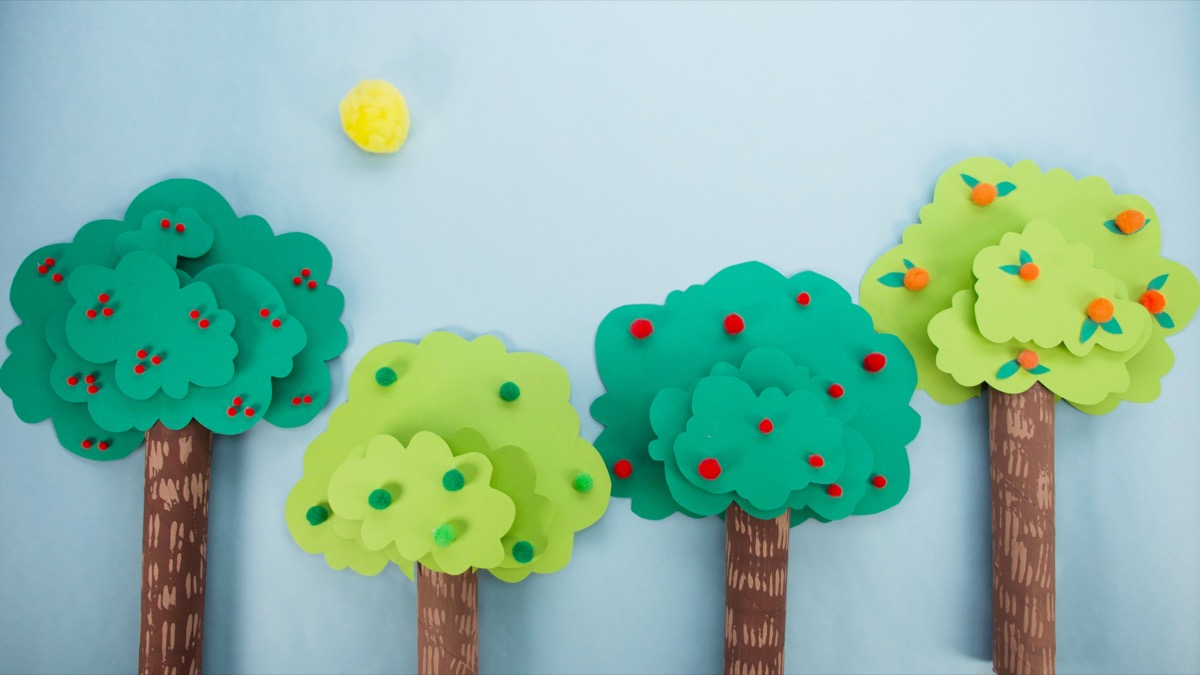
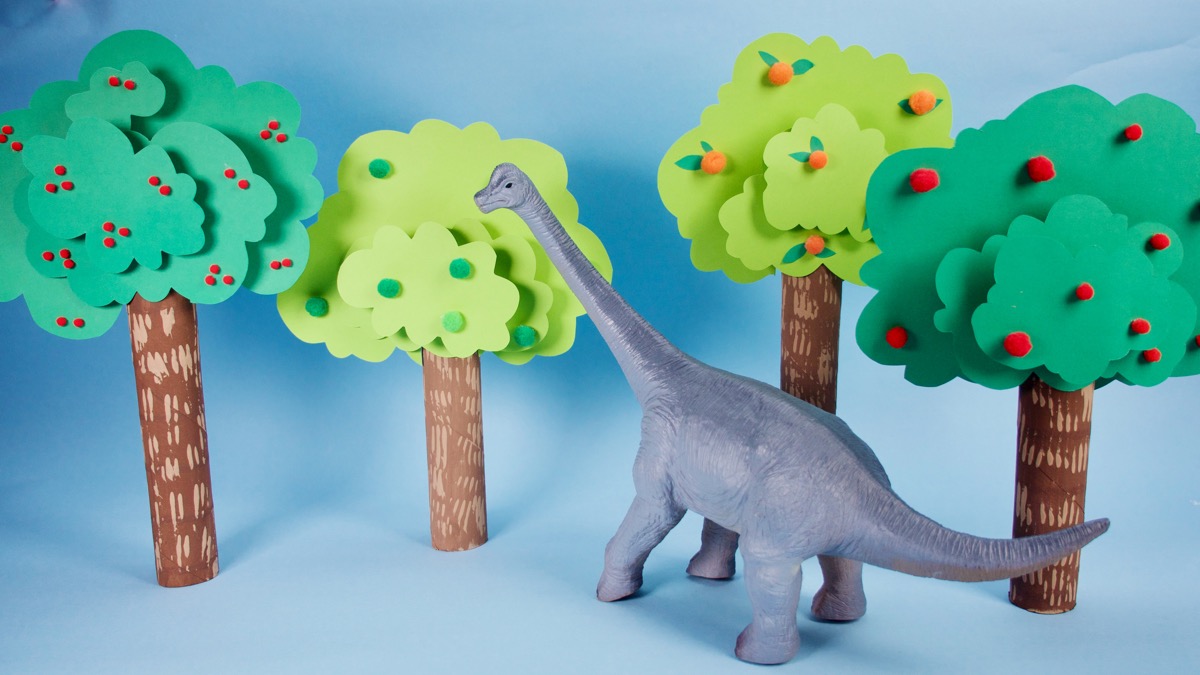
We love trees! Trees do so much for us – they help clean the air, give animals a place to live, grow delicious food, and so much more. Plus, they are very beautiful to look at. We think our stand up tree craft is pretty beautiful, too! You can make one tree, or create a whole forest to play in. Who will live in your forest? What kind of fruit will your trees grow? There is so much to love about trees, and we hope you love these tree crafts, too!
If you are looking for a tree craft for young children, please try our Tissue Paper Tree Craft – it may be easier to get them involved, and it will be more rewarding for them to make!
Things you’ll need
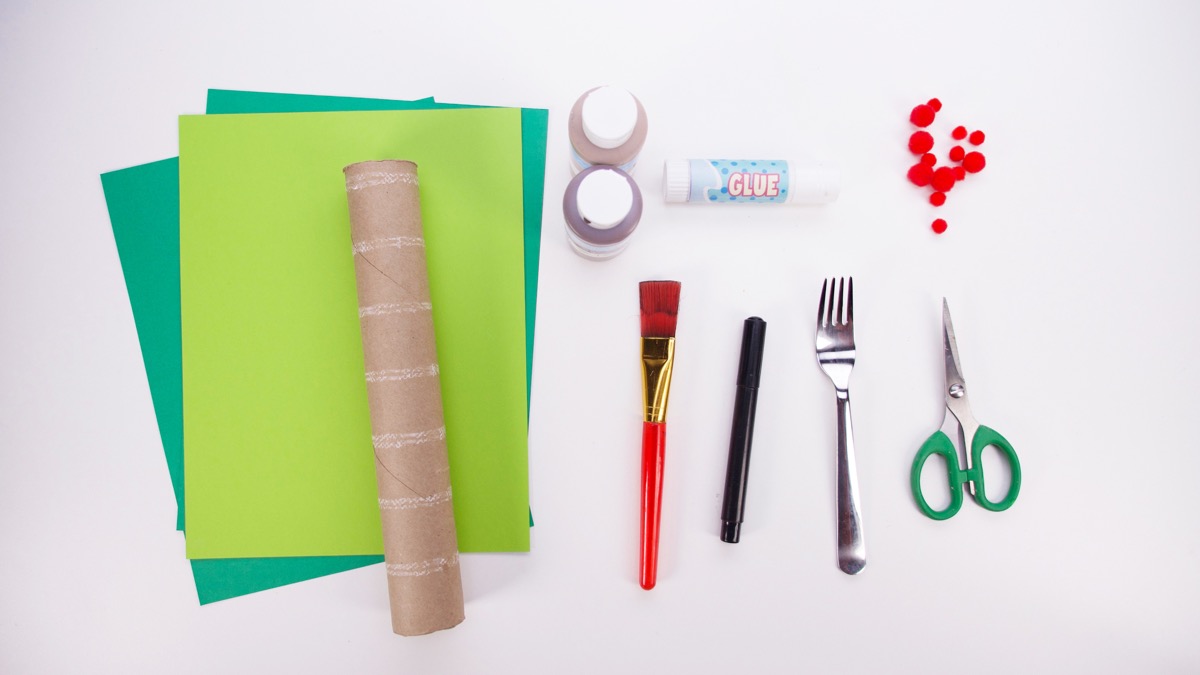
- 2 sheets of heavy green construction paper or bristle board
- Black marker
- Scissors
- Paper towel tube
- Light and dark brown craft paint (you can make brown craft paint darker by mixing in some black paint)
- A fork
- Paint brush
- Pom poms to decorate
Steps
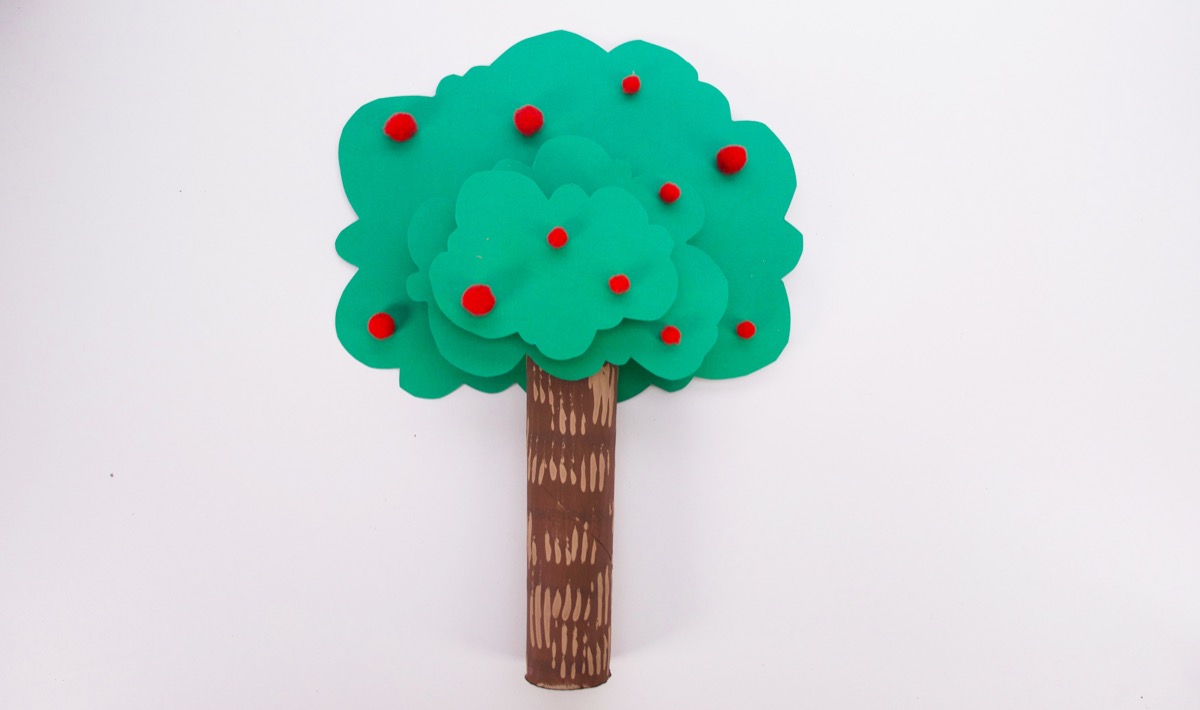
Tree Trunk:
- Trim off the length of your paper tube by a couple of inches or more – this will help the tree stand up and balance better once finished, and you can make trees that are different heights.
- First, paint your paper tube the darker shade of brown. Leave to dry. (You can speed up the process with a hair dryer!) Once the paint is dry, dip a fork onto the lighter shade of brown paint, and paint your paper tube. This makes a beautiful tree bark texture on the tree trunk!

Tree Top:
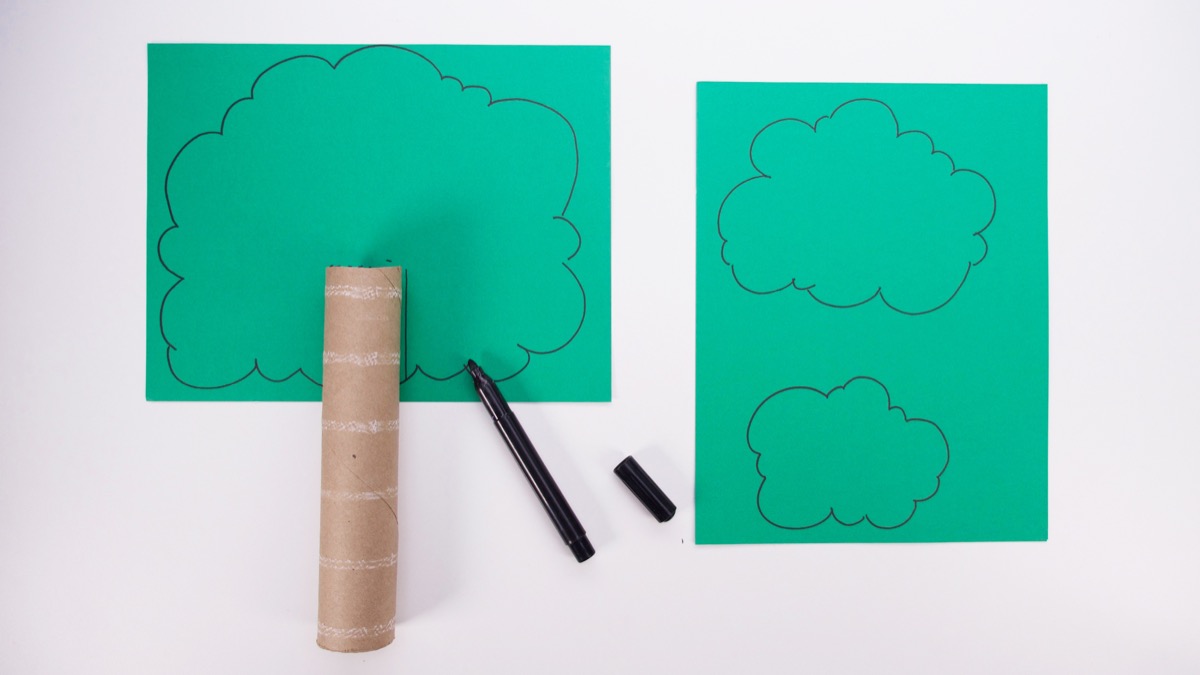
- Draw a large tree top shape onto a piece of green construction paper, and draw a medium and small tree top shape onto another piece of green construction paper.
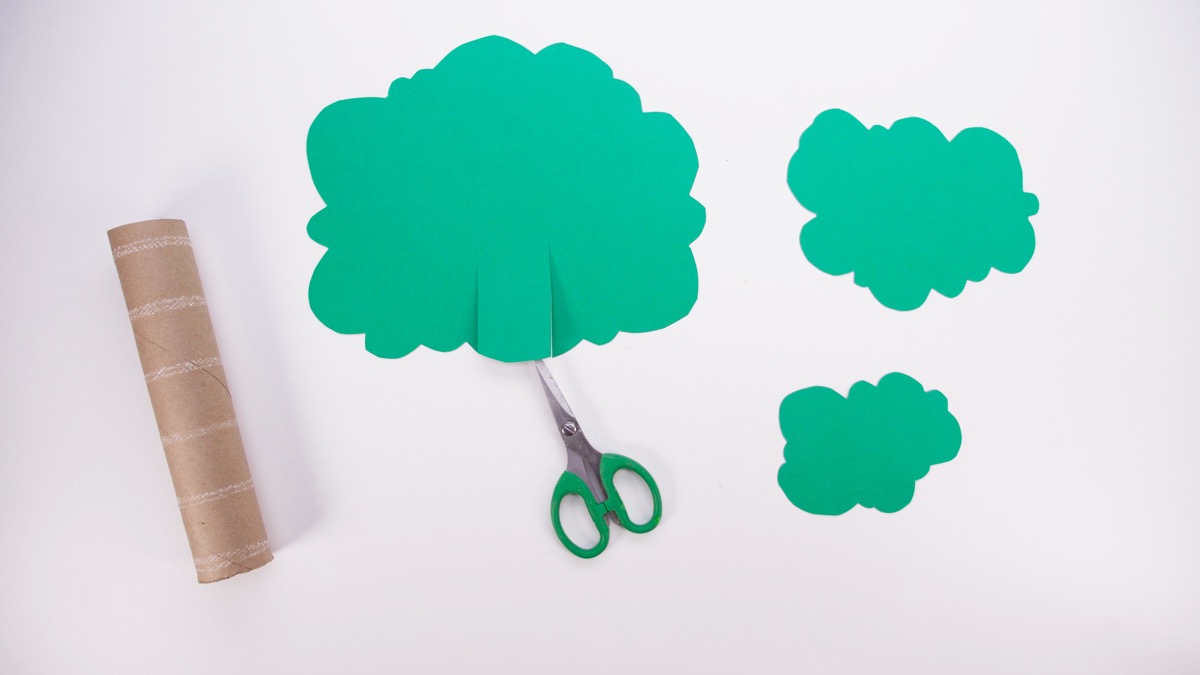
- Place the paper tube (your tree trunk) on the bottom of your largest tree top shape and have it overlapping by three inches, or so. Trace the sides of the tube onto the tree top shape. Cut out all three tree top shapes, and cut along the two lines drawn on to the largest tree top shape.
Assembly:
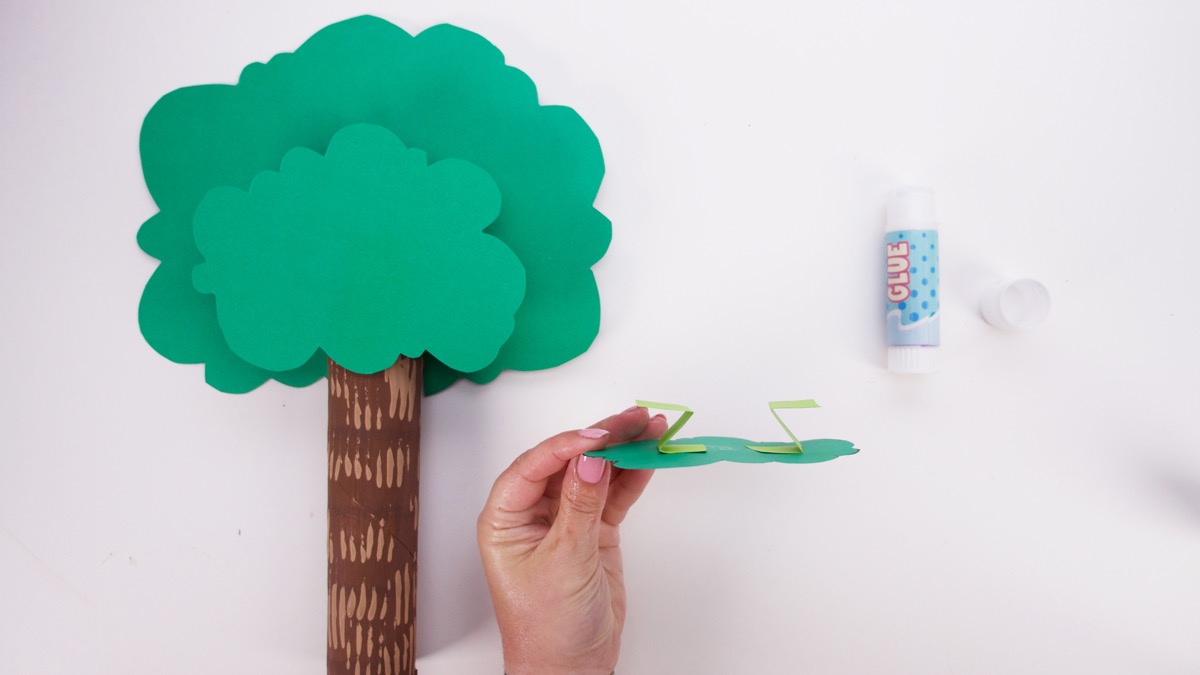
- Insert the large tree top shape into the tube with slits sitting on either side – it should stay upright. With a glue stick, glue the medium size tree top shape onto the front of the tube. Now you can start to see the 3-D shape start to form! Then add the smallest tree top shape. To do this, cut two strips of paper about two inches in length and fold both of them in a Z shape (see photo). Glue one side of the pieces of paper to the back of the small tree top shape, and glue the other side to the medium size tree top shape.
- If your tree needs help standing up, you can glue bottle caps to the bottom!
Decorate:
- Decorate your tree however you like! We used pom poms to make different kinds of fruit. You may like to paint, stamp, cut out fruit or leaf shapes, add birds or squirrels, or leave it as it is! Have fun getting creative with your trees!
For more fun crafts and activities about trees, join Caitie in Caitie’s Classroom! She has a whole episode about trees!
Don’t forget to follow us on Twitter, Instagram, Pinterest, and Facebook!
 Contributor
This post accompanies a video from Caitie’s Classroom. Join Caitie in the classroom for kids songs, games, activities, stories, crafts, and much more! Catch up on past episodes and segments, follow Caitie on Facebook and Instagram, and subscribe to Super Simple Play so you never miss an episode. Don’t forget to ring the bell for notifications!
Original content © 2019 Super Simple. Not to be reprinted without express written permission. Terms of Service.