Birthday parties. Let’s be honest, they can be a source of a lot of stress for parents. Not enough ideas, too many ideas, weather is too cold or too hot, have it at home or out. If you are reading this, you already know the drill. If you ask me, starting with a theme for a party helps bring things together. Finding a theme in itself is no mean feat. Especially if you are involving the little people in your tribe. Every day may bring a new suggestion, forever spiraling into a groundhog day situation. If that’s the case, narrow it down to two choices and get them to choose between them. Once they have chosen, that’s it, no changing!
Having a theme will help you form ideas on if you want themed, for example, games, decorations, and party food. Most birthday parties have games of some sort, but let me throw something out there… what about a craft activity? Instead of spending loads of ‘dollars’ on party bags that will be ingested in seconds, resulting in crazed children for the next hour, why not spend that money on a craft they can do and take home with them. Then just pop in some birthday cake into a loot bag which you will be making anyway.
So with no further ado, let me introduce you to our Superhero Cape Party!
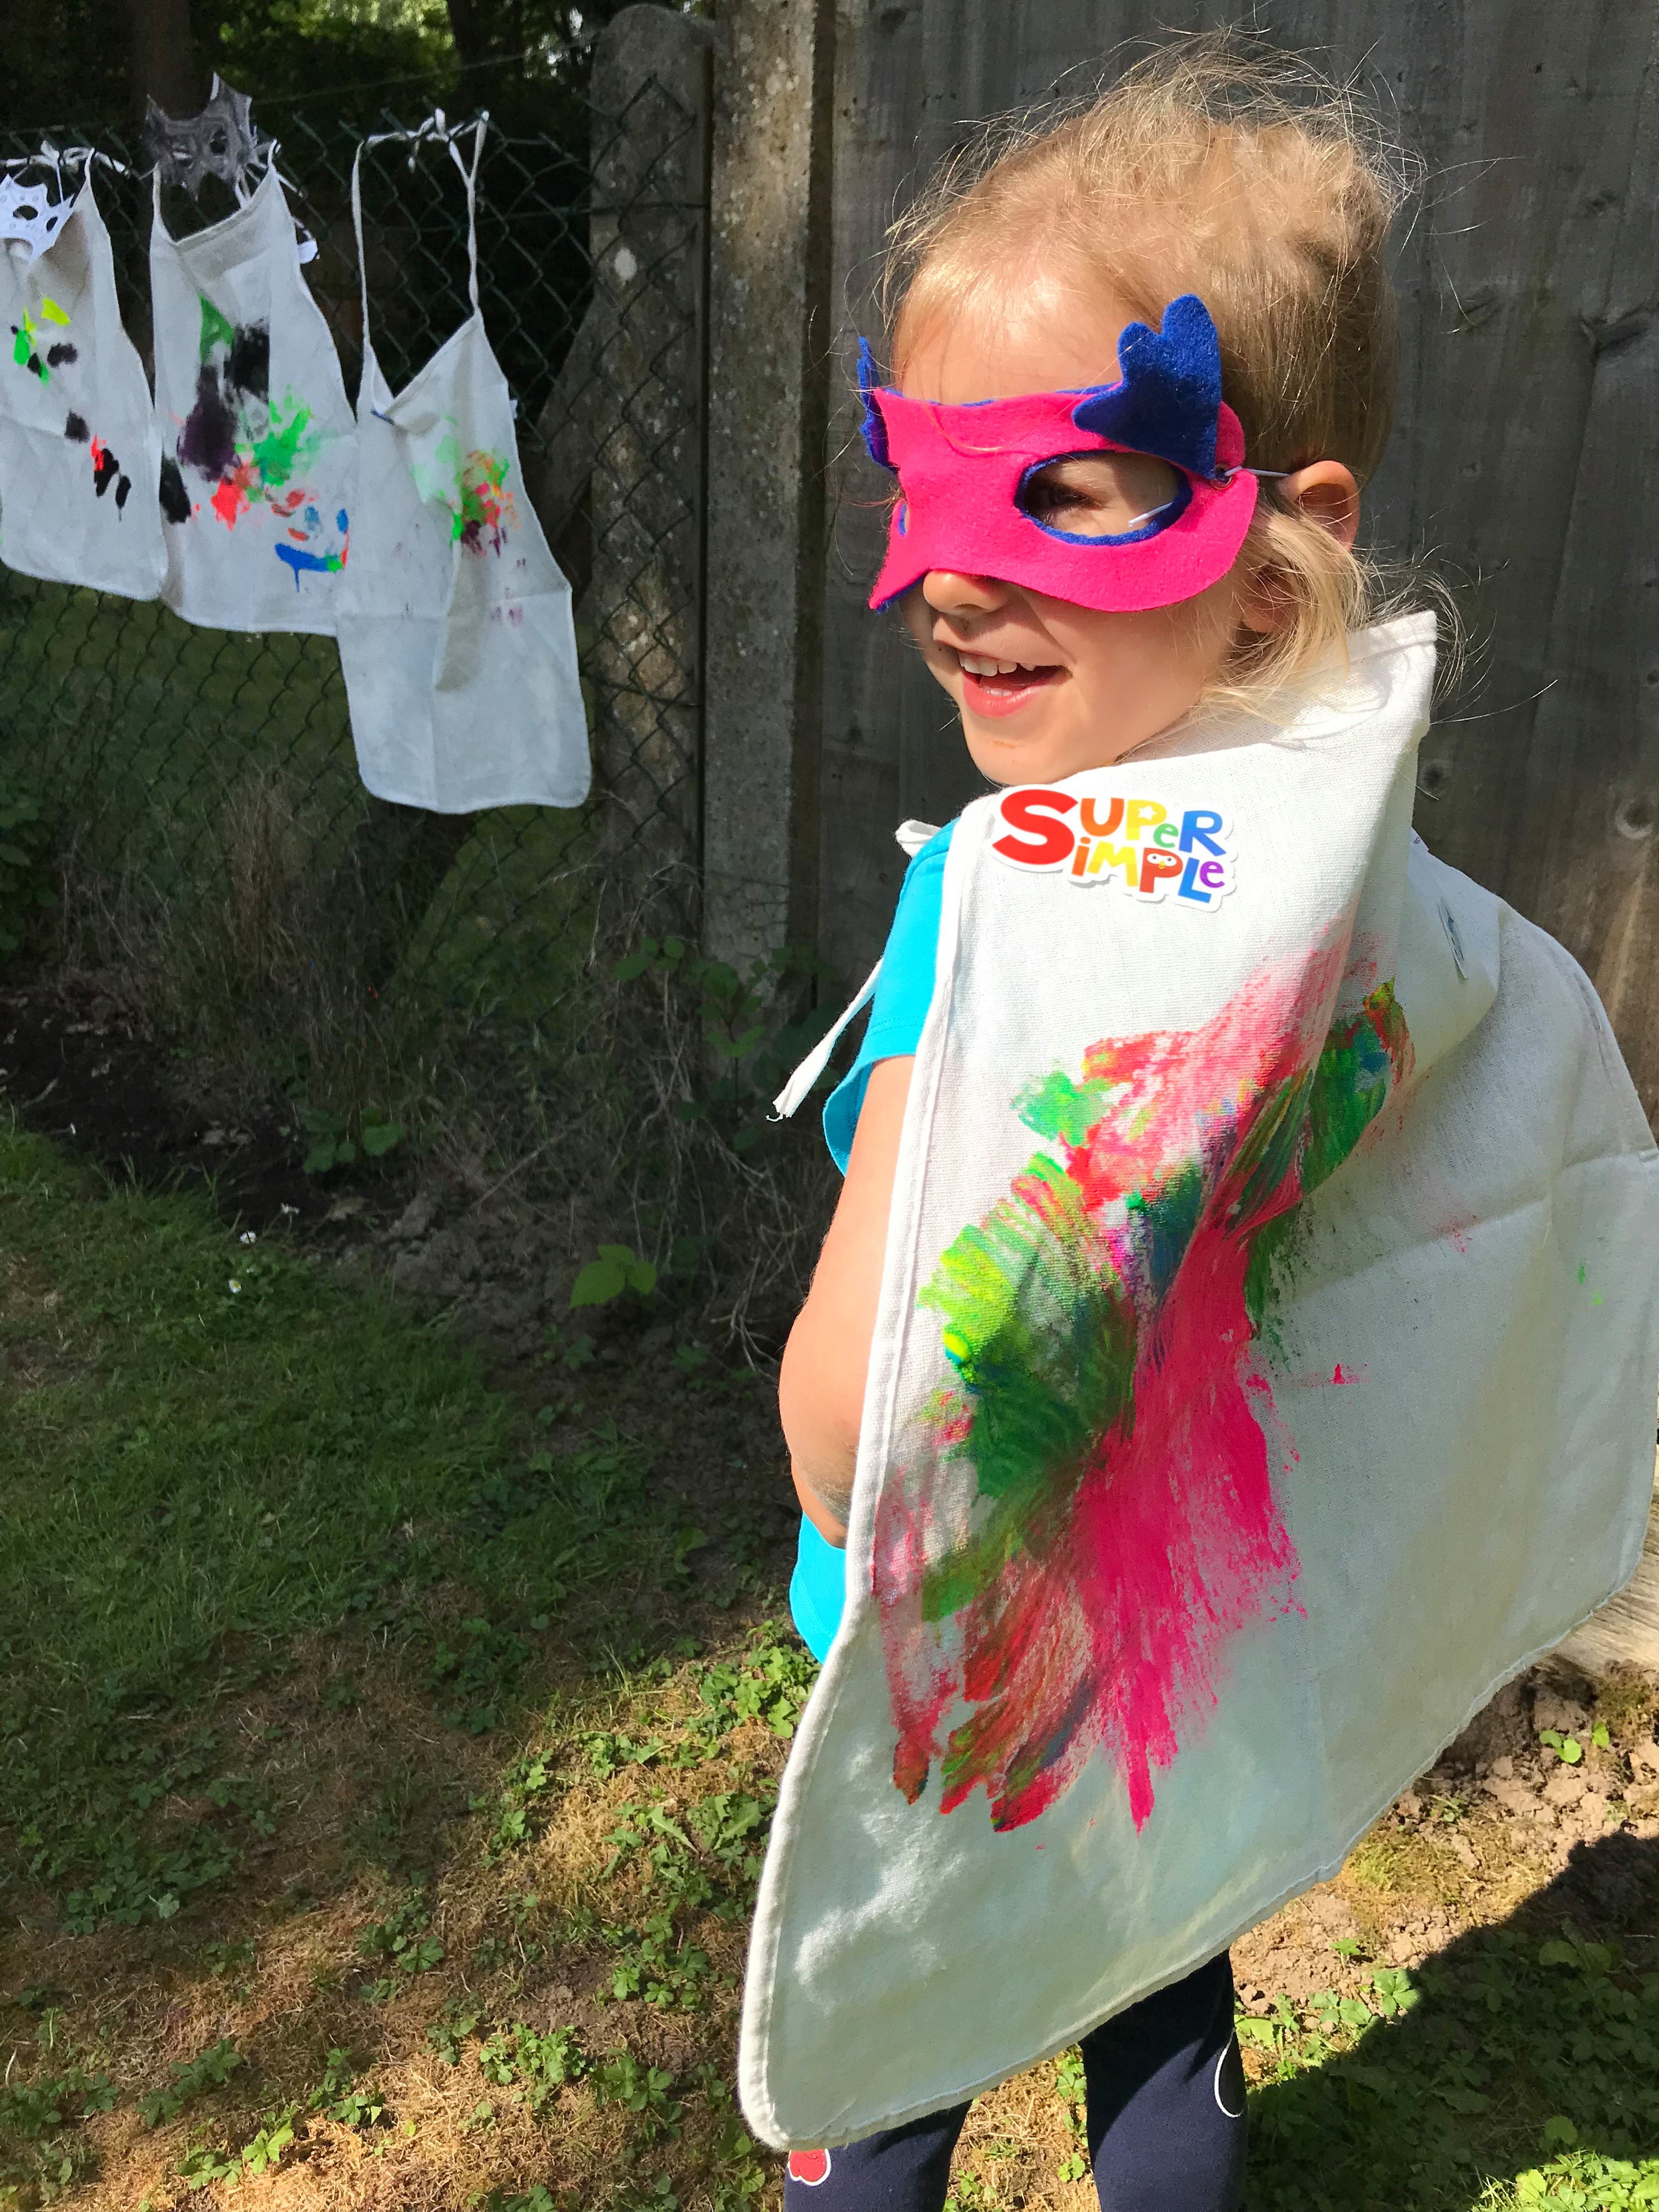
Think Captain Monsterica, think The Purple Protector, think Superheros to the rescue! Every child loves a superhero in a cape and mask, even more so if there are lots of pint-sized ones running around together. By doing a craft like this you simultaneously create imaginative play for the rest of the party and allow the parents a ‘little’ breather!
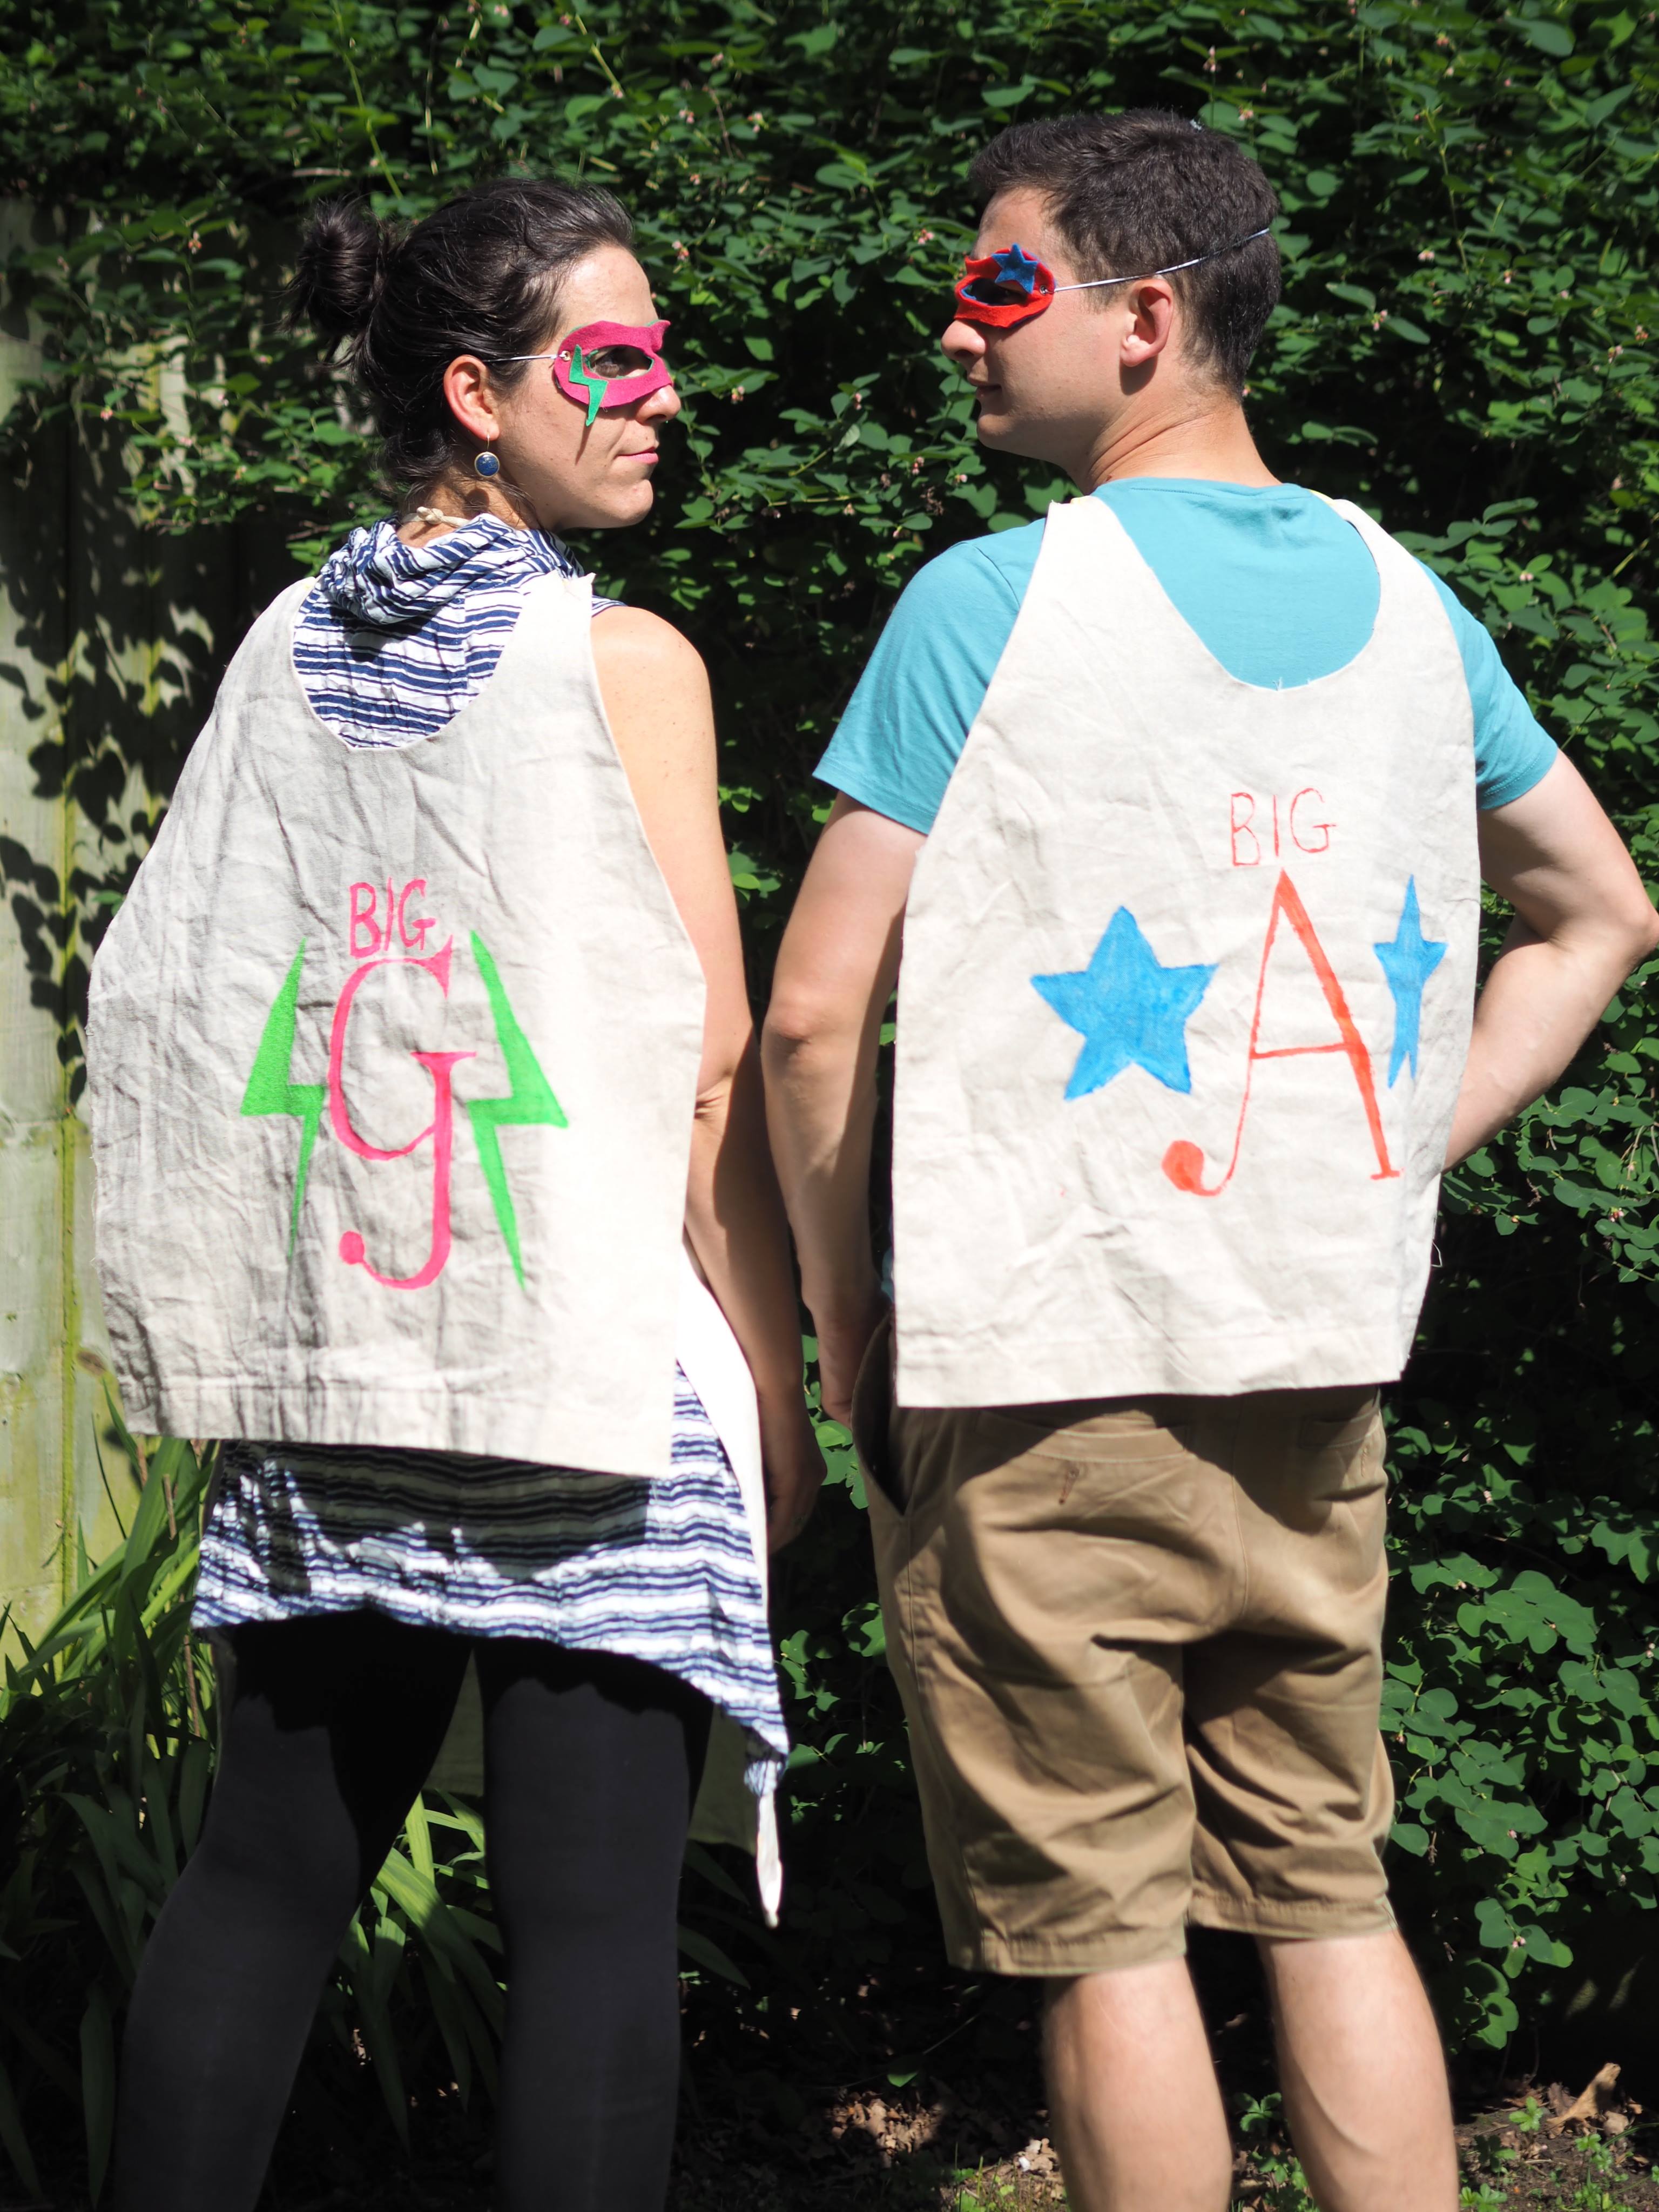
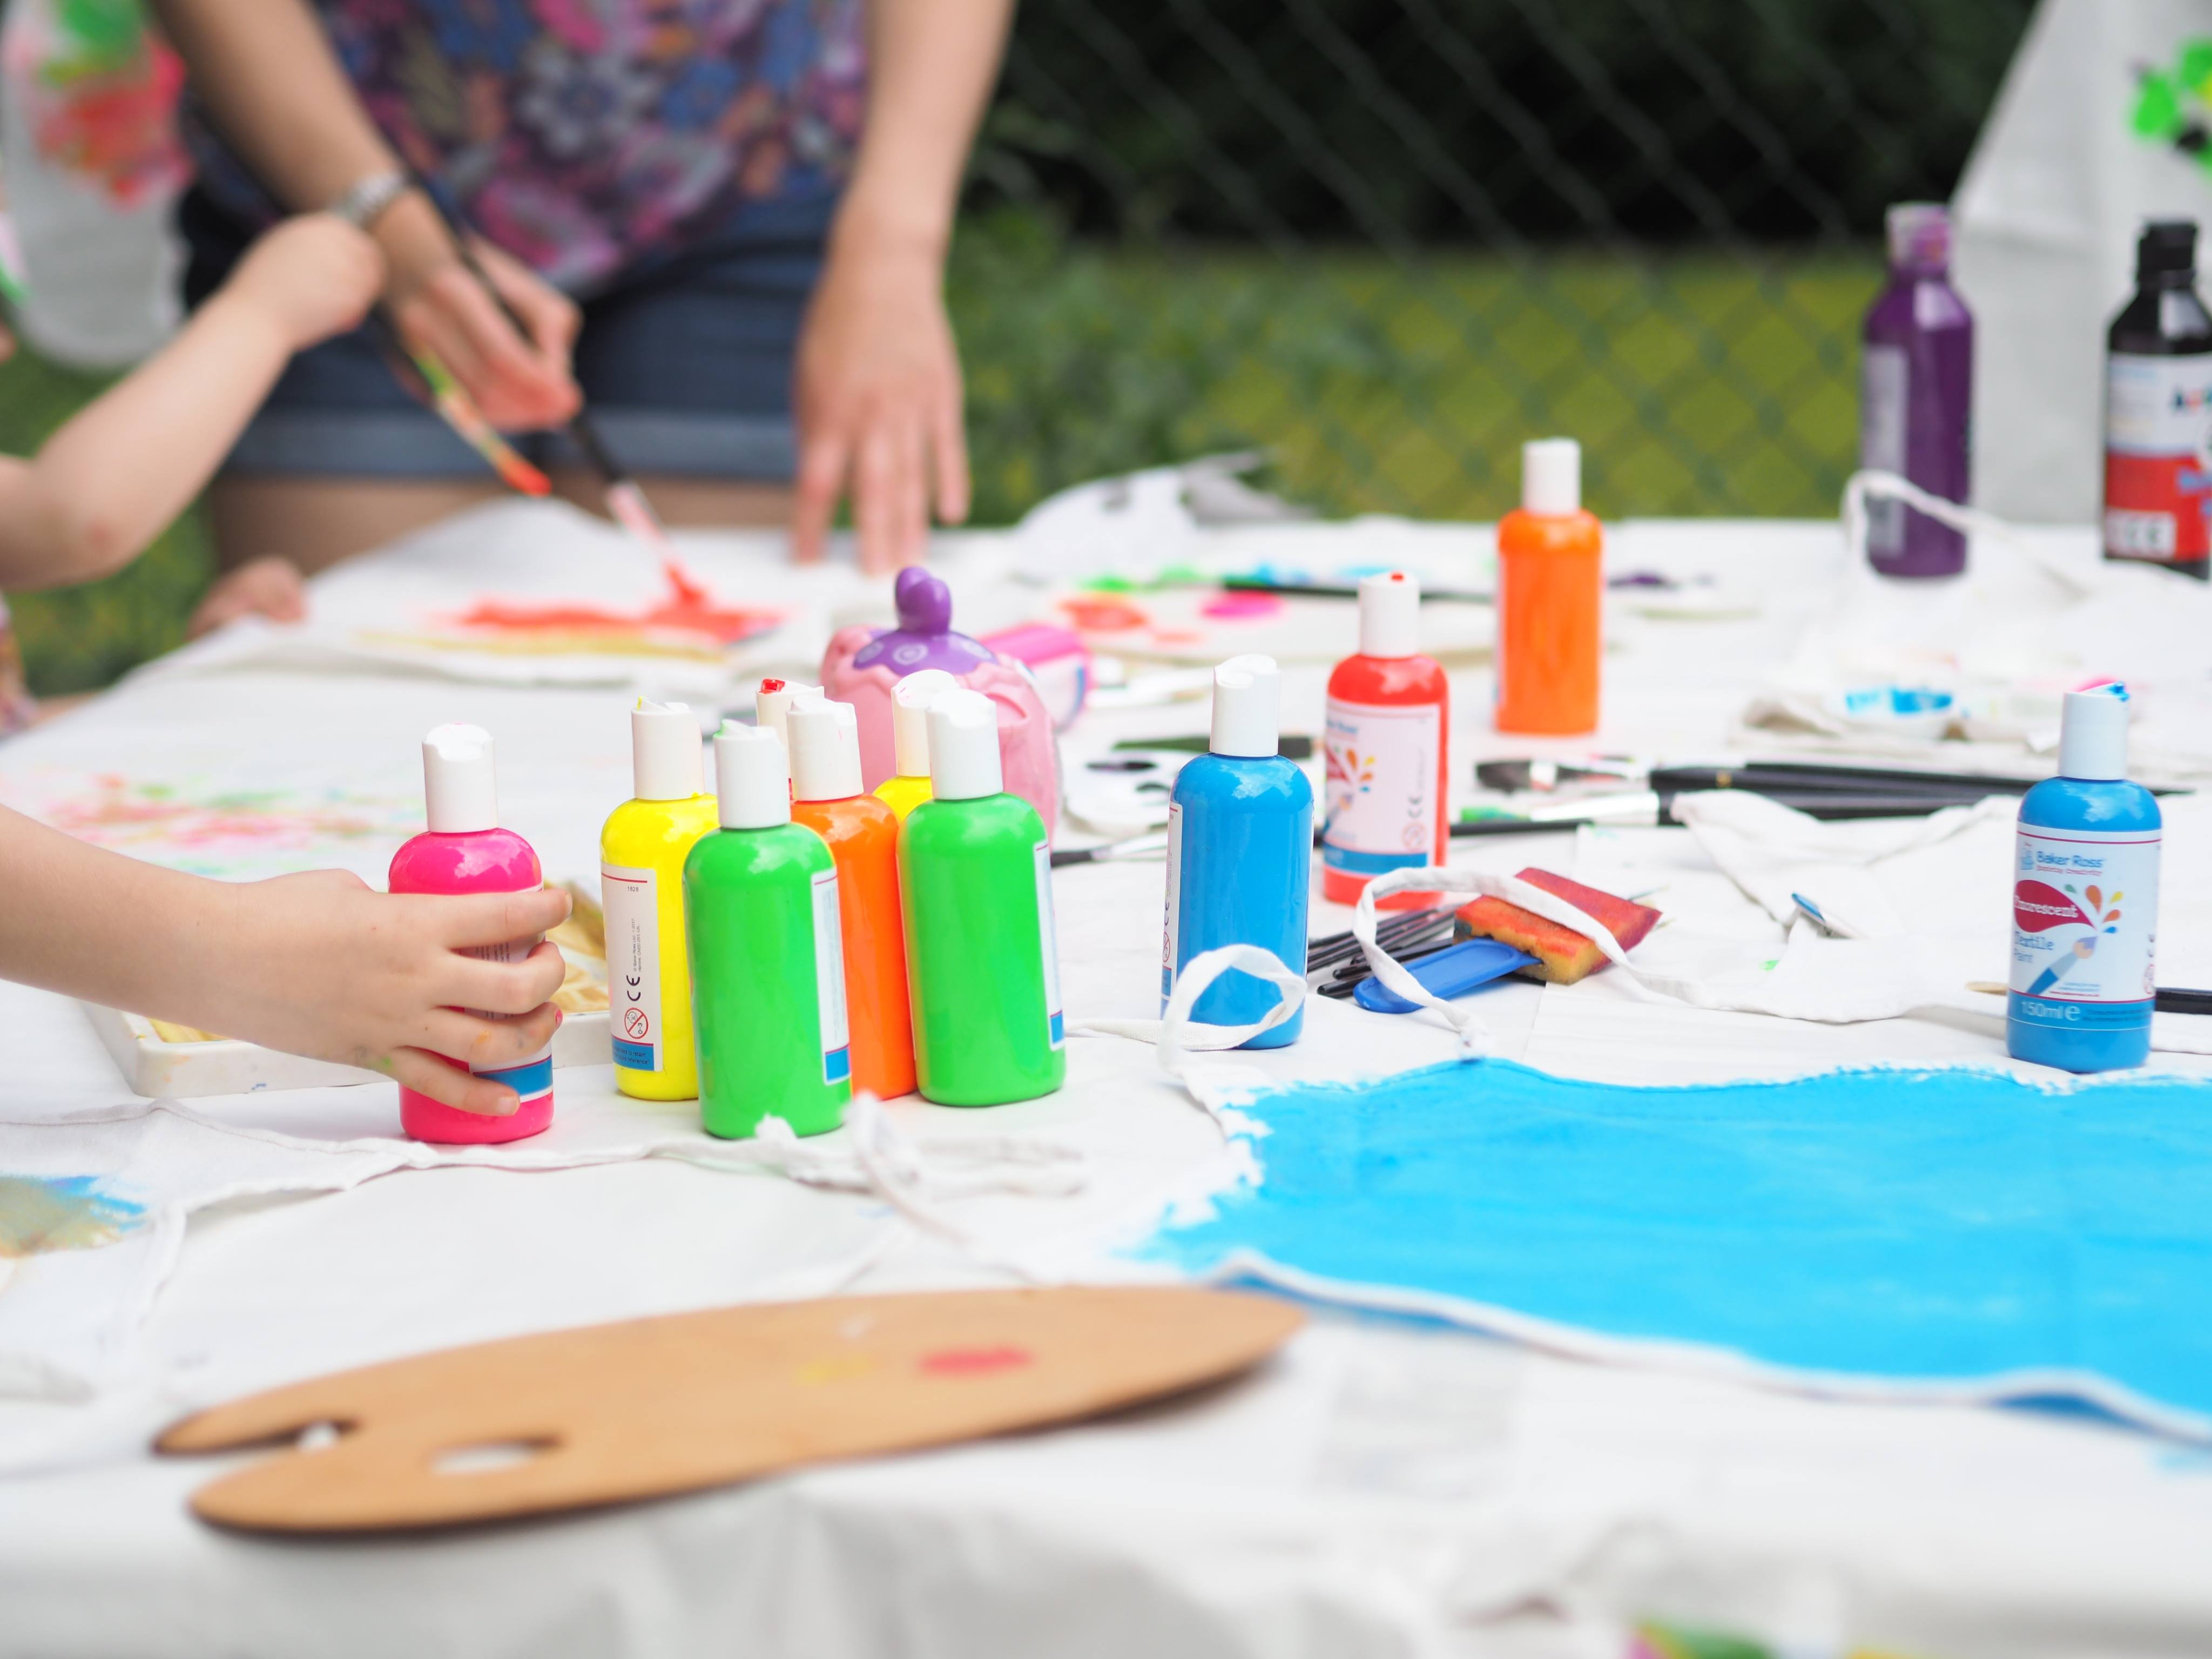
We had two types of cape. For the main bulk we bought pre-made linen capes from an online craft store that sell in bulk, one for each child. If it is not possible for you to find pre-made cloth capes, fear not, if it really simple to make them yourself from cotton linen. Being the hosts of the Superhero Cape Party, we couldn’t not dress up, so we made our own capes as well. I always encourage adults to join in, more often then not you’ll see they have just as much fun (if not more!). To accompany the capes you will need some fabric paint, paintbrushes and a few other bits shown below.
What you will need:
- Either pre-made capes or cotton linen (1 metre will make 2 capes)
- Fabric paint
- Paintbrushes and or sponges
- Paint palettes
- PVC cloth / newspaper to put under the capes when being painted
- Table / grass / pavement
- Scissors
- Measuring tape
- Fabric glue / glue gun with glue sticks.
- Pen
- Ribbon
Instructions:
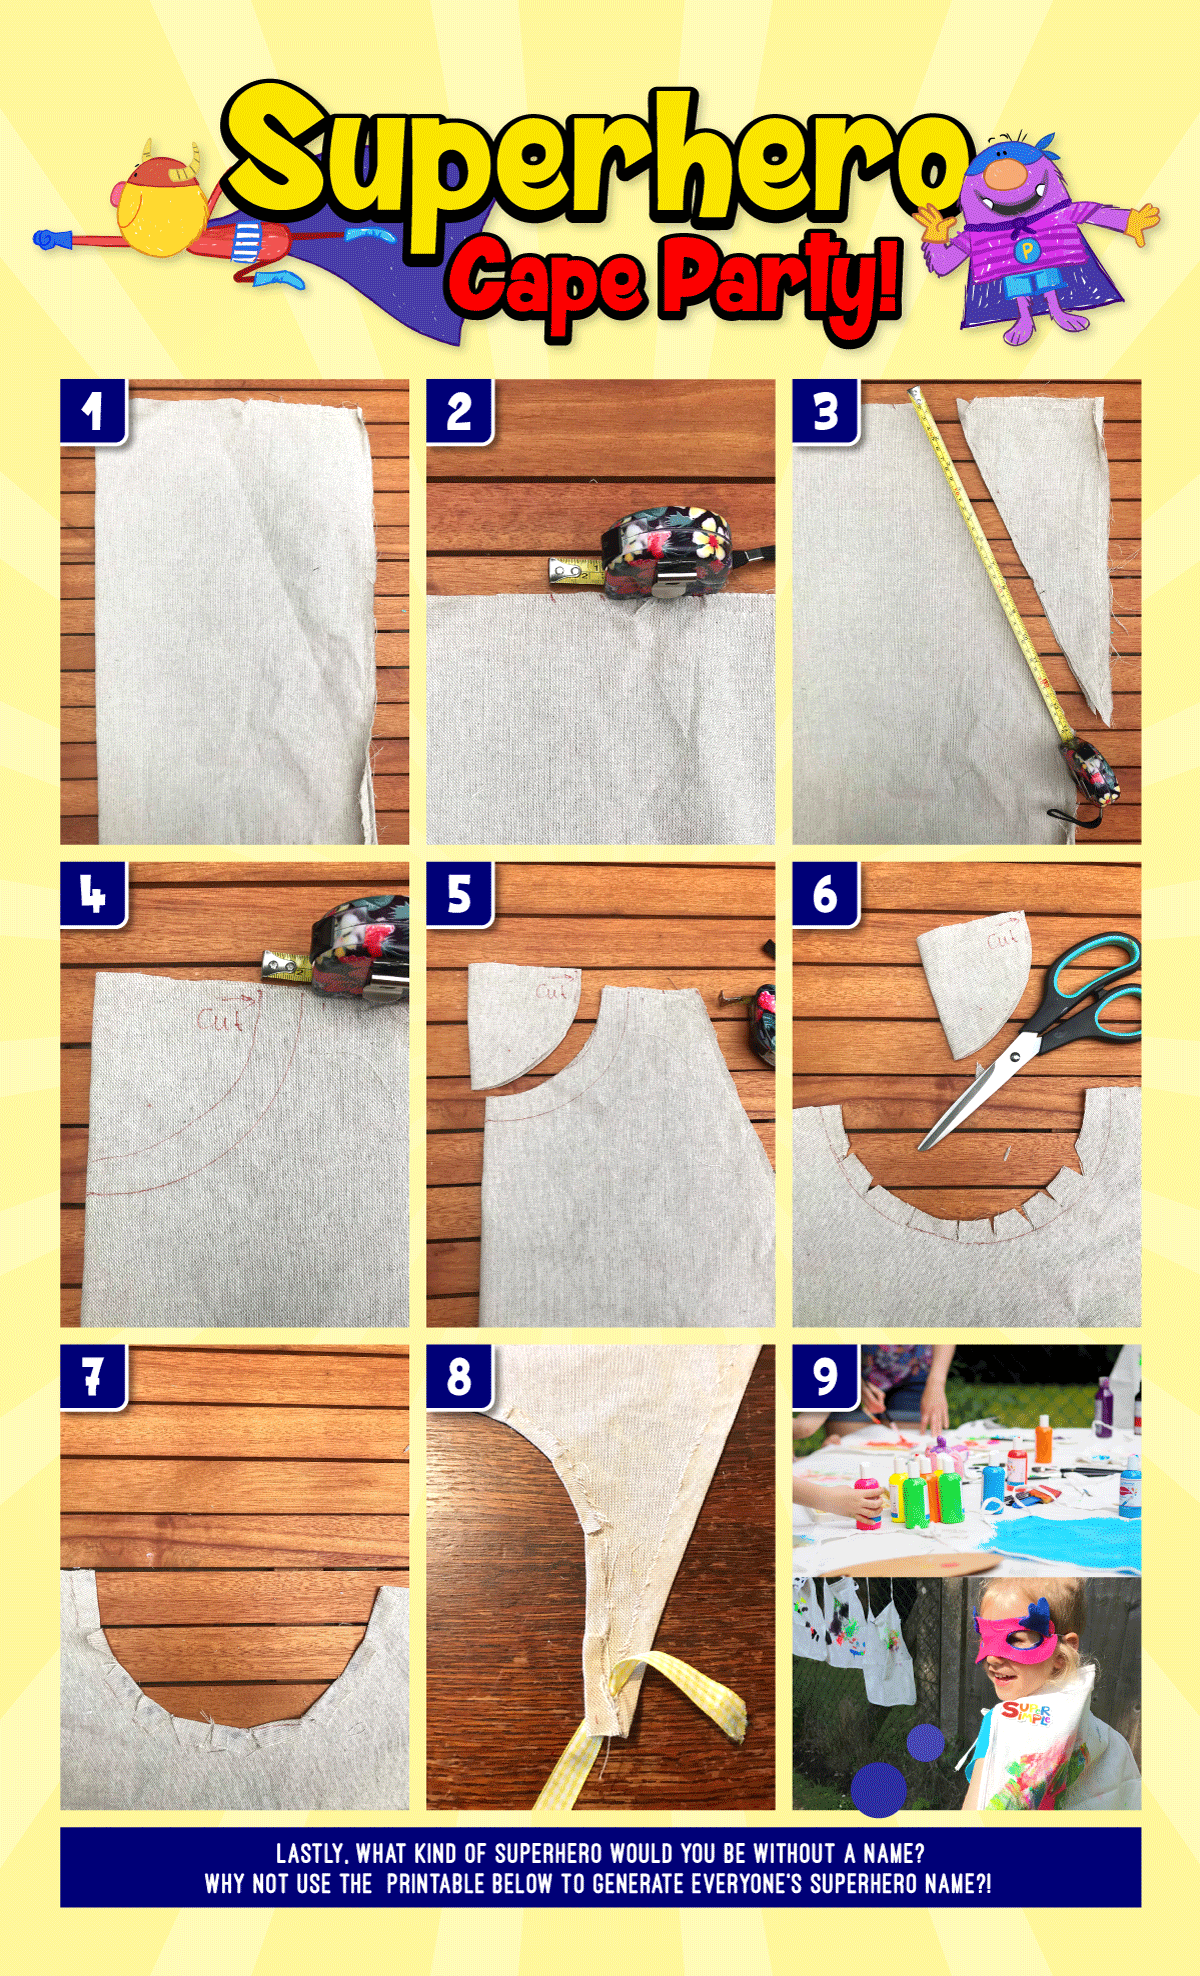
- If your material has come in one long strip, cut into metres. When you have your metre of fabric in front of you, cut in half. Put one half to the side and the other in front of you. Fold your fabric in half, so that the folded part is on your left. Bring the top right corner diagonally across to the left side, so it touches it. Press the fold firmly down so to leave a crease. Unfold again.
- At the top of the material, where the crease starts, make a mark with your pen and then measure an inch to the right of it and make another pen mark. On this last one mark draw a pen line all the way down to the right side, it should be parallel to the crease you have previously made (see photos for clarification). You need both these marks as you will be creating a hem later on with fabric glue so to stop the material fraying.
- Now cut down that drawn line.
- With a plate or anything large and circular, place it at the narrow part of the cape (so the top bit). It needs to be over the folded part of the material as you are now cutting the neck part of the cape. Draw around your plate with your pen and again measure 1 inch from the line, this time to the left, and make a pen mark. Draw a rough pen circle, it should be parallel to the initial circle.
- Cut along this line.
- With your scissors cut little V shapes around the neckline. This will make it easier and neater to glue the neck part down.
- Put fabric glue on the neck part and fold down. Hold for a couple of minutes to allow the glue to set sightly. Now work your way around the sides and bottom of the cape, putting fabric glue on an inch out of the edge and folding it over to stick. Your pen marks will show you how far you want to stick the hem.
- Go to the neck part of the cape (where you will attach it around your neck) and on each side cut 1/2 inch line and thread some ribbon through it, make a big knot on the back of it (making sure the knot is on the inside of the cape. Thread round to the other side of the cape and repeat. Make sure there is enough space for a head to fit through, but not so long that the cape doesn’t sit properly at the shoulders. You may need the model to try it on so you can get it just right.
Now you are ready to paint them!
Fabric Paint. There are lots of versions around, it is up to you which you use. Most will require you to leave the paint to dry completely first and then iron the paint on the cape for about 5 minutes. This means that it fuses to the cloth and becomes one with it and therefore is permanent. If you don’t want to buy fabric paint as you think you won’t use it again, you can buy something called a ‘Fabric Painting Medium’. This means you can mix it into your normal paint and it will become fabric paint. Again you will need to iron it once dry to make permanent.
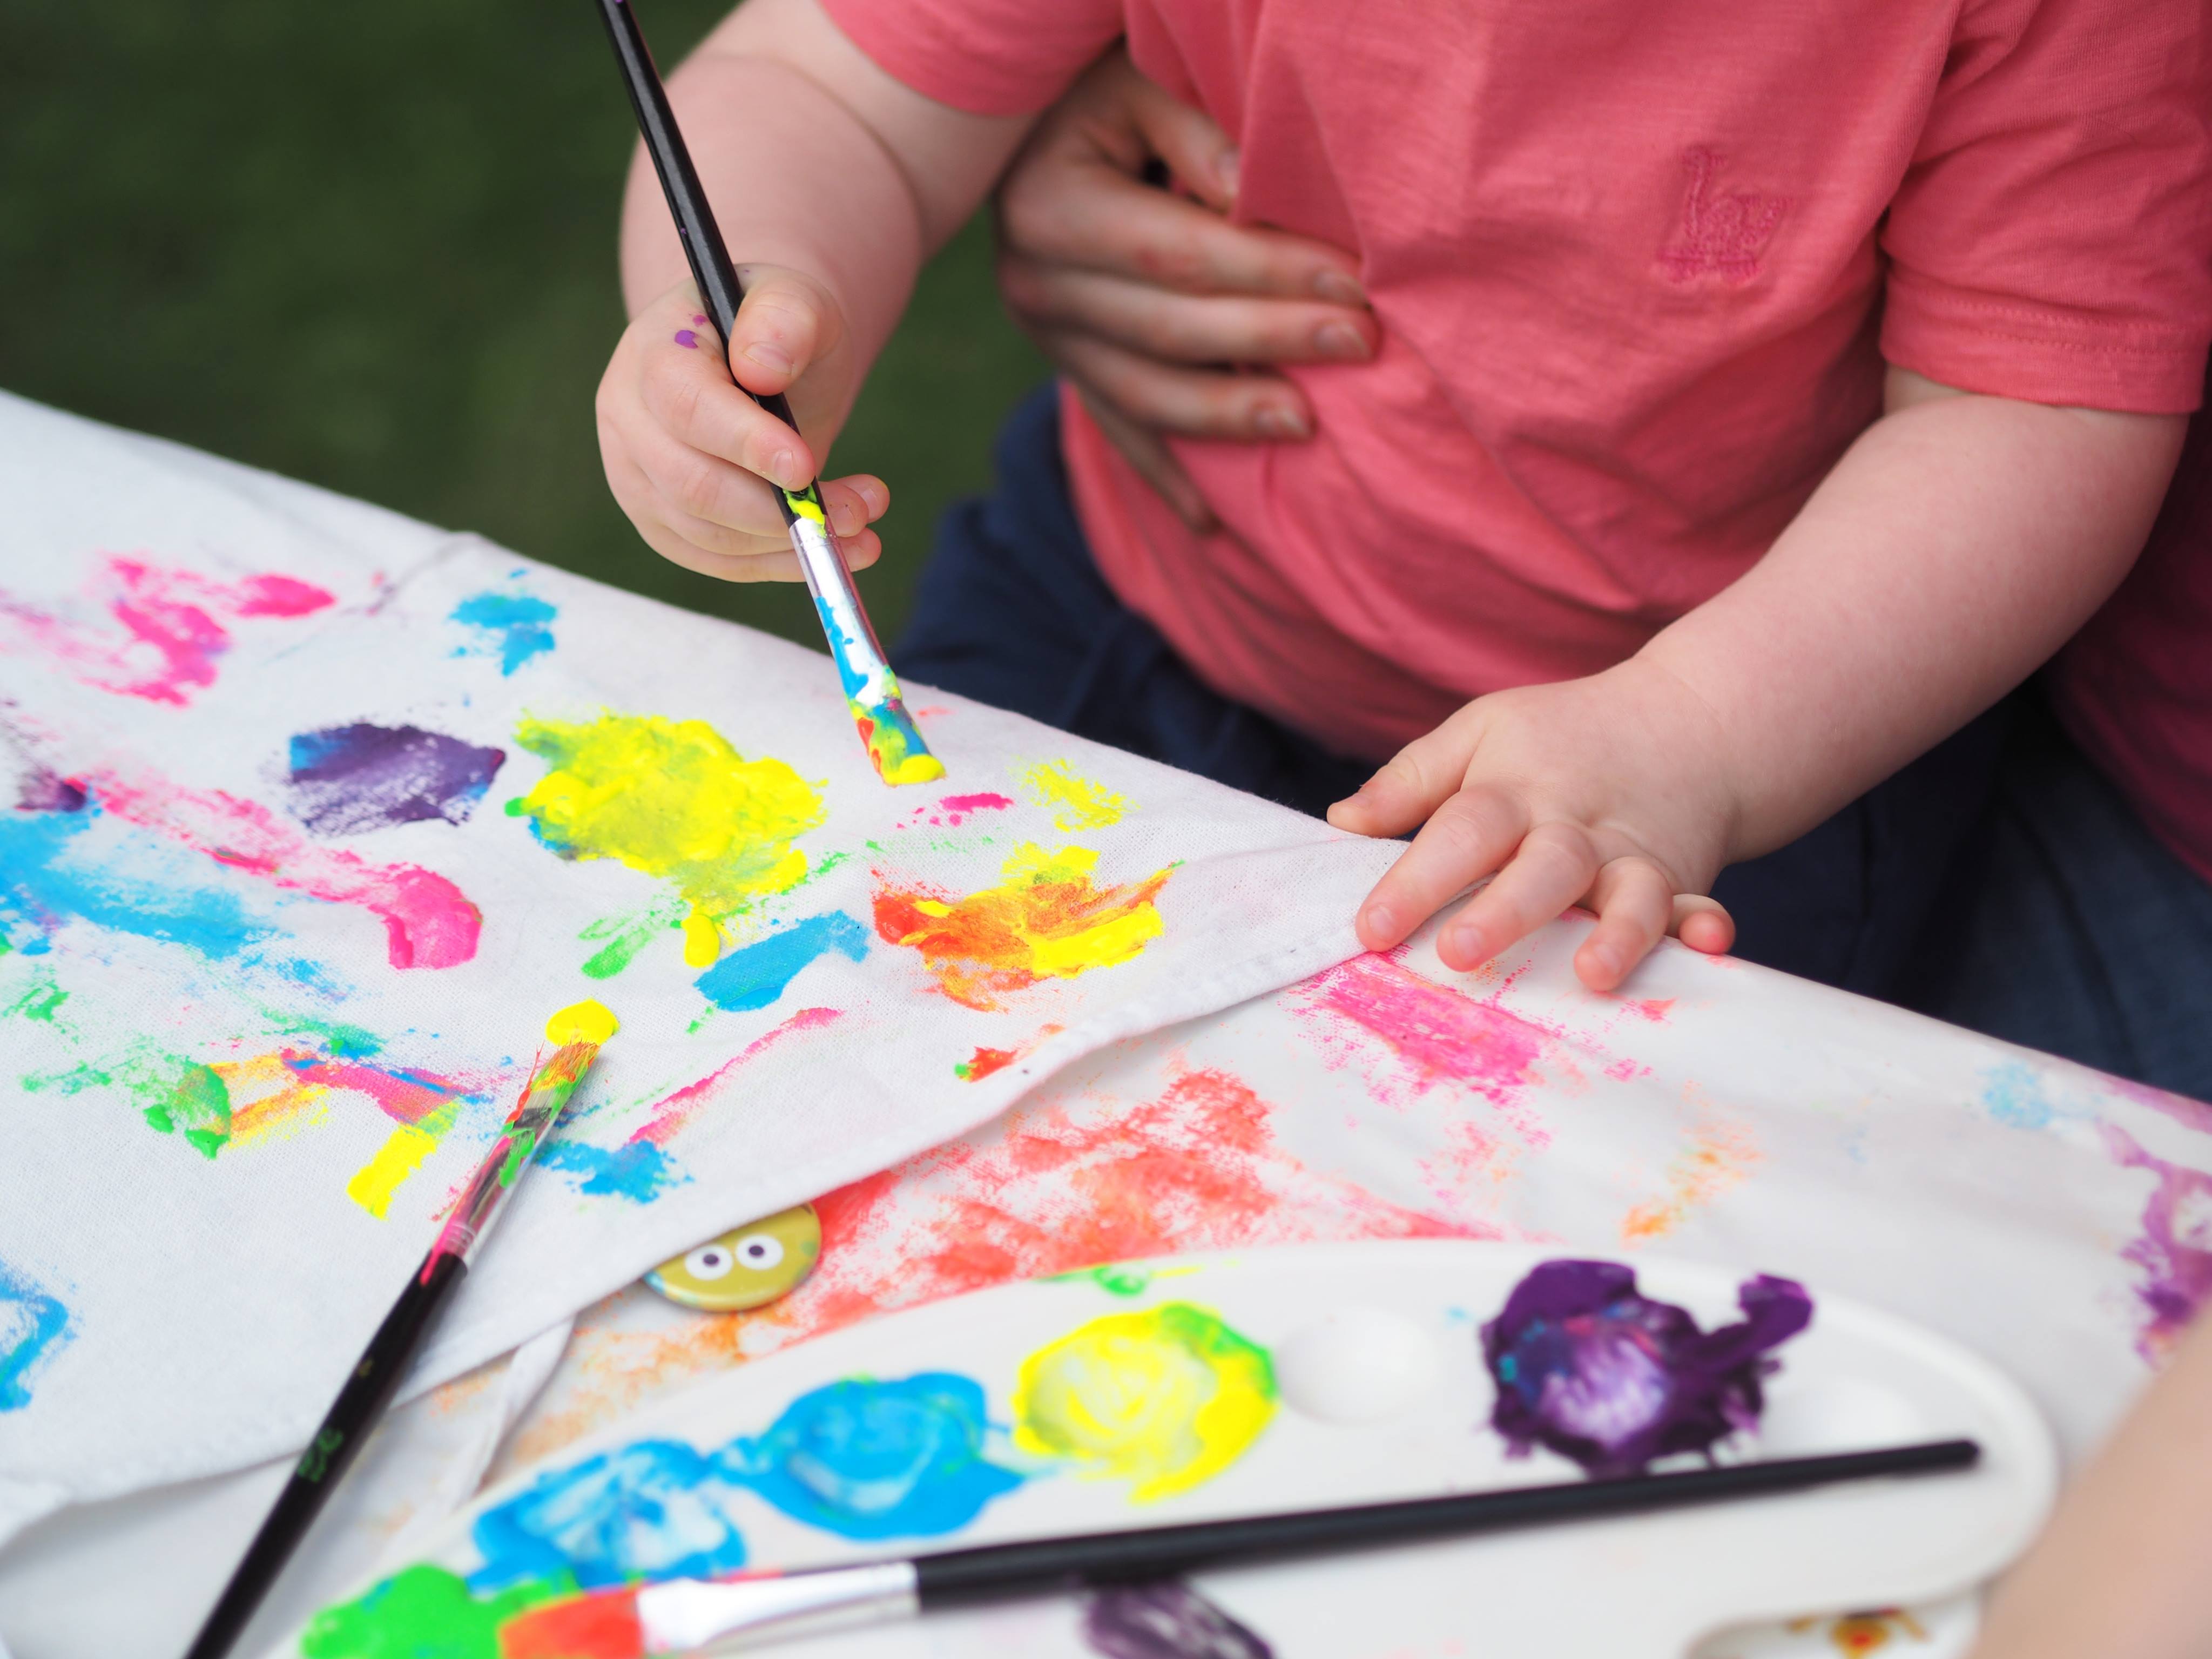
The capes that were painted at our cape party were almost completely dry after a couple of hours. If you have impatient, excitable kids why not use a hair dryer and try to quicken the process.

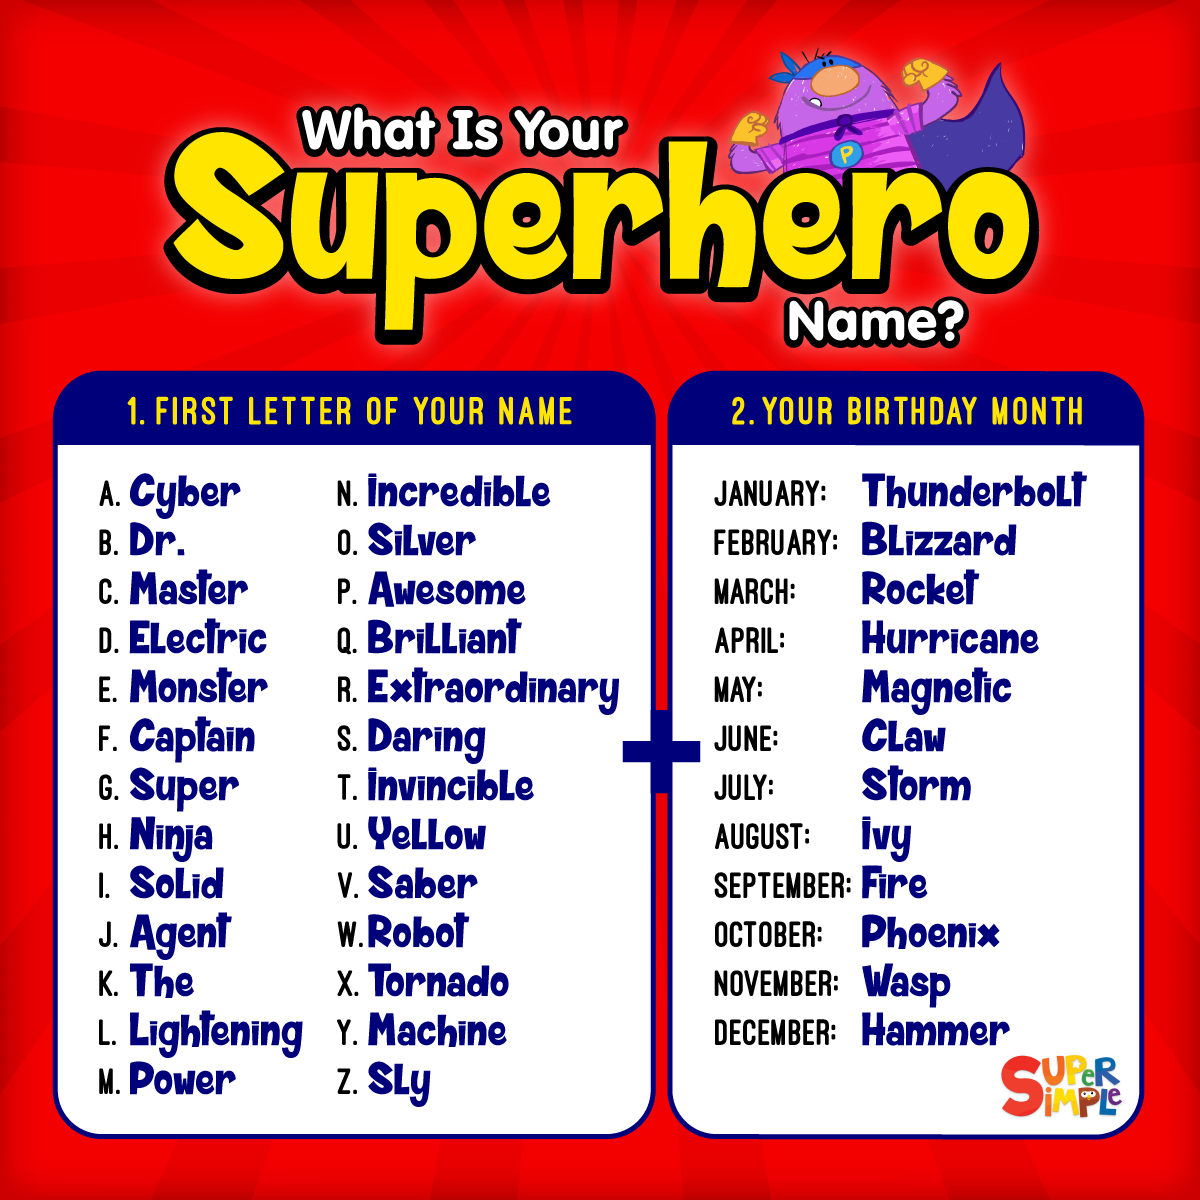
Lastly, what kind of superhero would you be without a name? Why not use the printable below to generate everyone’s Superhero name?!
Here are some tunes to help you get the party started:
Don’t forget to follow us on Twitter, Instagram, Pinterest, and Facebook!
 Contributor
Grace Selous Bull is an arts education author and freelance blogger. Her book, ‘Potty About Pots: arts and crafts for home and school’ is aimed at children from 5-12 years old and takes them through a journey of ceramics through time. She is a full time Mummy of two girls, both of whom love being creative, and is married to her husband, Andrew, who does not.
Original content © 2018 Super Simple. Not to be reprinted without express written permission. Terms of Service.